

DevOps Engineer
Pritam possesses strong expertise in AWS, CI/CD, and Infrastructure as Code. He focuses on designing scalable, automated cloud environments and enhancing overall system performance.

Setting up SSO with AWS VPN Client enables secure, user-based authentication using IAM Identity Center (SSO) and SAML 2.0. This ensures centralized access control and group-based authorization.
To configure this, follow the guidelines below:
To configure SSO with user-based authentication for AWS Client VPN, a server certificate and the associated client certificates/keys must be generated.
git clone https://github.com/OpenVPN/easy-rsa.git
./easyrsa init-pki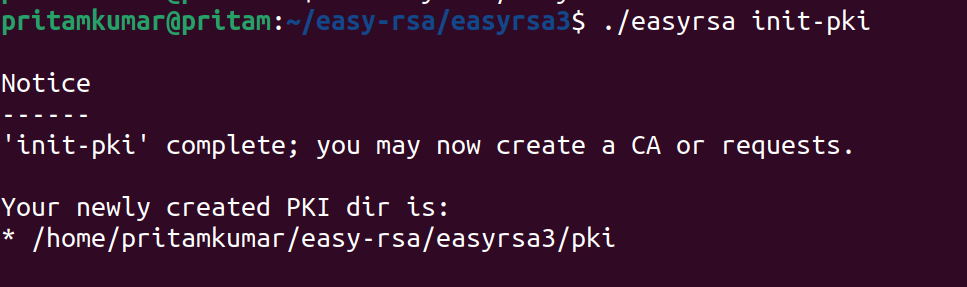
./easyrsa build-ca nopass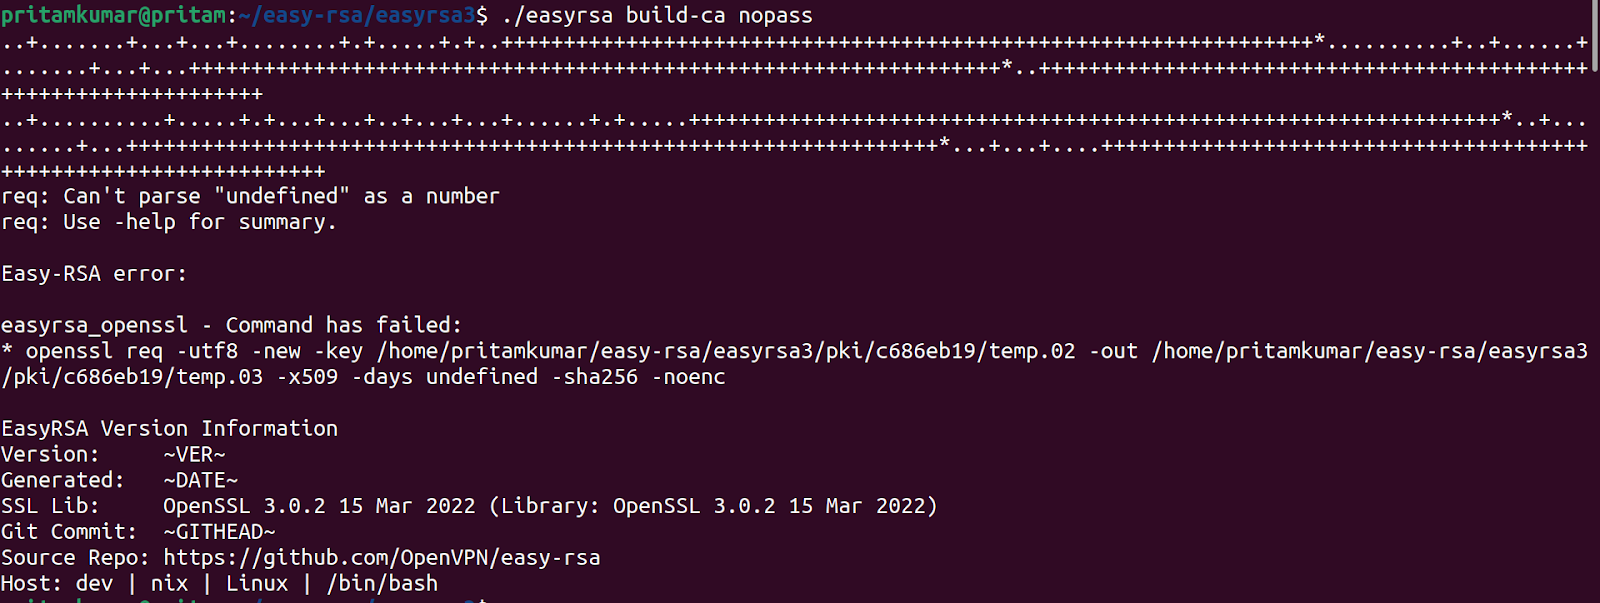
./easyrsa --san=DNS:server build-server-full server nopass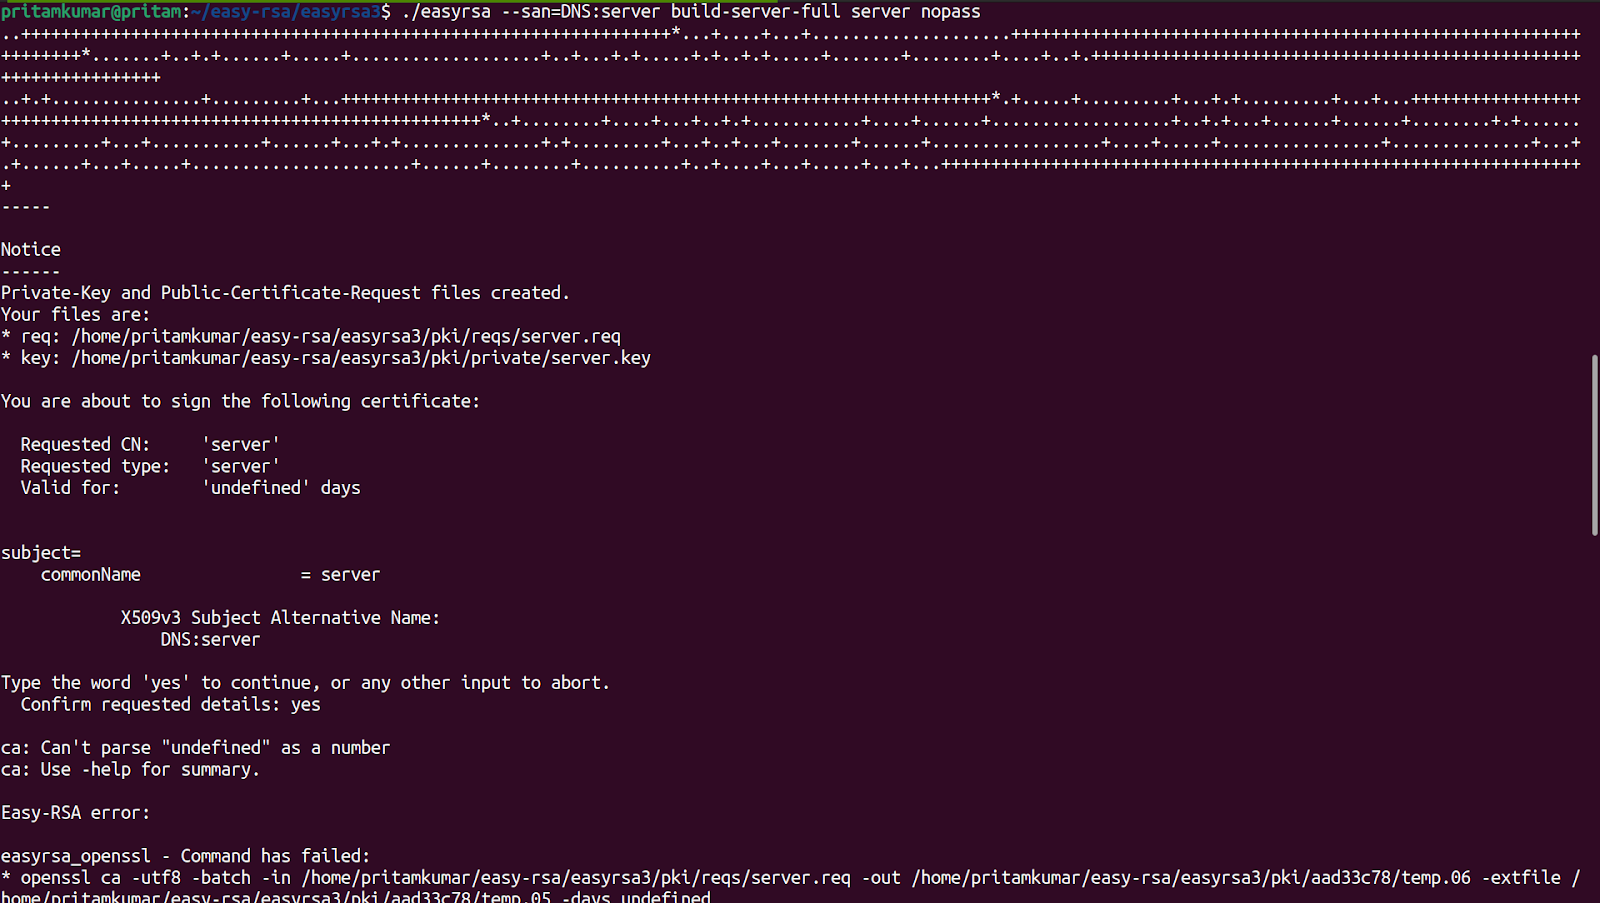
./easyrsa build-client-full client1.domain.tld nopass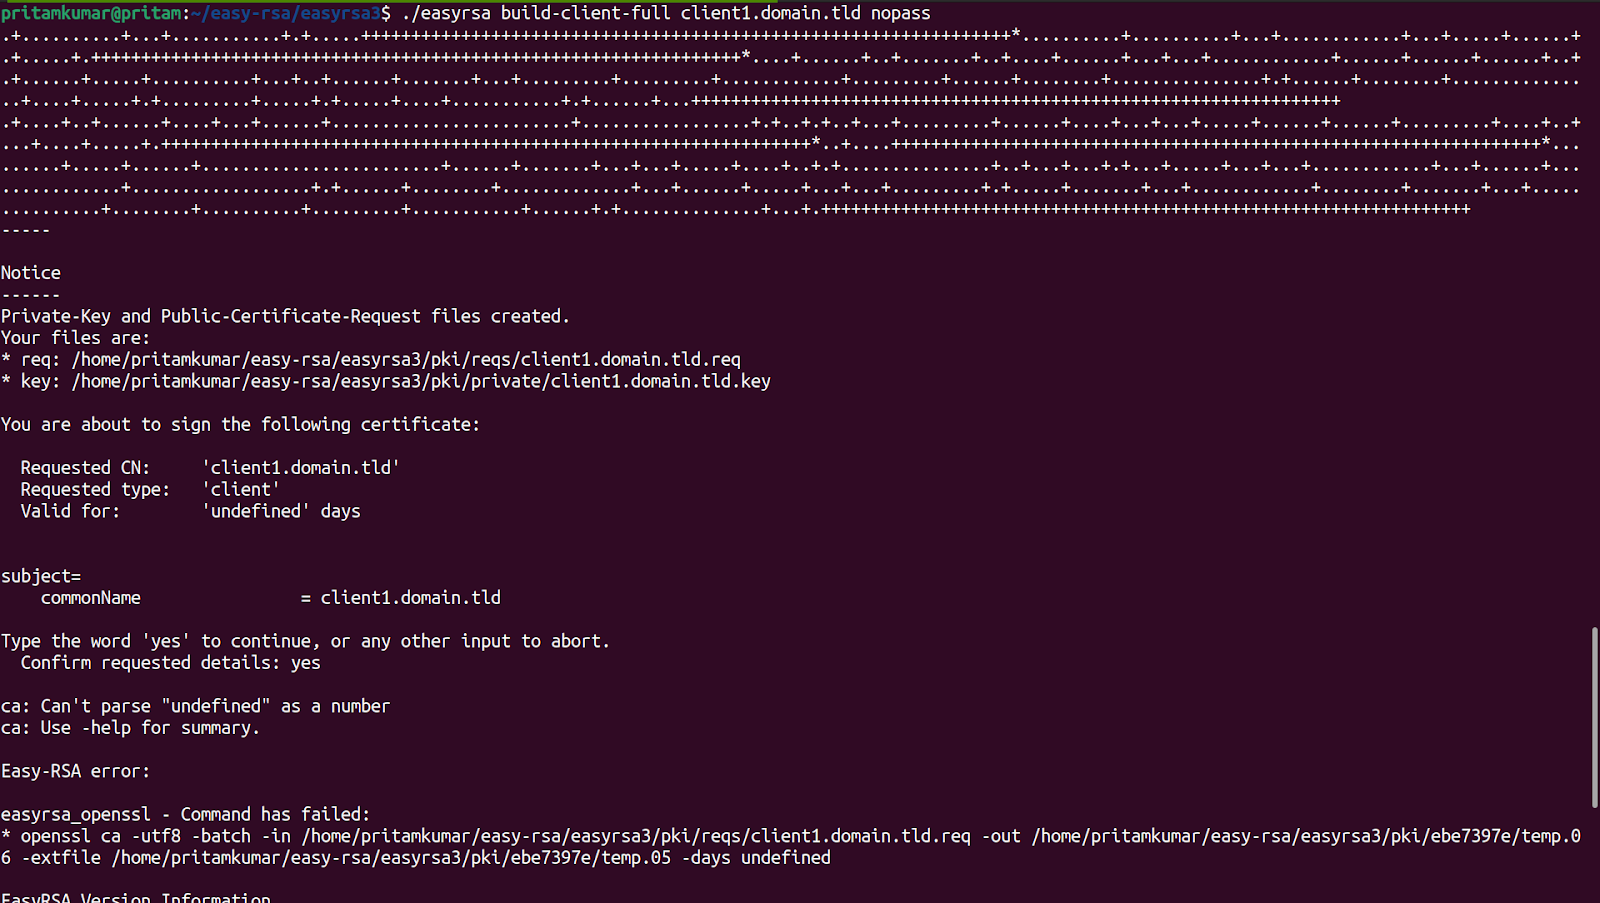

Above, you can see that I have successfully generated server and client certificates and keys.
Step 1: Log in to the AWS Management Console and go to AWS Certificate Manager (ACM).
Step 2: In the left-hand menu, click on Certificates.
Step 3: Click the Import a certificate button.
Step 4: On the Import Certificate page, upload the certificate files:
Certificate body → Upload your server.crt file.
Certificate private key → Upload your server.key file.
Certificate chain → Upload your ca.crt (CA root or intermediate chain certificate).
Step 5: (For client certificates, repeat the same steps with the client.crt, client.key, and ca.crt).
Step 6: Click Next, review the details, and then click Import.
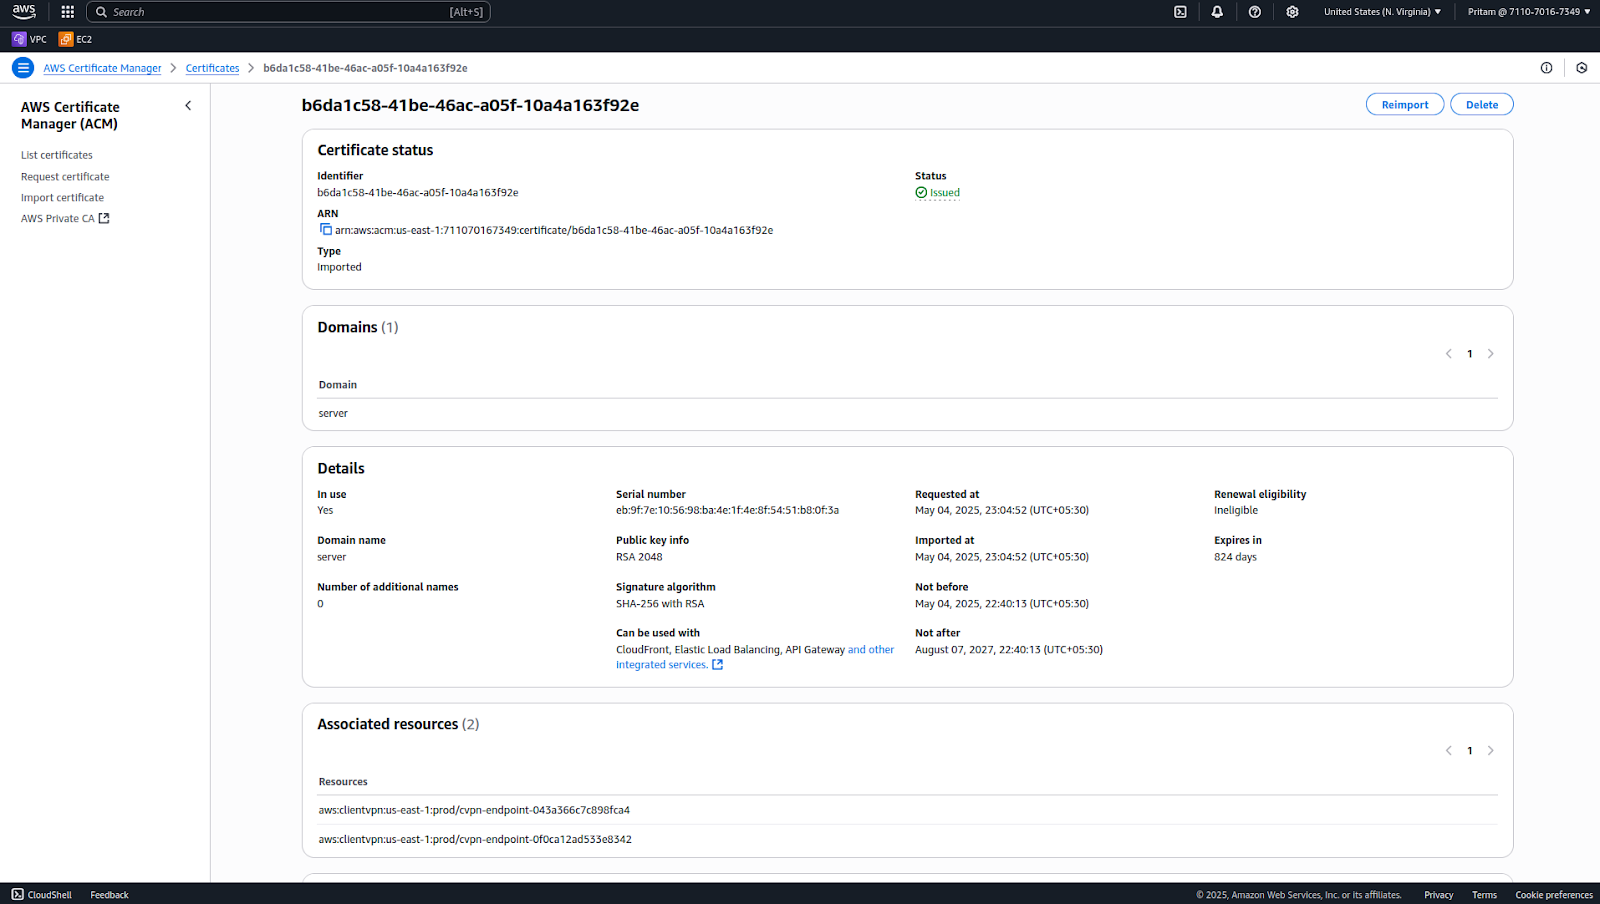
Step 7: Once imported, you should see a message confirming that the certificate has been successfully issued/imported into ACM.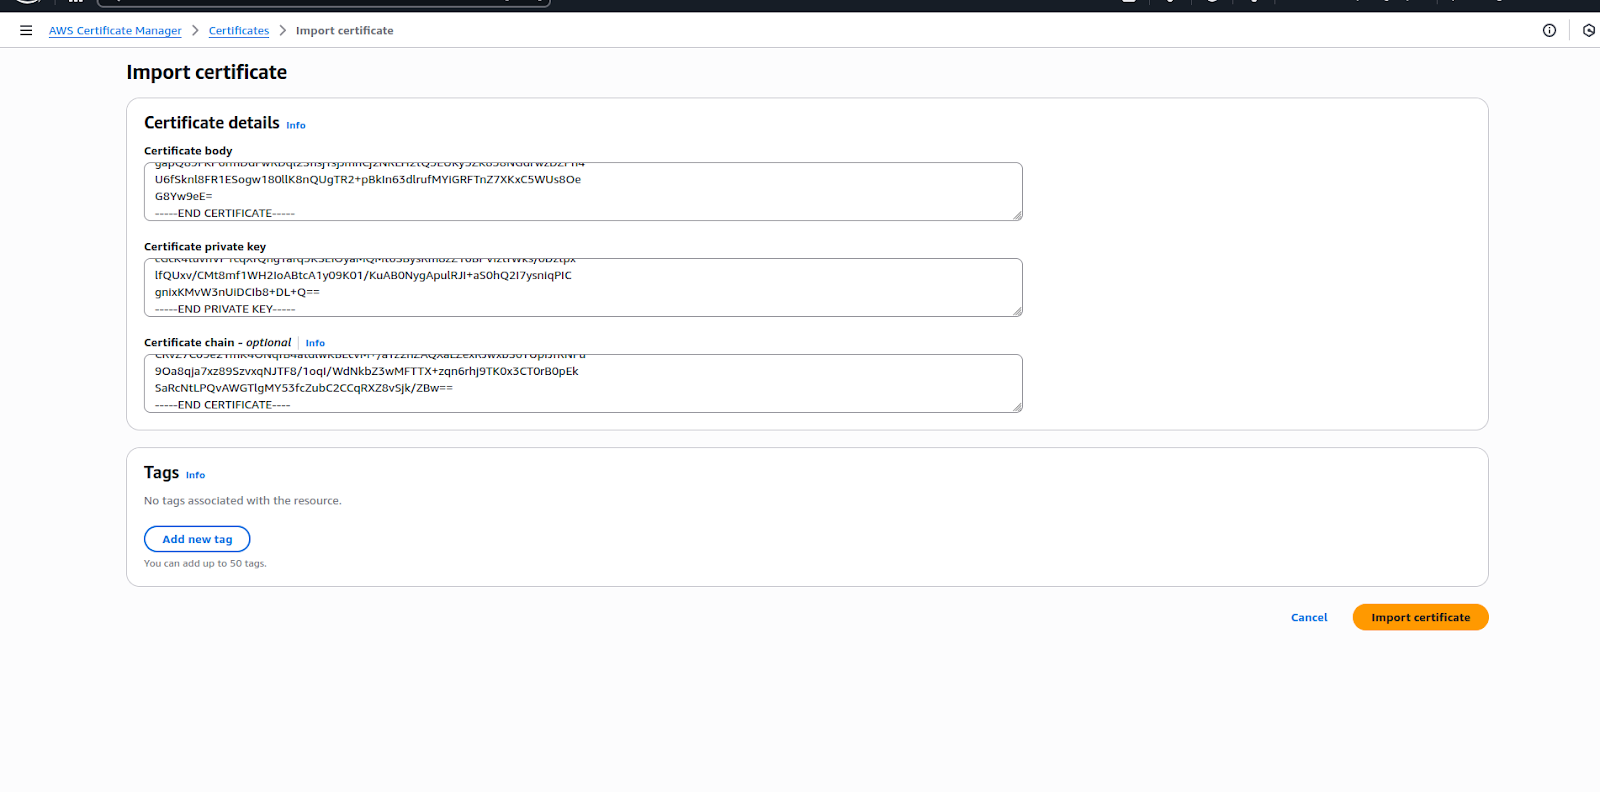
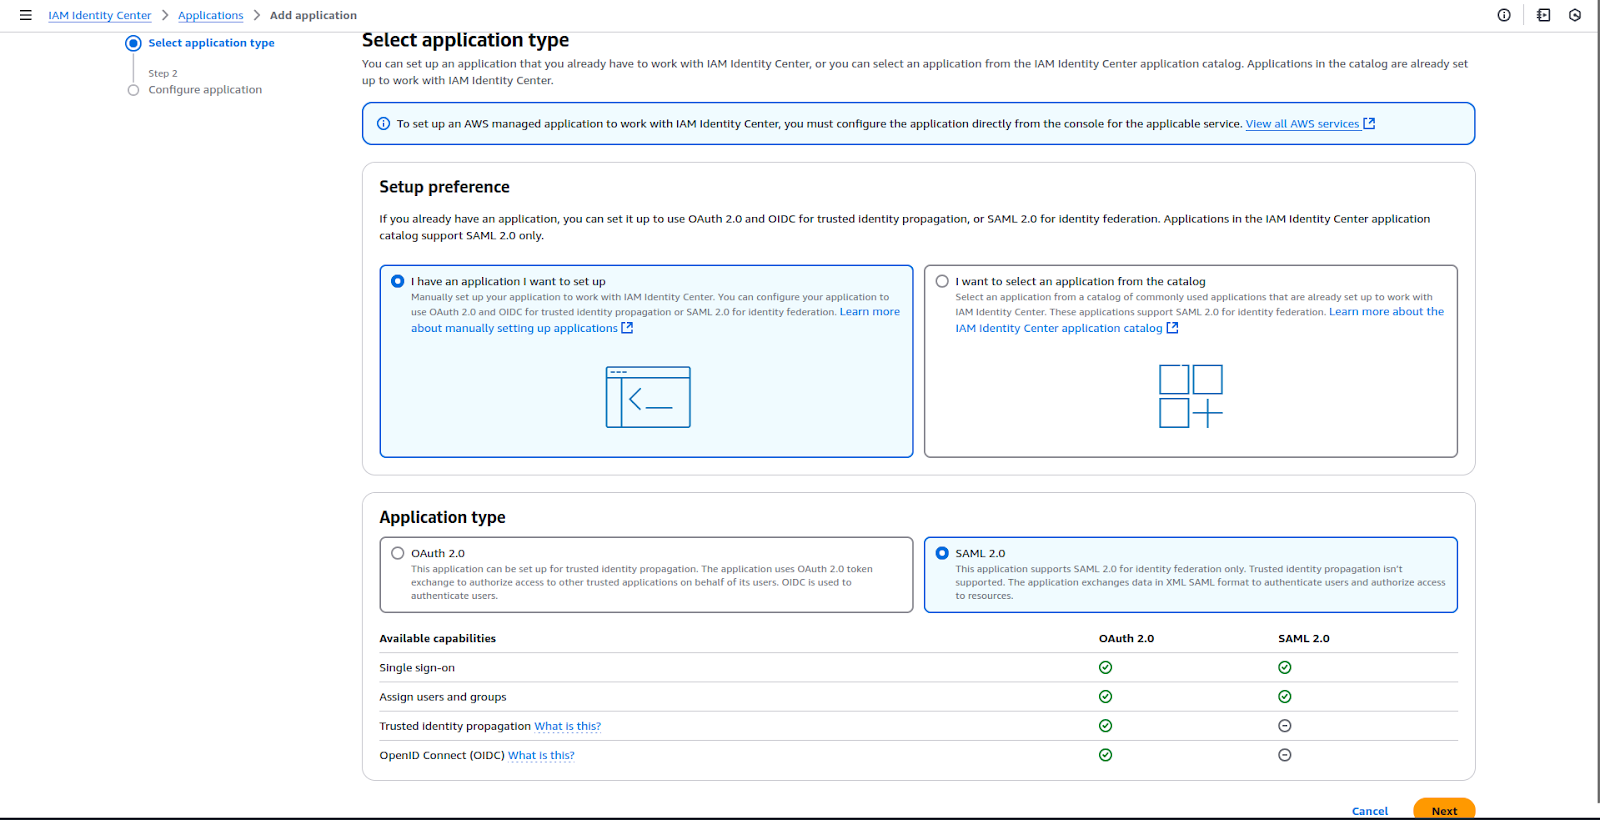
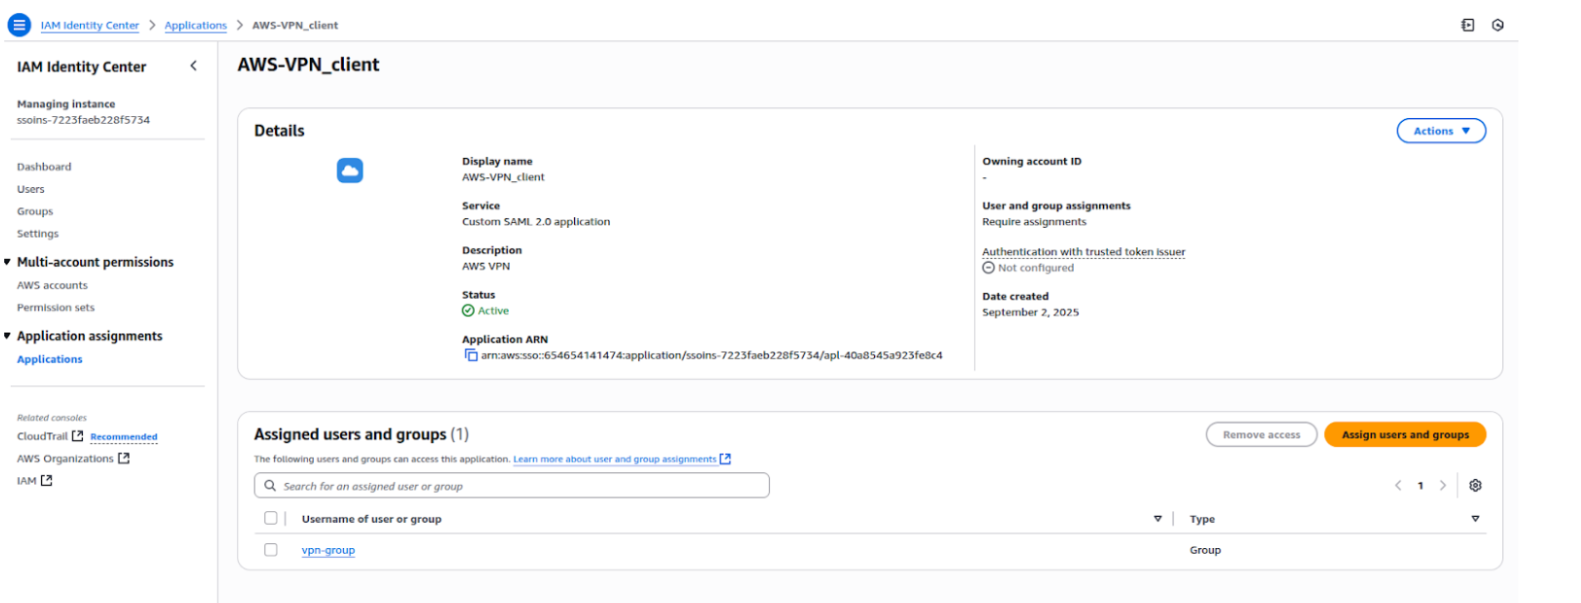
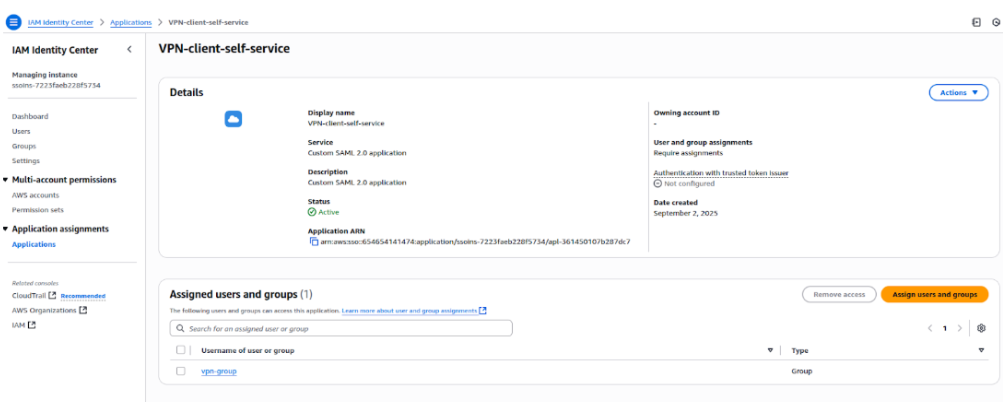
Step 1: In IAM Identity Center, go to the Applications section.
Step 2: Click Add Application → Add custom SAML 2.0 application.
Step 3: Create two applications:
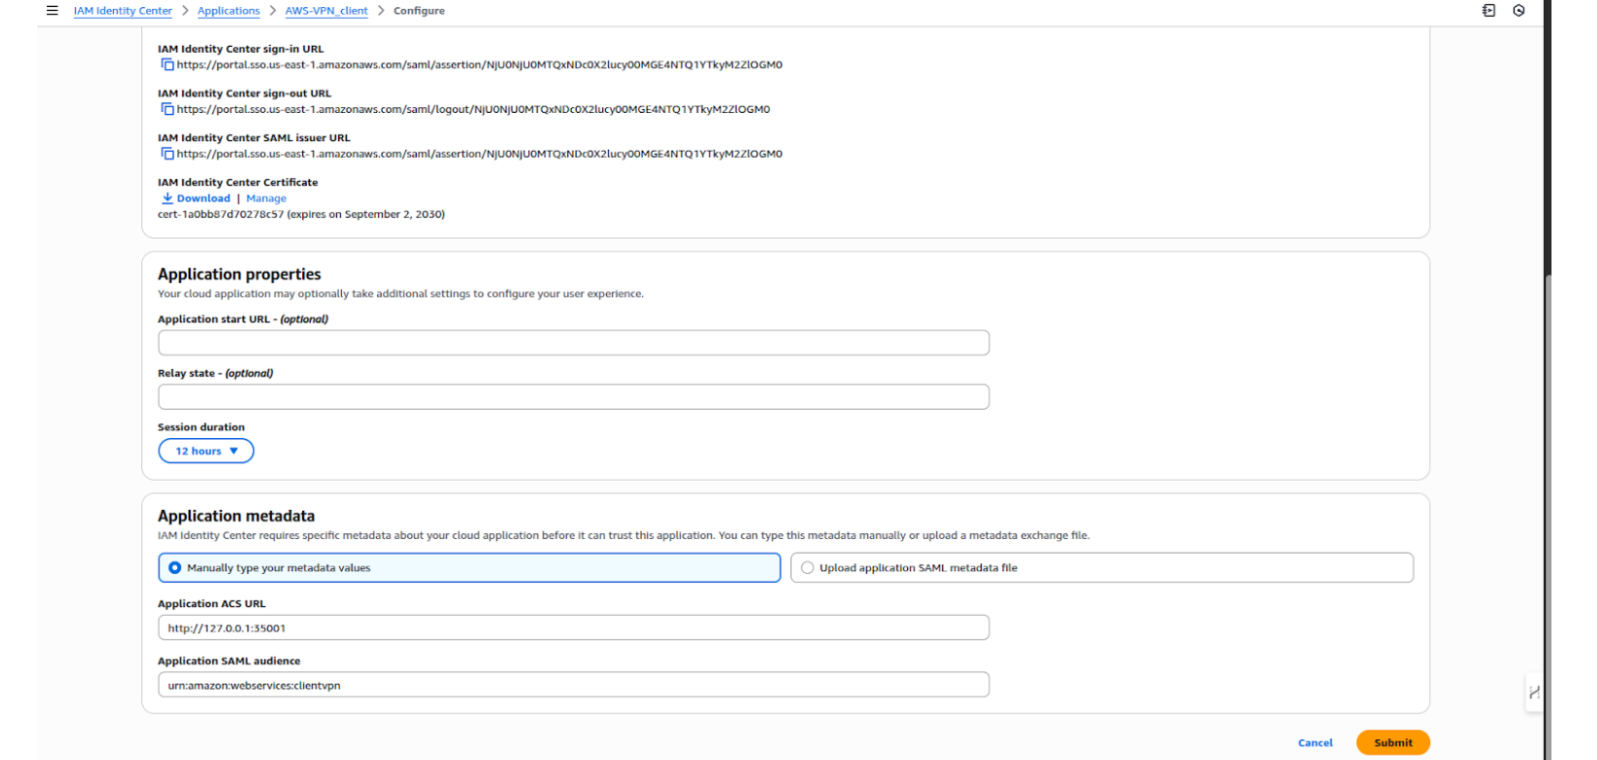
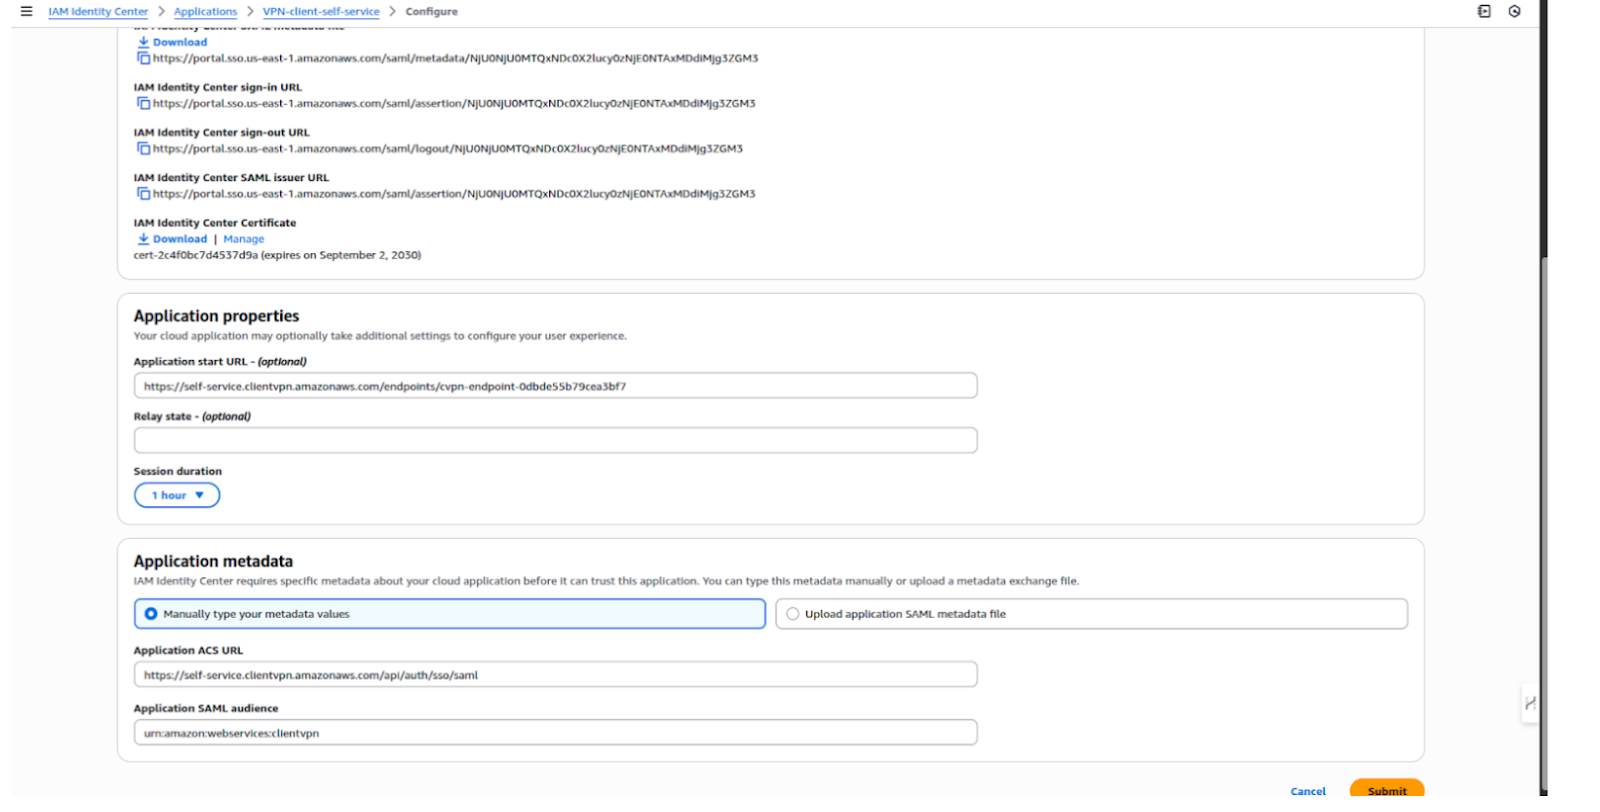
Step 4: For each application, configure the SAML settings:
ACS URL / Reply URL → Will be the Client VPN endpoint SAML URL (to be configured later).
Audience URI (SP Entity ID) → Use the Client VPN Entity ID.
Step 5: Save both applications and download the metadata files (one for each application).
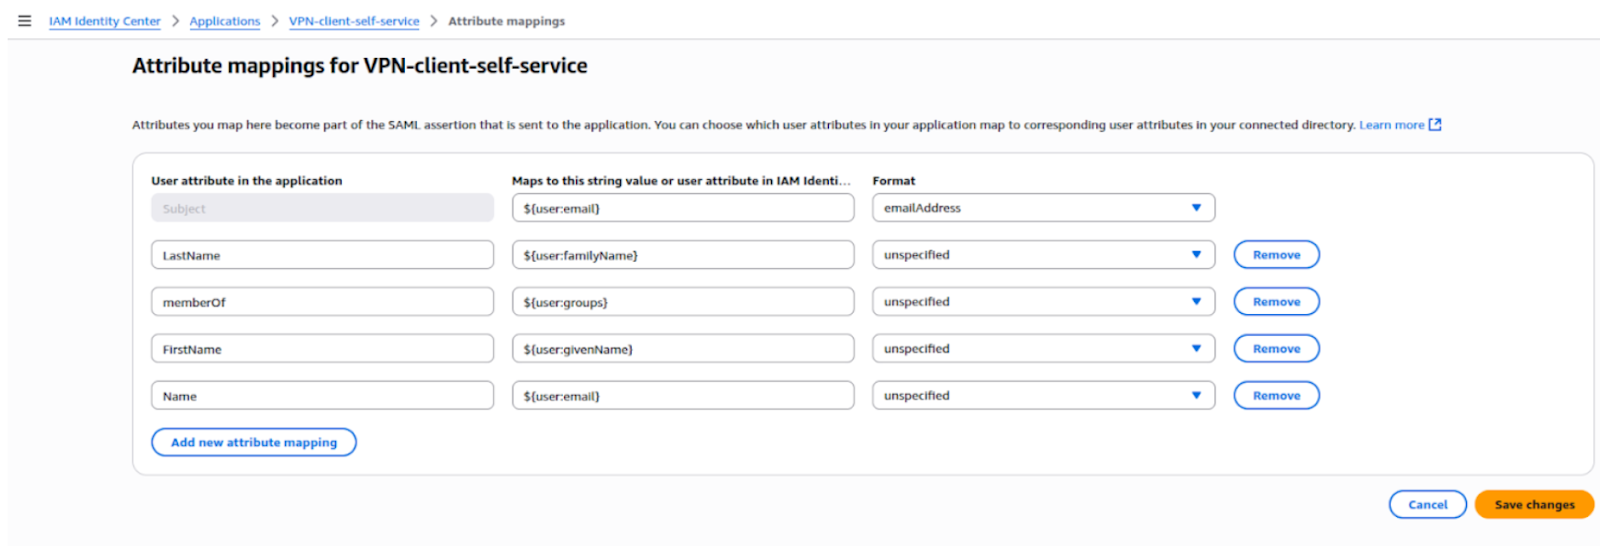
Attribute mapping in IAM Identity Center passes user details (email, name, groups, etc.) to the SAML app, allowing the VPN to identify users and apply group-based access rules.
Step 1: Go to IAM Identity Center → Applications.
Step 2: Select your application (AWS-VPN-Client or VPN-Self-Service).
Step 3: Open the Attribute mappings tab.
Step 4: Add mappings between IAM Identity Center attributes and SAML attributes. Common mappings include:
Step 5: Click 'Save changes'.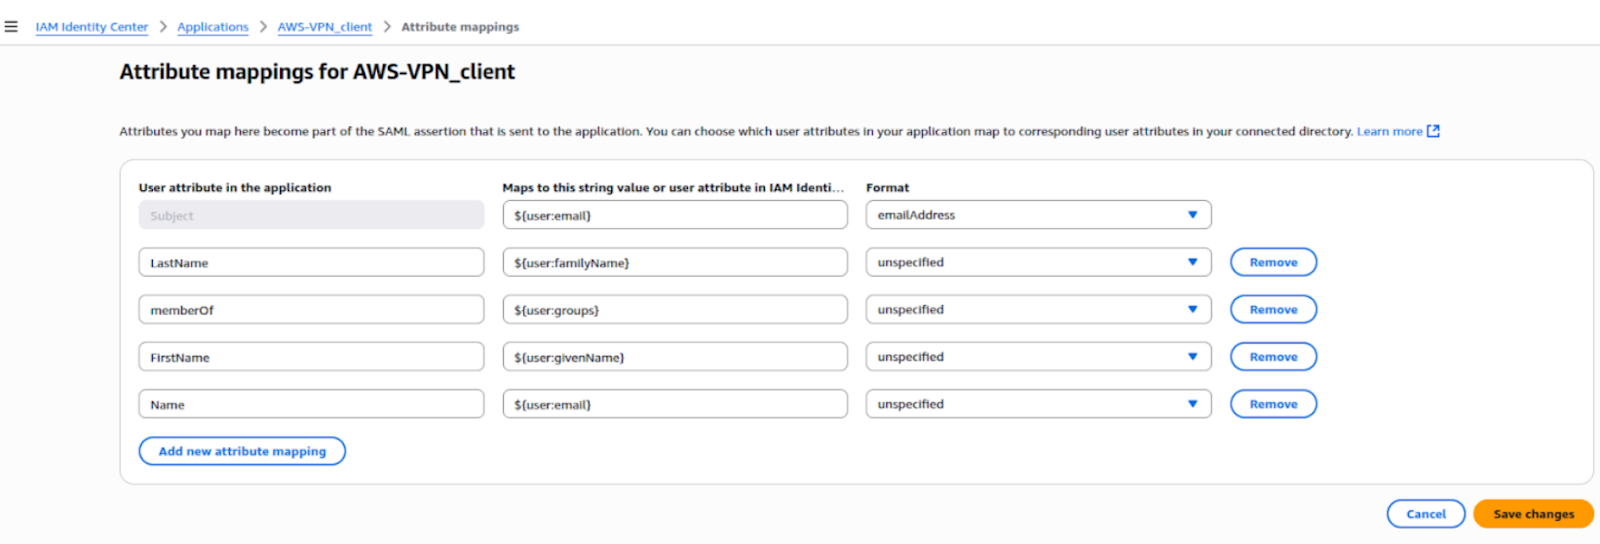
Creating an IAM Identity Provider (SAML 2.0) links your AWS account with the IAM Identity Center applications. This allows AWS services like Client VPN to trust the SAML metadata and authenticate users via SSO.
Step 1: Log in to the AWS Management Console and open the IAM service.
Step 2: In the left navigation pane, click on Identity providers.
Step 3: Click the Add provider button.
Step 4: On the Add an identity provider page:
Step 5: Repeat the same process to create a second Identity Provider:

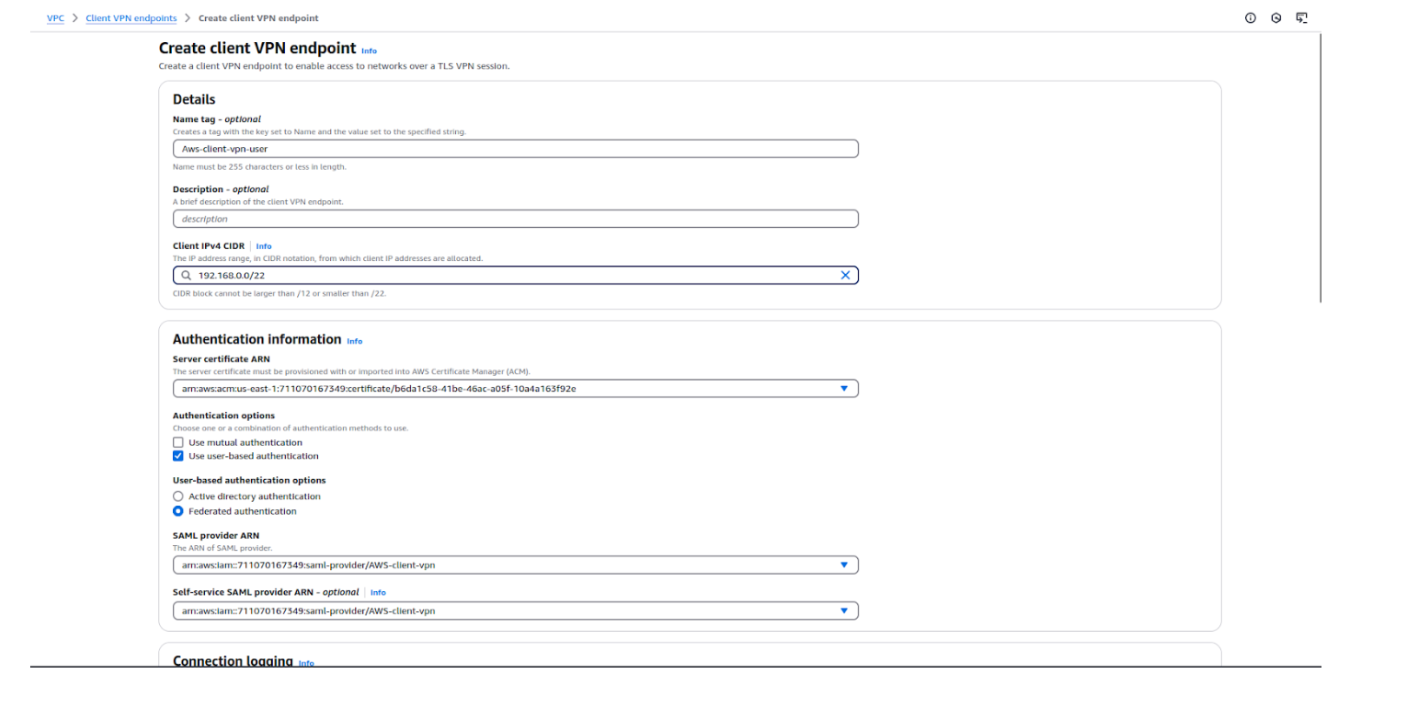
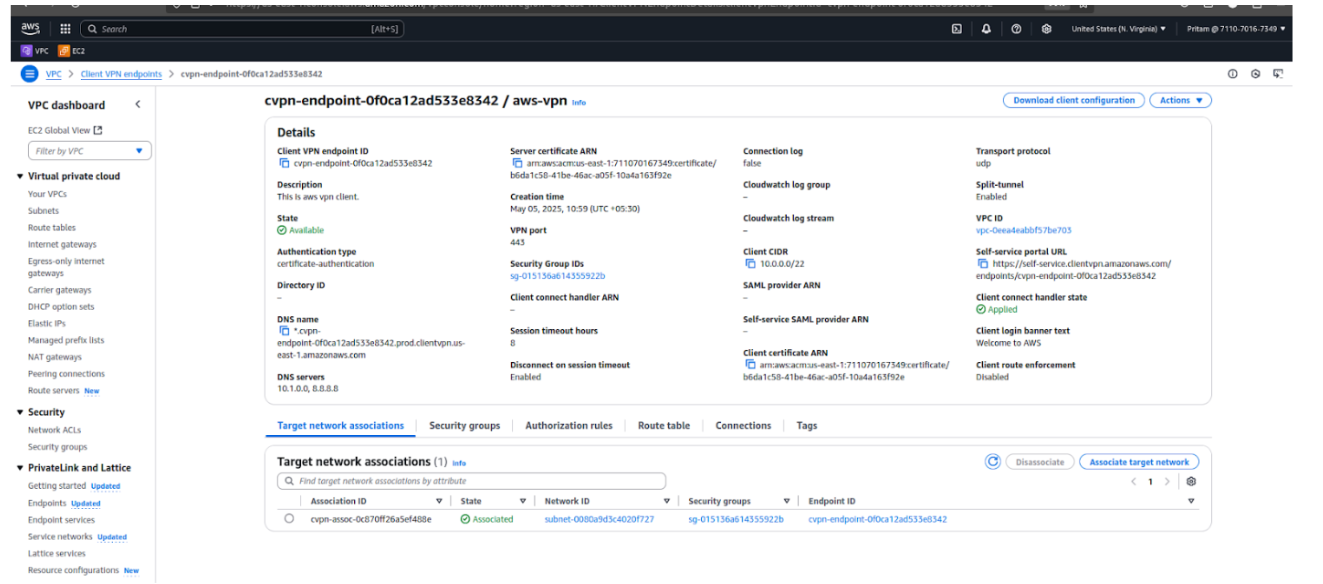
Creating a Client VPN Endpoint establishes the secure entry point for users to connect to your AWS VPC. It defines the client CIDR, authentication method, certificates, and acts as the gateway for remote access.
Step 1: Log in to the AWS Management Console and open the VPC service.
Step 2: In the left navigation pane, click on Client VPN Endpoints.
Step 3: Click the Create Client VPN Endpoint button.
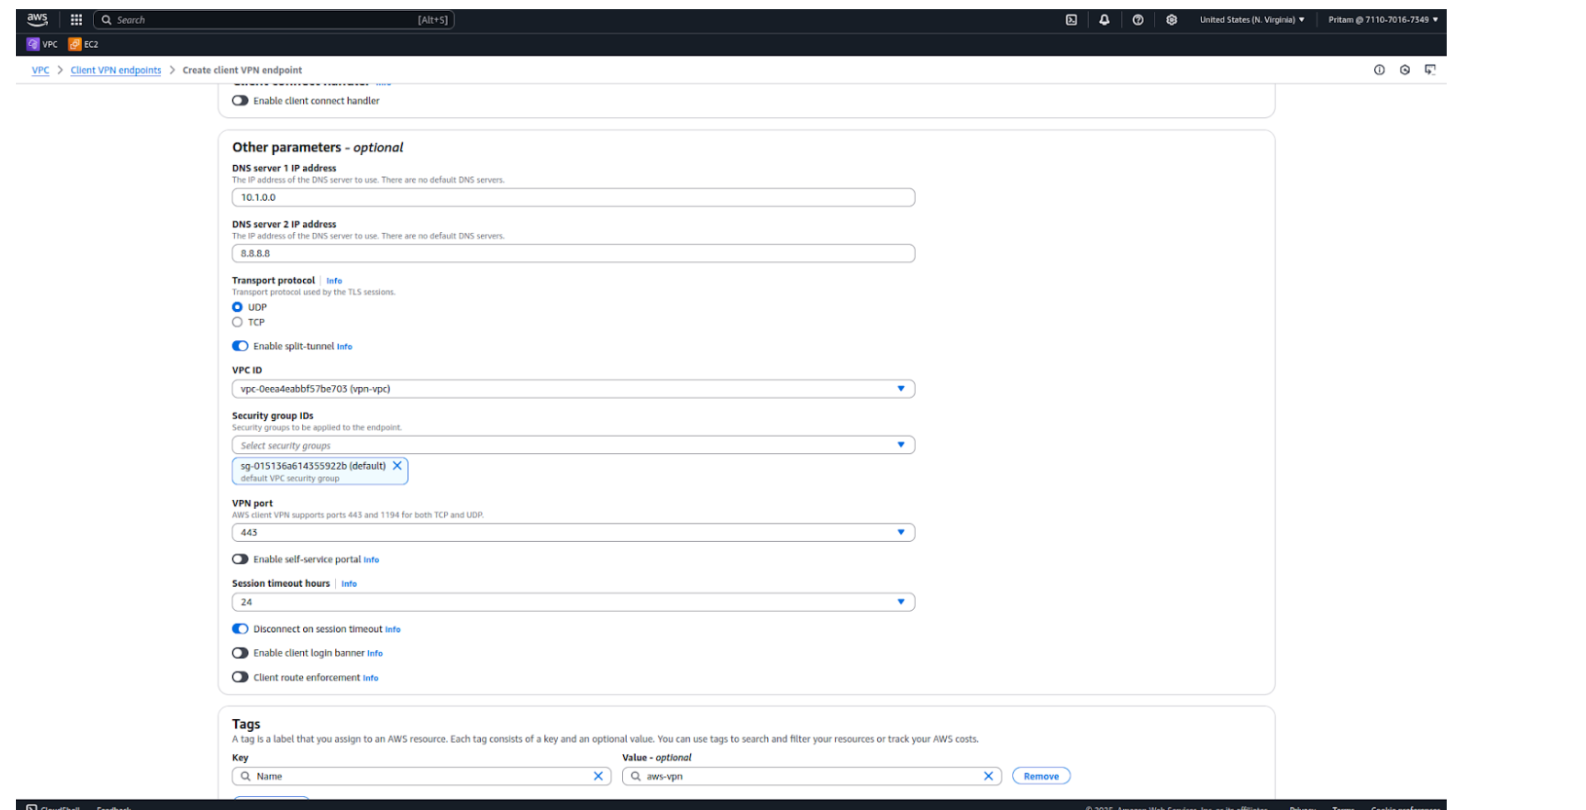
Step 4: Fill in the required details:
Step 5: Configure Connection Logging (optional, for auditing).
Step 6: Under VPC Settings:
Step 7: Review the settings and click on the Create Client VPN Endpoint button.
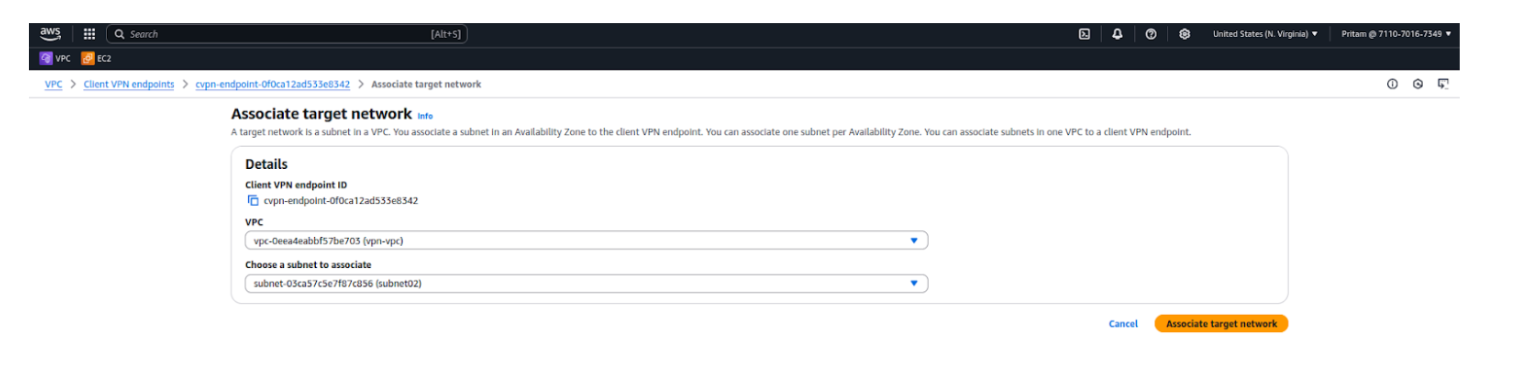
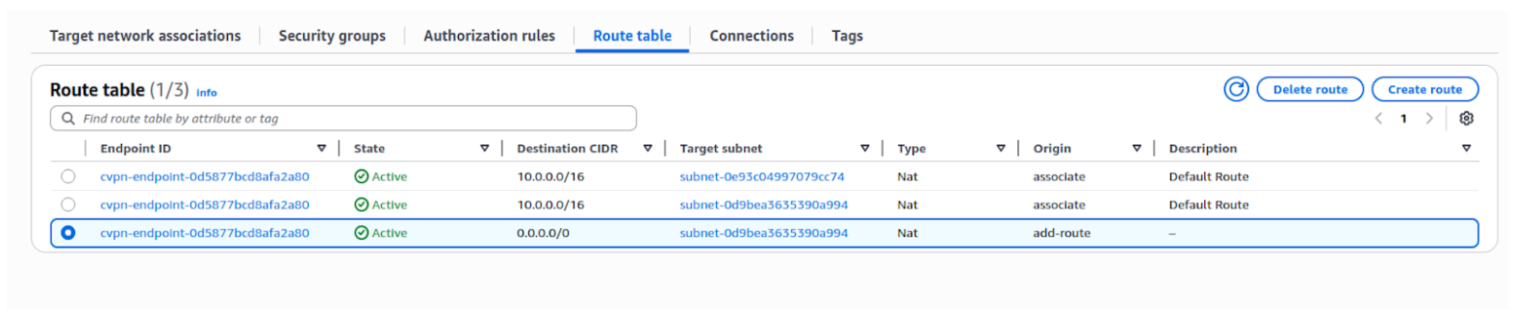
Associating a target network connects the Client VPN endpoint to a specific VPC subnet. This allows VPN users to access resources inside the VPC through either a public or private subnet, depending on requirements.
Step 1: In the AWS Management Console, go to the VPC service.
Step 2: From the left-hand menu, click on Client VPN Endpoints.
Step 3: Select the Client VPN Endpoint you created earlier.
Step 4: Go to the Target network associations tab.
Step 5: Click on Associate target network.
Step 6: Choose the following:
Step 7: Click on Associate.
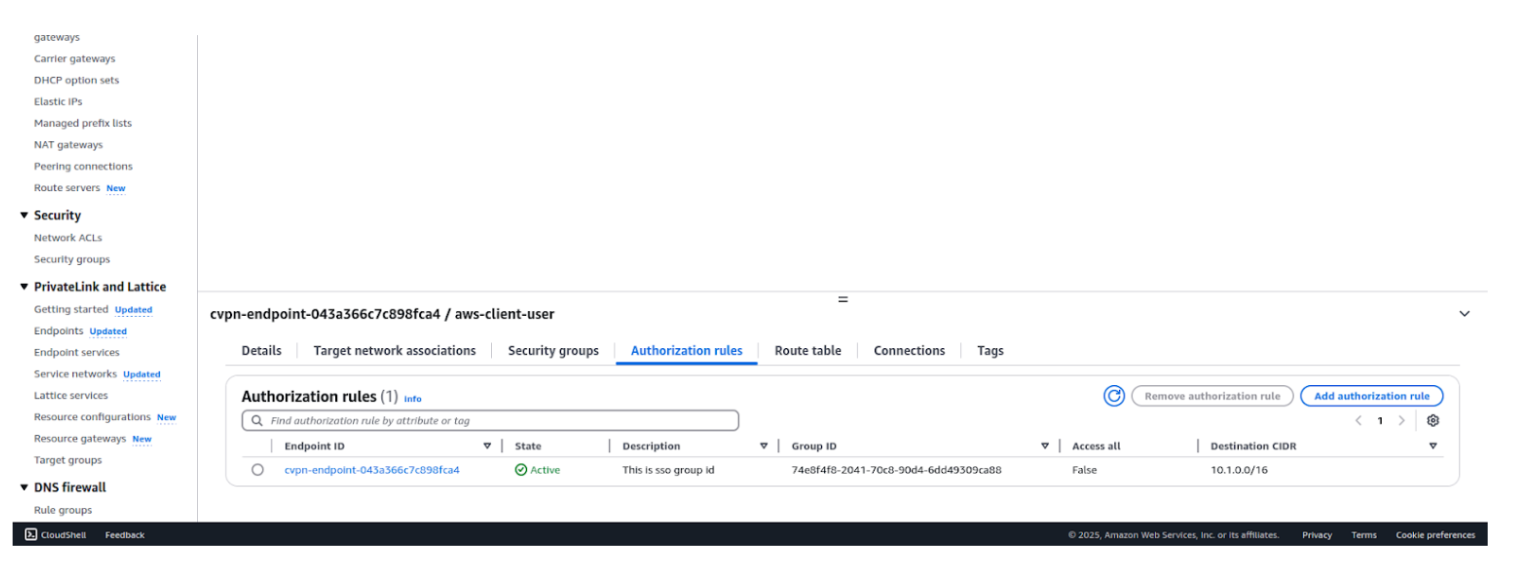
Creating an authorization rule defines which users or groups from IAM Identity Center can access specific networks. This ensures only authorized SAML users are allowed to connect to your VPC resources via the VPN.
Step 1: In the AWS Management Console, go to the VPC service.
Step 2: From the left-hand menu, click on Client VPN Endpoints.
Step 3: Select your Client VPN Endpoint.
Step 4: Go to the Authorization rules tab.
Step 5: Click on Add authorization rule.
Step 6: Provide the following details:
Step 7: Click Add authorization rule.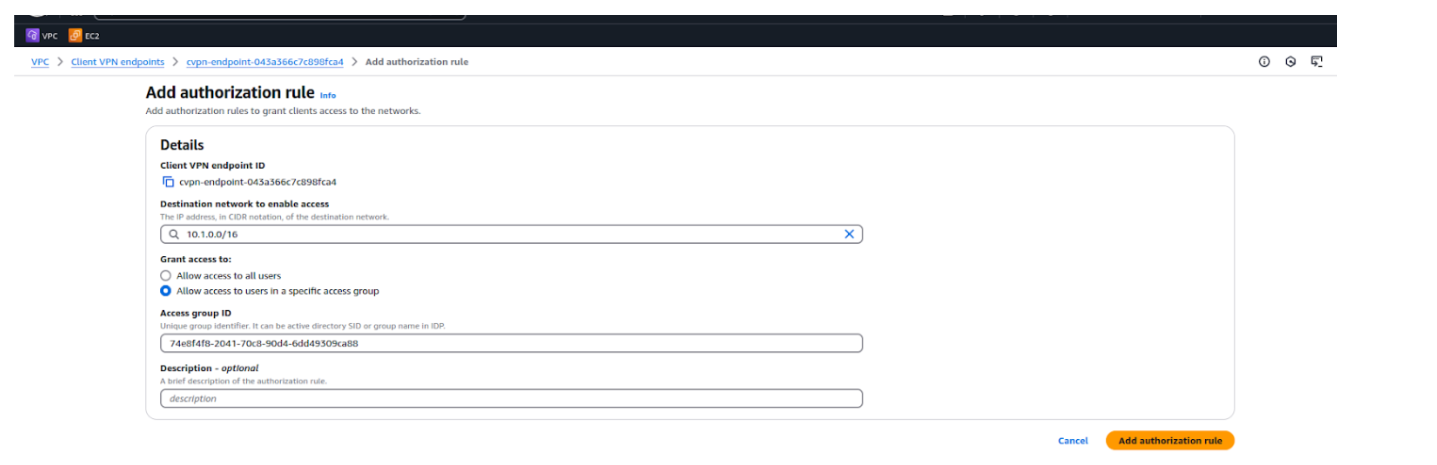
The AWS VPN Client is required on end-user machines to establish a secure connection with the Client VPN endpoint. It uses the configuration file, certificates, and SAML authentication to enable seamless and secure access.
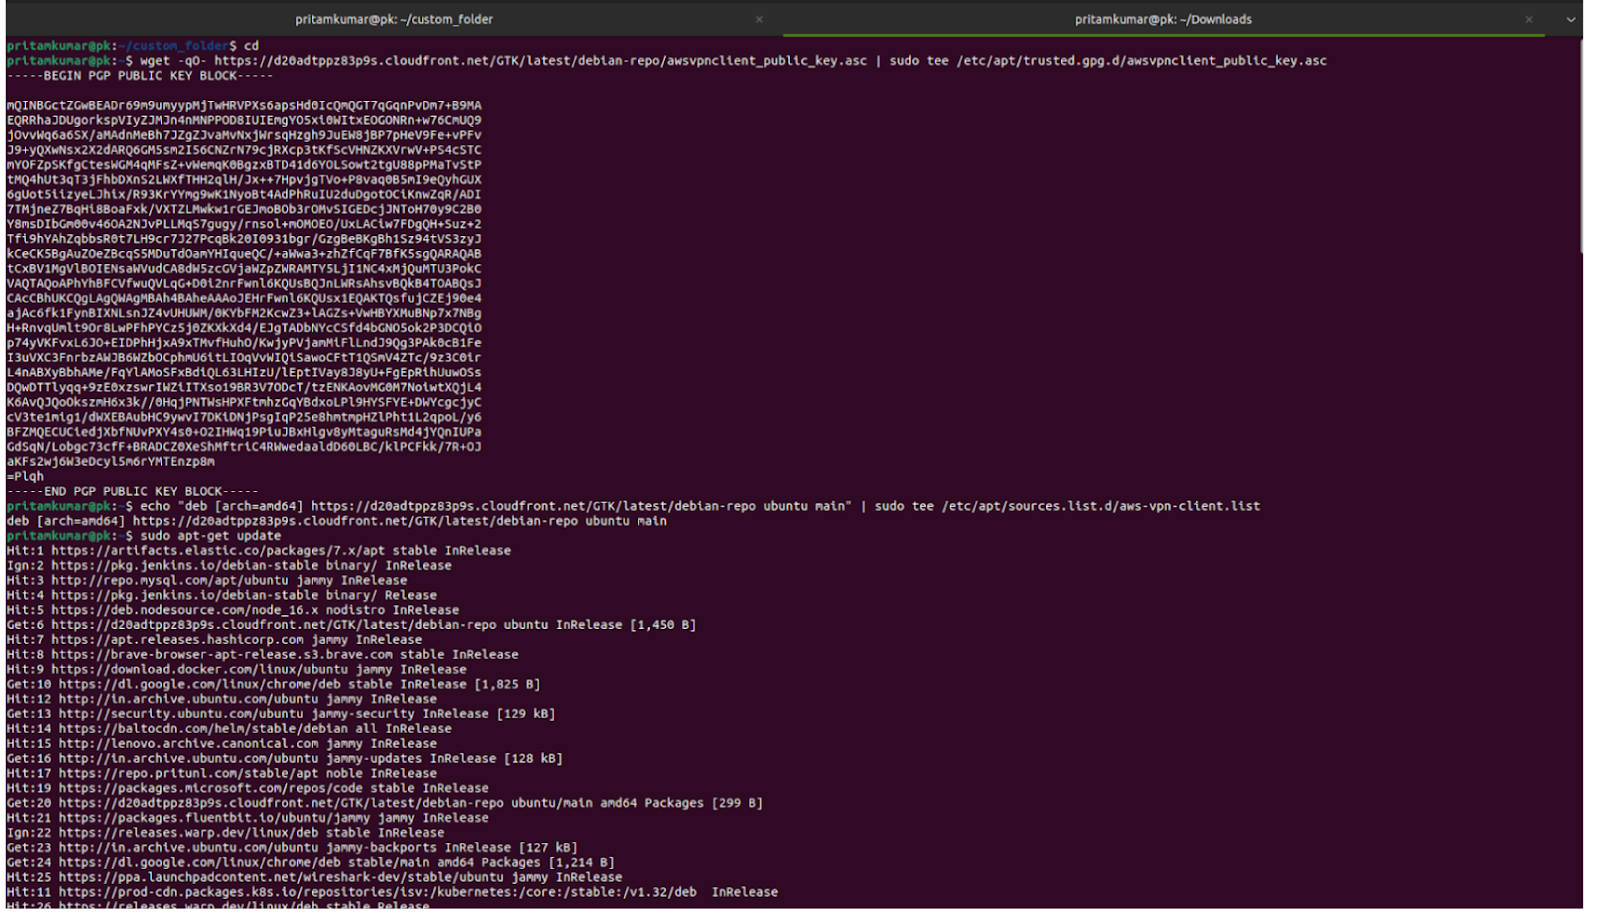
Step 1: Open a terminal on your Ubuntu/Debian system.
Step 2: Import the AWS VPN Client public key:
wget -qO- https://d20adtppz83p9s.cloudfront.net/GTK/latest/debian-repo/awsvpnclient_public_key.asc | sudo tee /etc/apt/trusted.gpg.d/awsvpnclient_public_key.asc
Step 3: Add the AWS VPN Client repository to your system sources:
echo "deb [arch=amd64] https://d20adtppz83p9s.cloudfront.net/GTK/latest/debian-repo ubuntu main" | sudo tee /etc/apt/sources.list.d/aws-vpn-client.list
Step 4: Update the package lists:
Step 5: Install the AWS VPN Client:

Step 1: In the AWS Management Console, go to the VPC service.
Step 2: From the left-hand menu, click Client VPN Endpoints.
Step 3: Select your Client VPN Endpoint and go to the Client configuration tab.
Step 4: Click Download client configuration to get the .ovpn file.
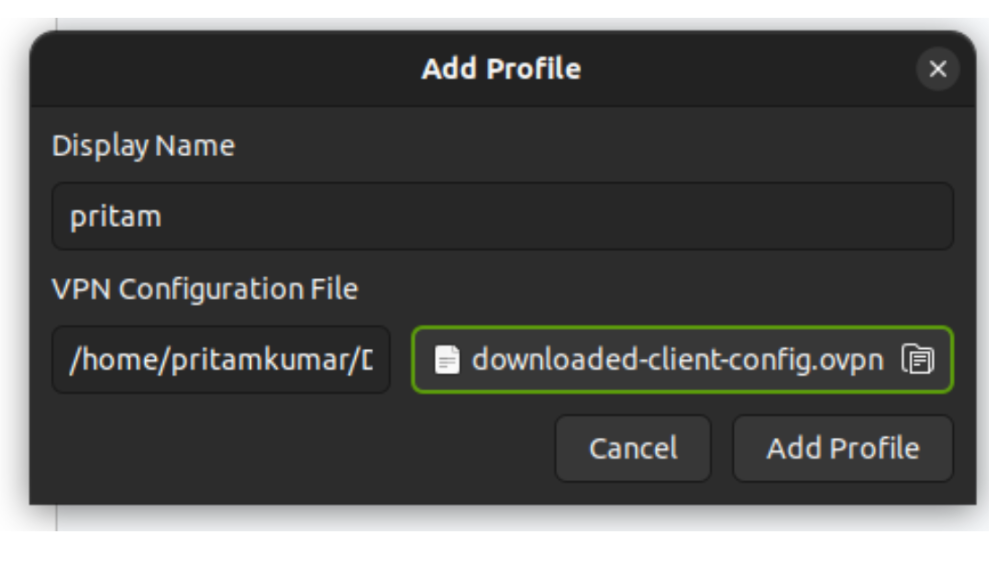
Step 5: Open the AWS VPN Client application on your machine.
Step 6: Import the downloaded .ovpn configuration file into the client.
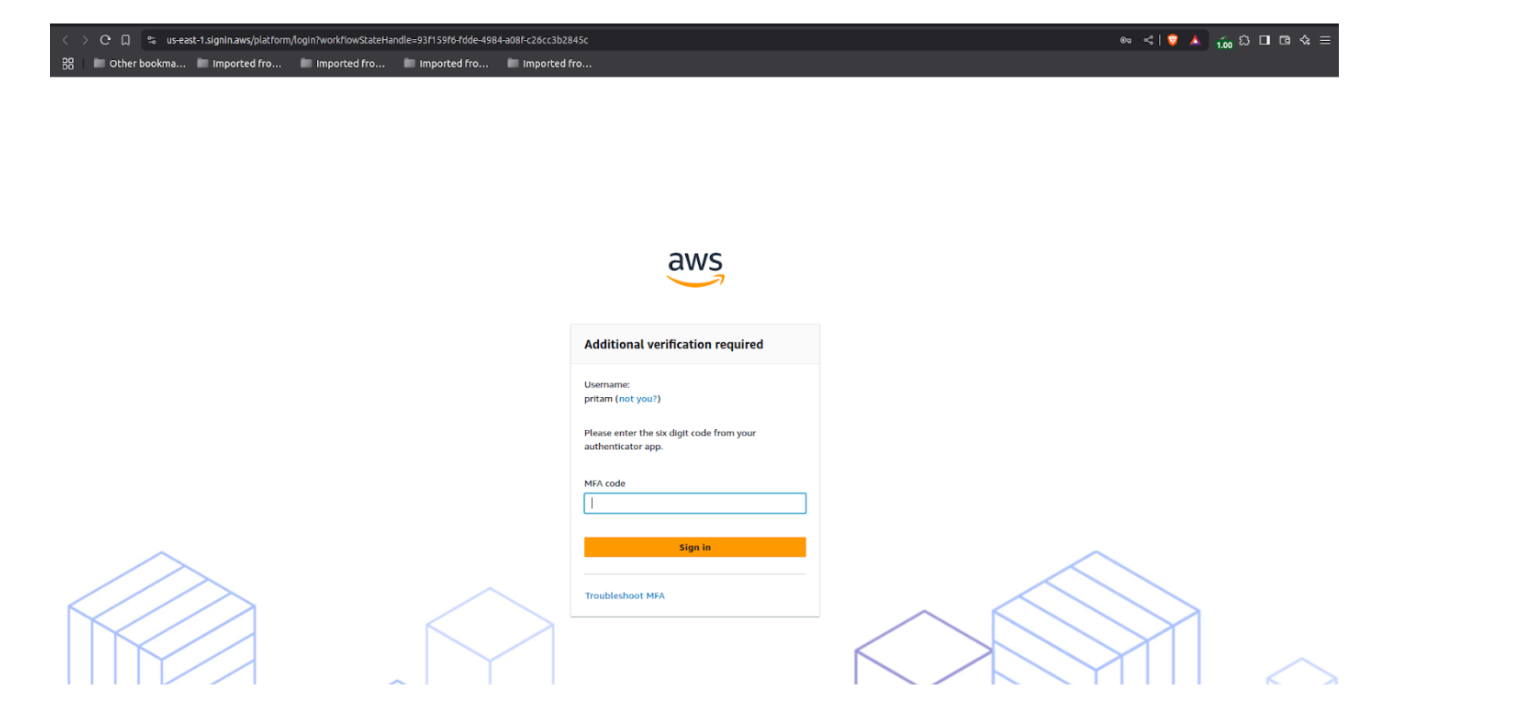
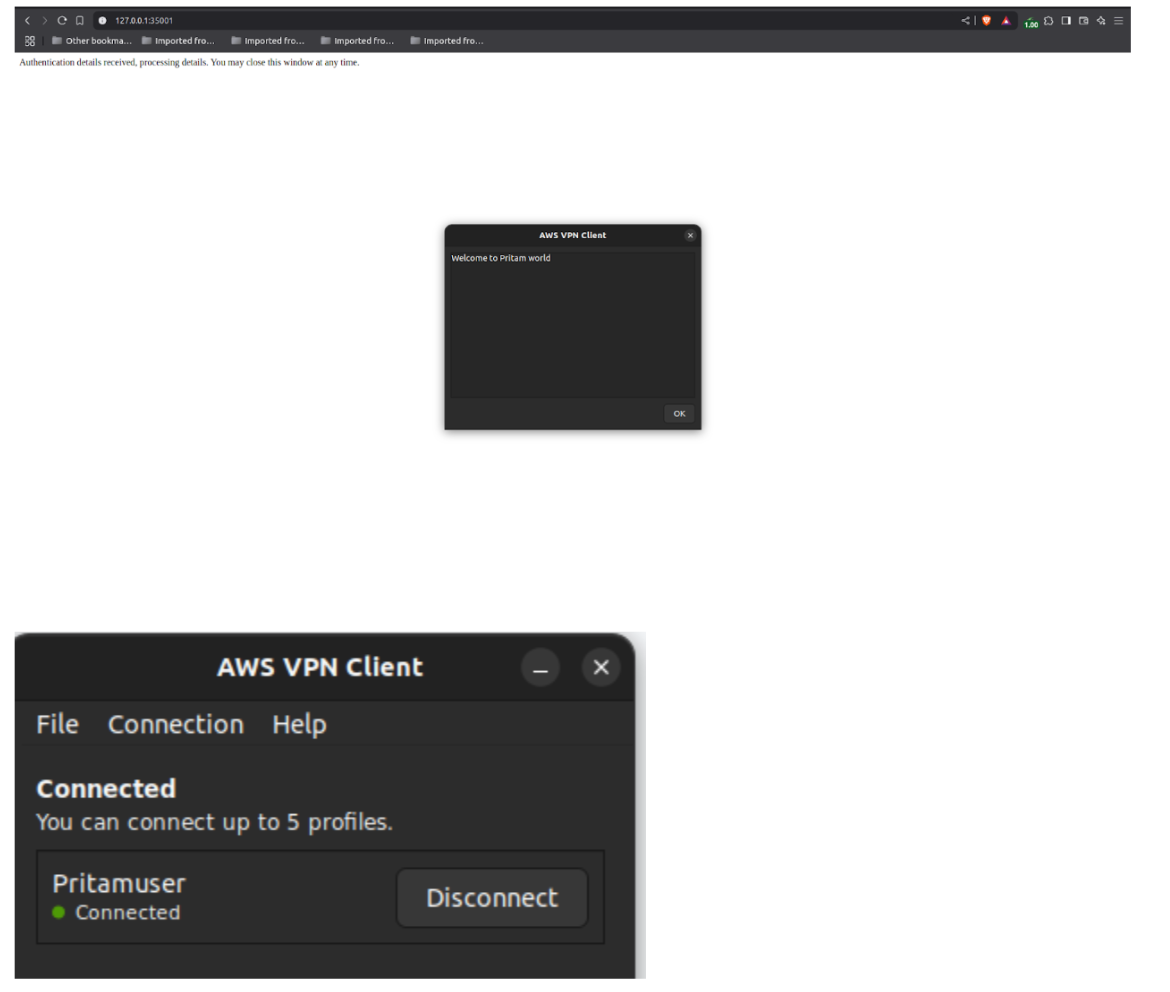
Step 7: Connect to the VPN. You will be redirected to the IAM Identity Center (SSO) portal for authentication.
Step 8: Sign in using your SAML (IAM Identity Center) credentials.
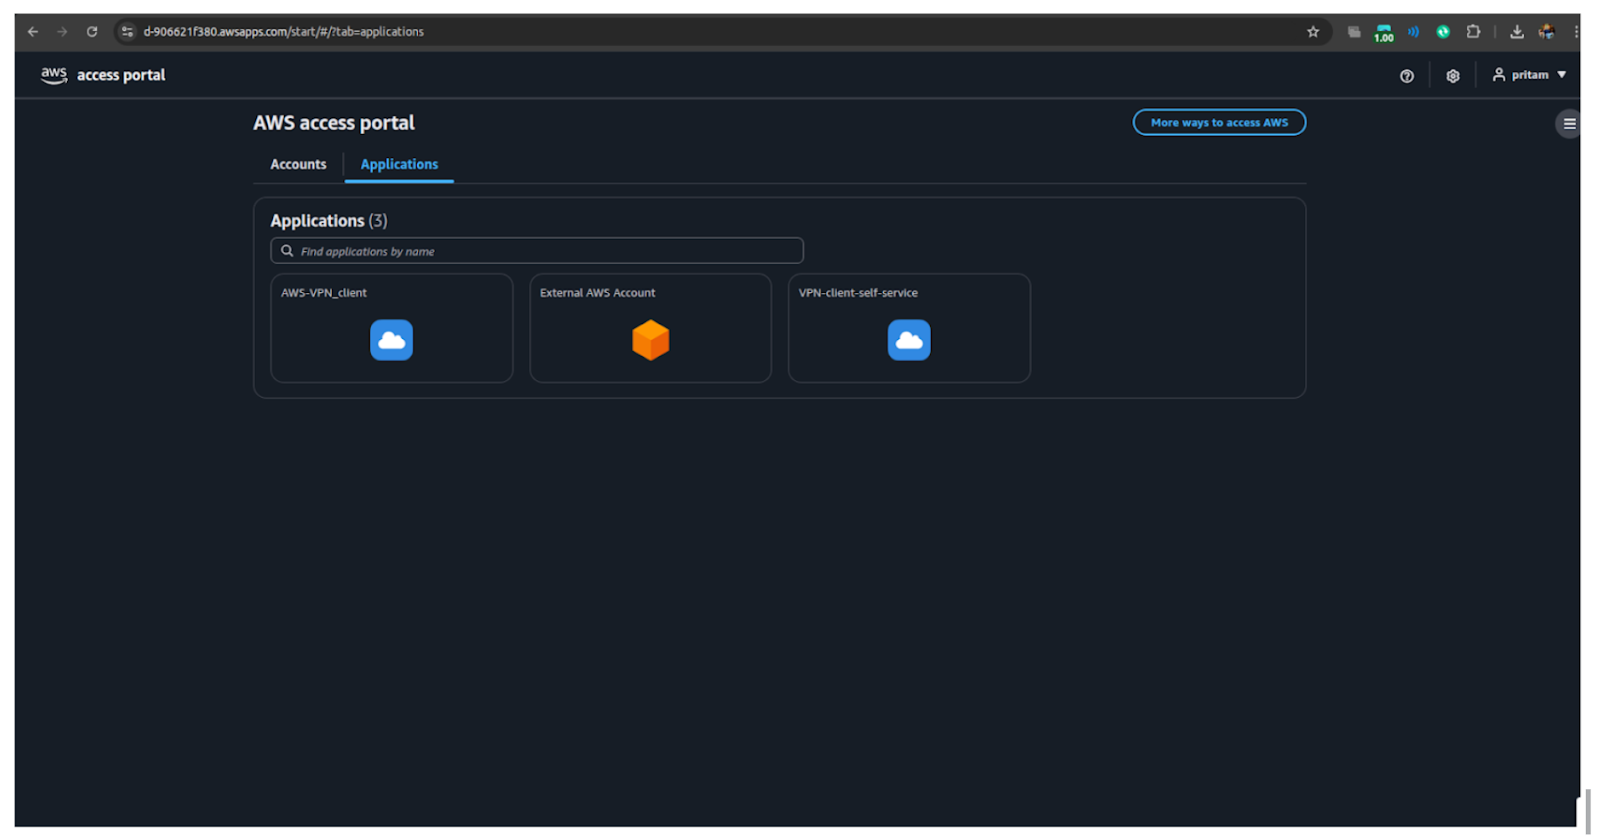
Step 9: After authentication, go to the Self-Service VPN application (created earlier in IAM Identity Center).
Step 10: Open the application and download the cvpn-endpoint configuration file.
Step 11: Import this new configuration file into the AWS VPN Client (if required).
Step 12: Connect again, and the connection will also be authenticated via the SSO portal.


Integrating AWS Client VPN with IAM Identity Center (SSO) via SAML 2.0 provides secure, scalable, and user-friendly remote access. It eliminates the need for managing individual VPN credentials by centralising authentication and authorisation. Administrators gain stronger security and compliance, while users enjoy seamless access with their existing SSO credentials—a modern, efficient solution for secure AWS VPN access.

99% of companies saved up to 15% monthly with this plan & achieved peak performance.

Speak with our advisors to learn how you can take control of your Cloud Cost


