

DevOps Engineer
Pritam possesses strong expertise in AWS, CI/CD, and Infrastructure as Code. He focuses on designing scalable, automated cloud environments and enhancing overall system performance.
11 Feb, 2026 | 6 Min read

In modern cloud architectures, organizations often operate and manage multi-cloud environments, leveraging the strengths of different cloud providers such as Amazon Web Services (AWS) and Oracle Cloud Infrastructure (OCI).
To enable secure communication between workloads running across these platforms, a Site-to-Site VPN is one of the most reliable and cost-effective solutions.
This blog walks through a complete implementation of an AWS ↔ OCI Site-to-Site VPN using static routing and IPSec (IKEv1).
By the end of this guide, AWS VPC and OCI VCN will be connected through a private, encrypted tunnel, allowing seamless network communication.
The primary goals of this configuration are:
Before starting the configuration, define the network boundaries clearly.
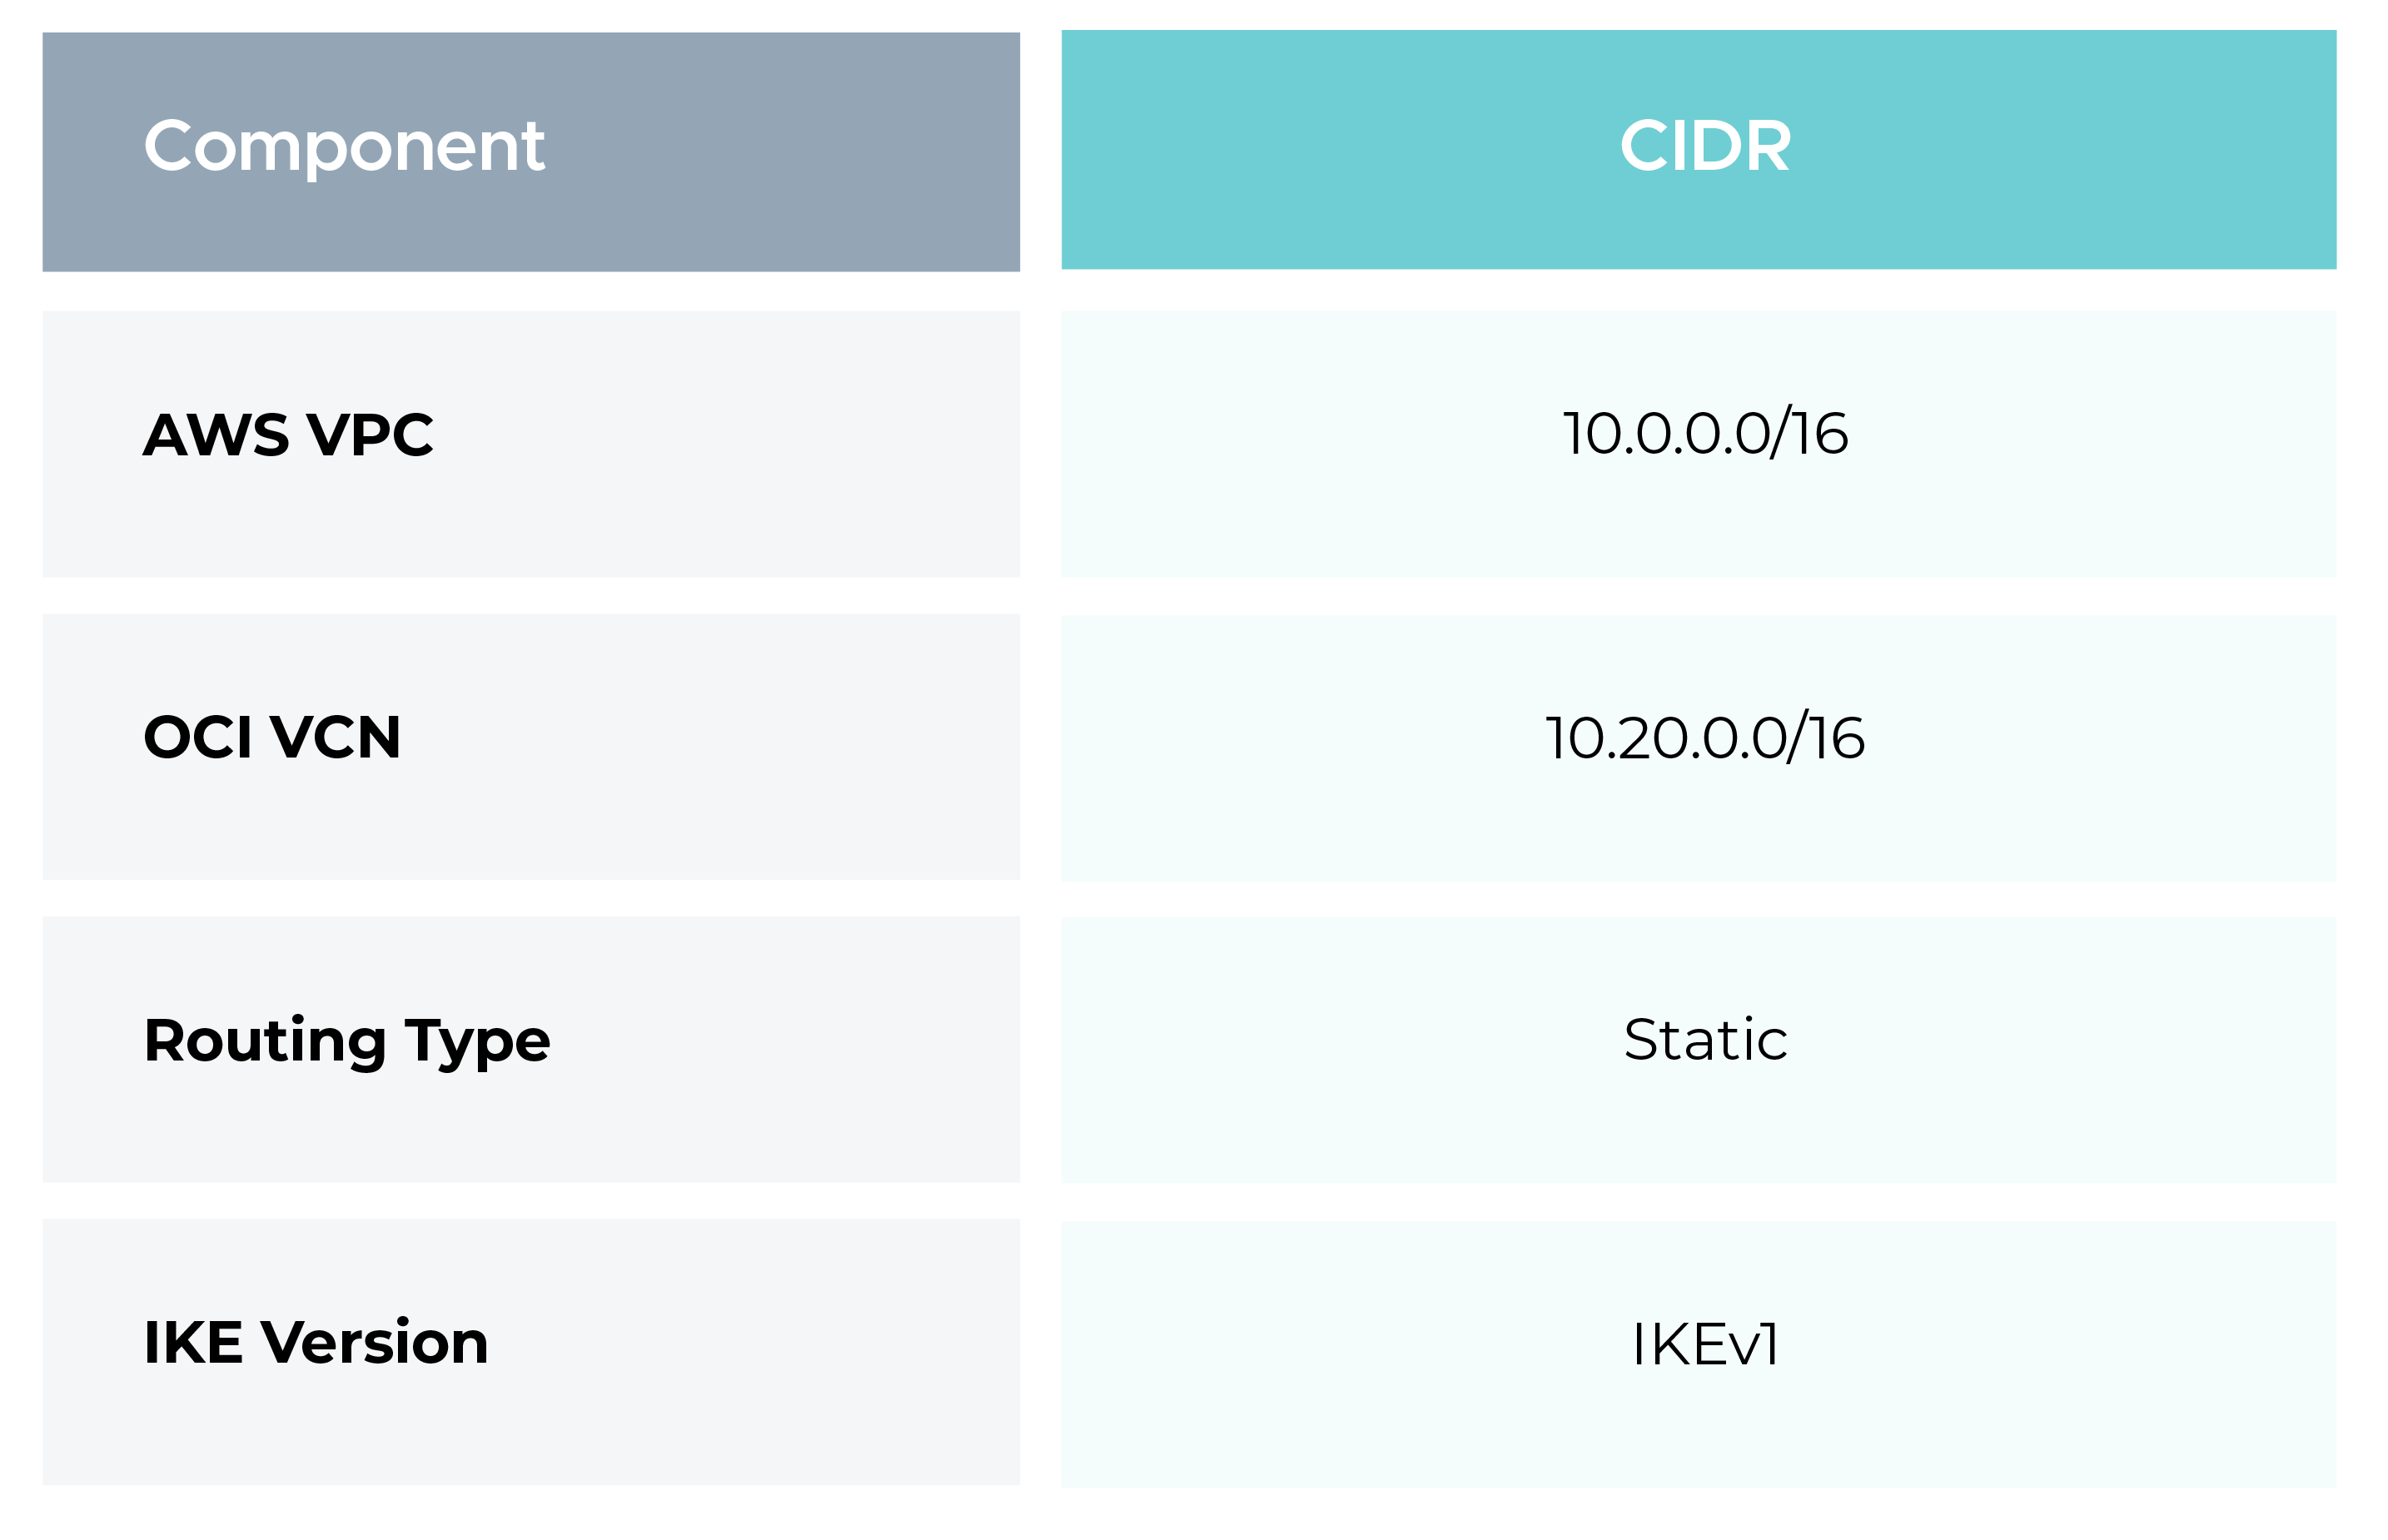
Static routing is used in this setup, meaning all network prefixes are manually defined on both sides. This approach is simple and effective when network ranges are well-known and do not change frequently.
On the AWS side, the VPN architecture consists of:
A Virtual Private Gateway acts as the AWS-managed VPN endpoint that connects your VPC to external networks such as OCI.
Steps:
The VGW must be attached to the target VPC to enable VPN traffic flow.
Steps:
This step logically associates the VPN gateway with the AWS VPC.
A Customer Gateway represents the remote VPN device, in this case, the OCI IPSec tunnel public ip.
Since OCI tunnel public IP addresses are available only after tunnel creation, a temporary placeholder IP is used initially.
Steps:
AWS does not allow modification of a Customer Gateway IP address later, which is why a new CGW will be created once the actual OCI tunnel IP is available.
This step establishes the actual IPSec VPN connection between AWS and OCI.
Steps:
Static Route Prefix:
10.20.0.0/16 - This CIDR represents the OCI VCN network reachable from AWS.
AWS automatically generates pre-shared keys containing special characters.
However, OCI does not support special characters in pre-shared keys.
Important constraints:
Example of a compatible pre-shared key: psd43mdk620djn
This key must be identical on both the AWS and OCI sides
Download the AWS VPN configuration and note the parameters for Tunnel-1.
These settings must match exactly on the OCI side.
IKE Phase 1
IPSec Phase 2
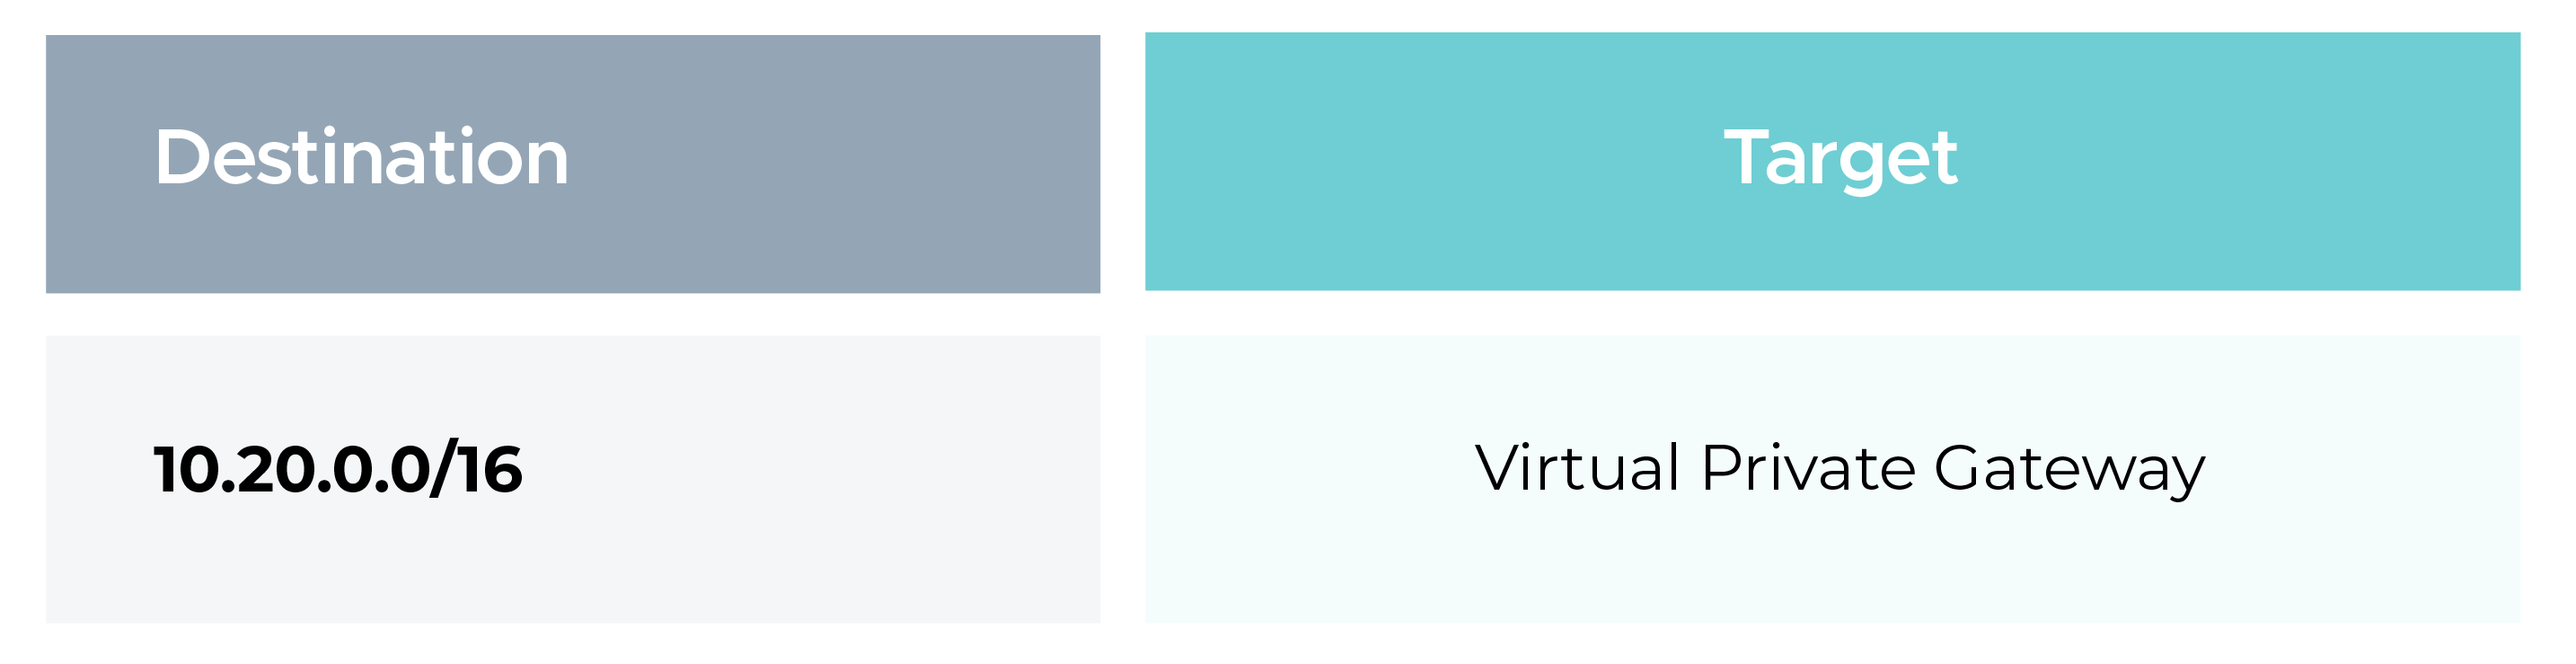
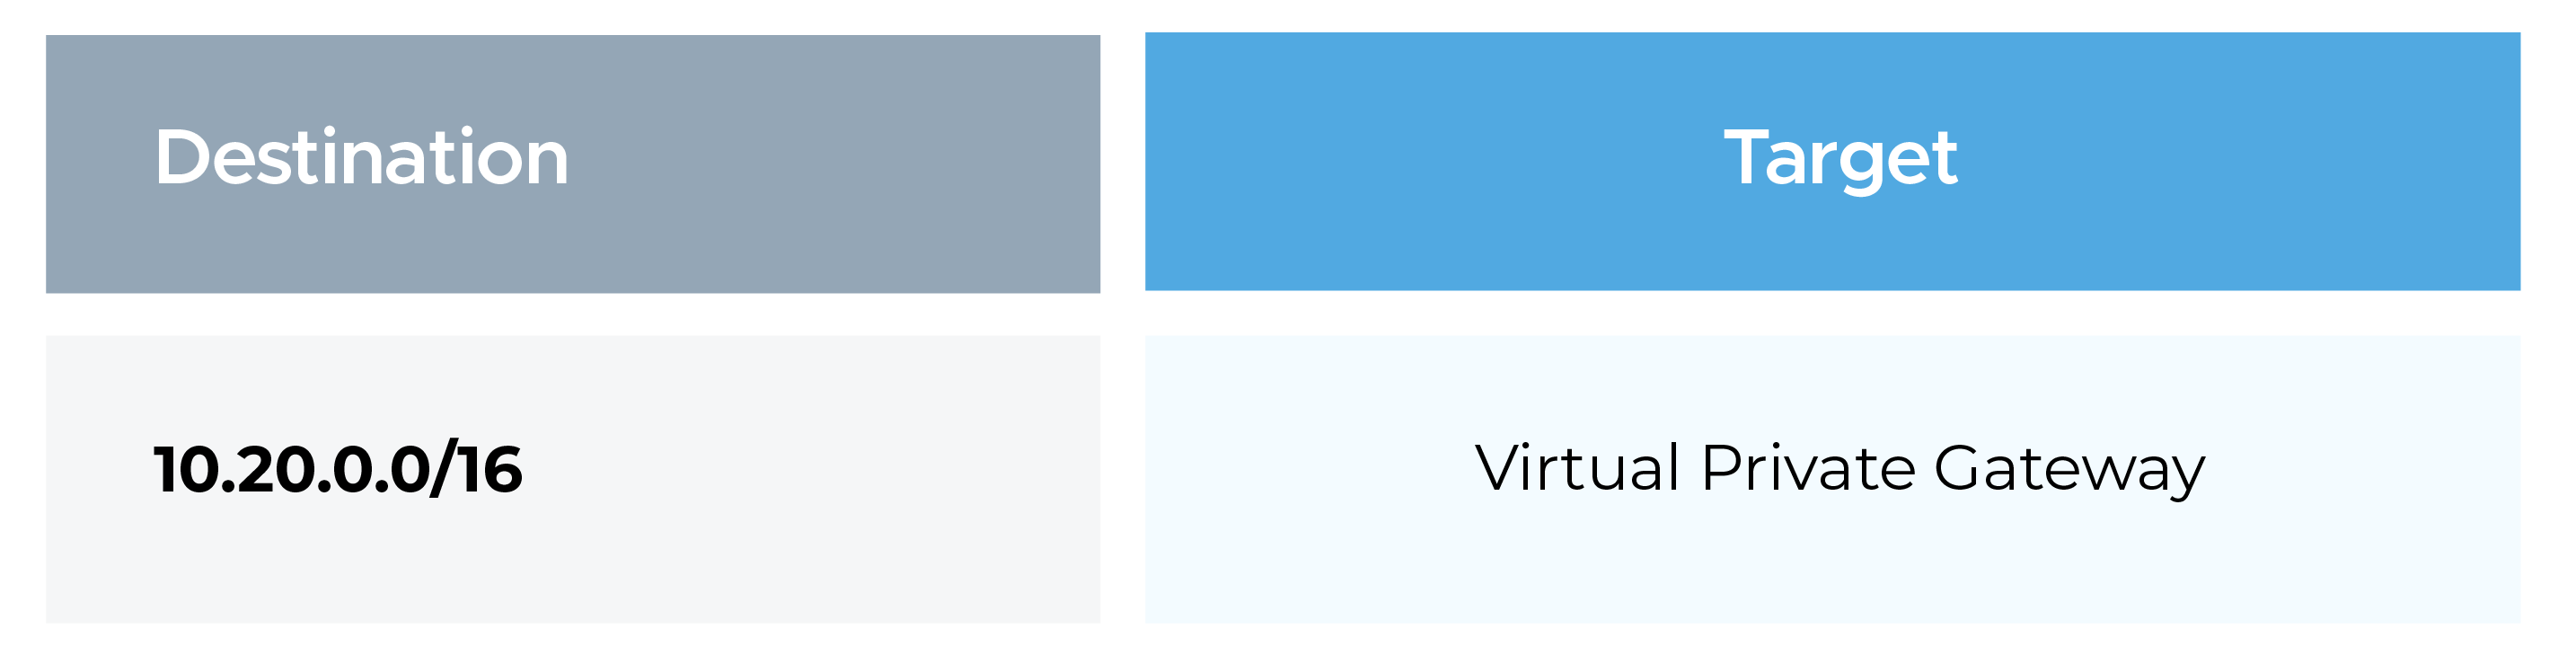
To route traffic destined for OCI through the VPN, update the AWS subnet route tables.
A DRG in OCI functions similarly to an AWS VGW.
Steps:
CPE represents the AWS VPN endpoint from OCI’s perspective.
Steps:
This establishes the OCI side of the VPN tunnel.
Basic Configuration
Tunnel Configuration and Phase Settings
Phase 1
Phase 2
Lifetime: 3600 seconds
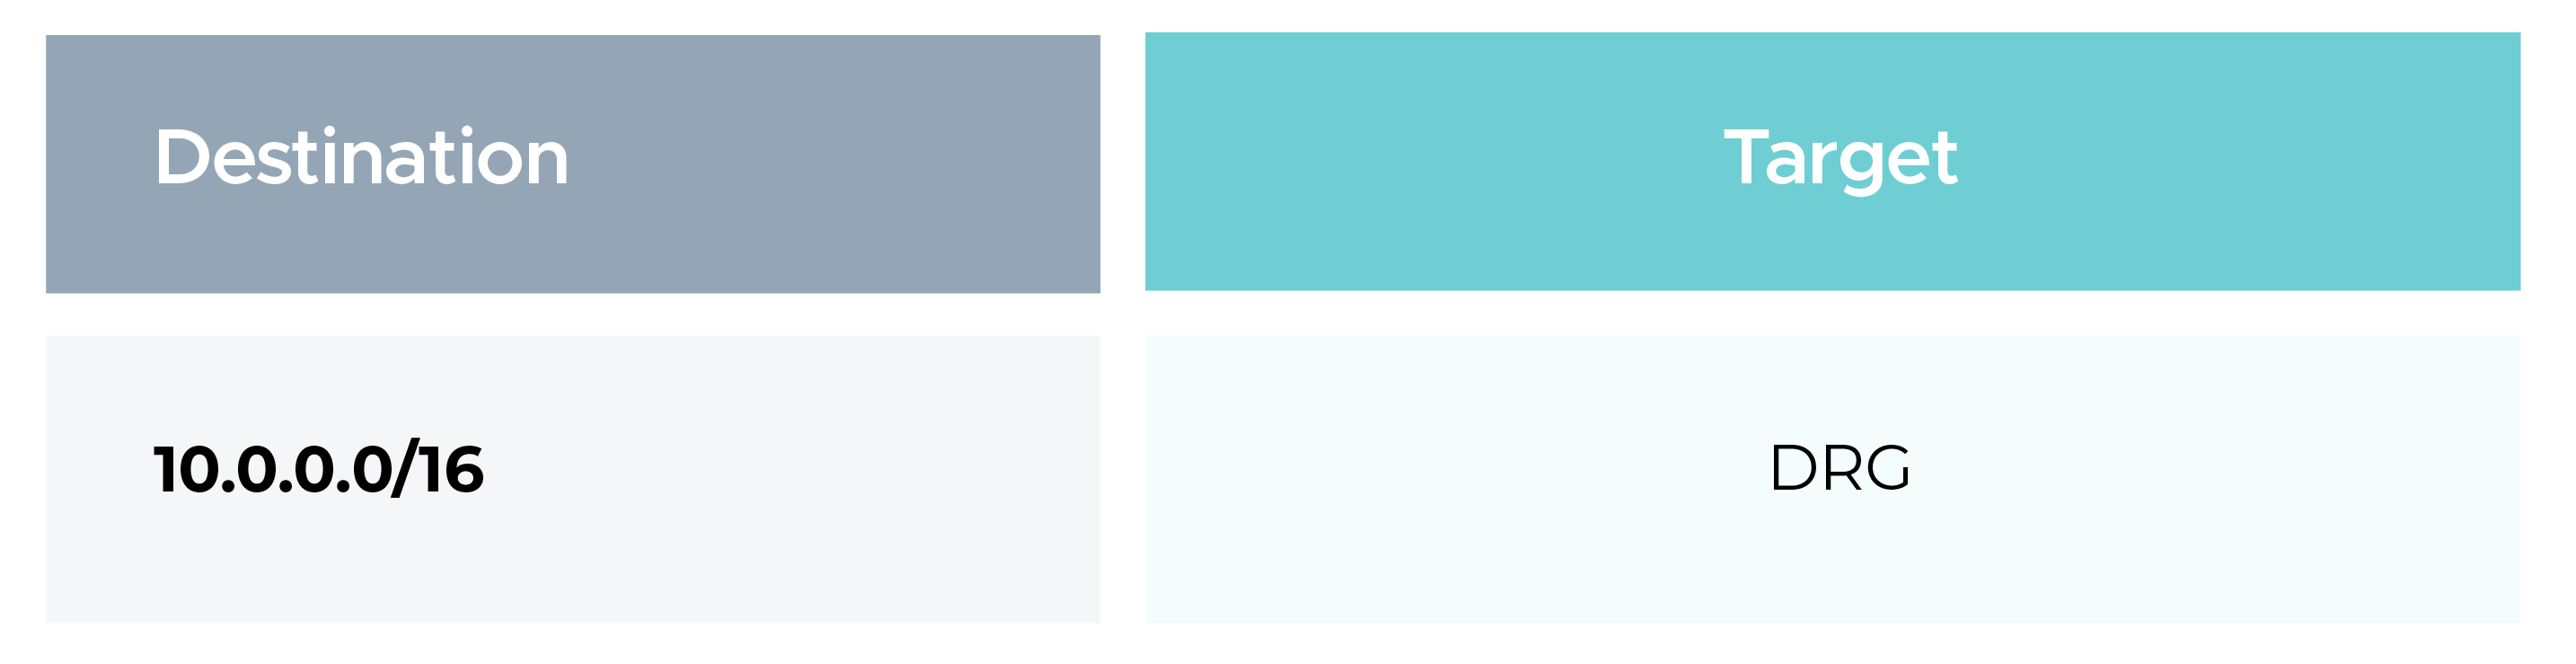
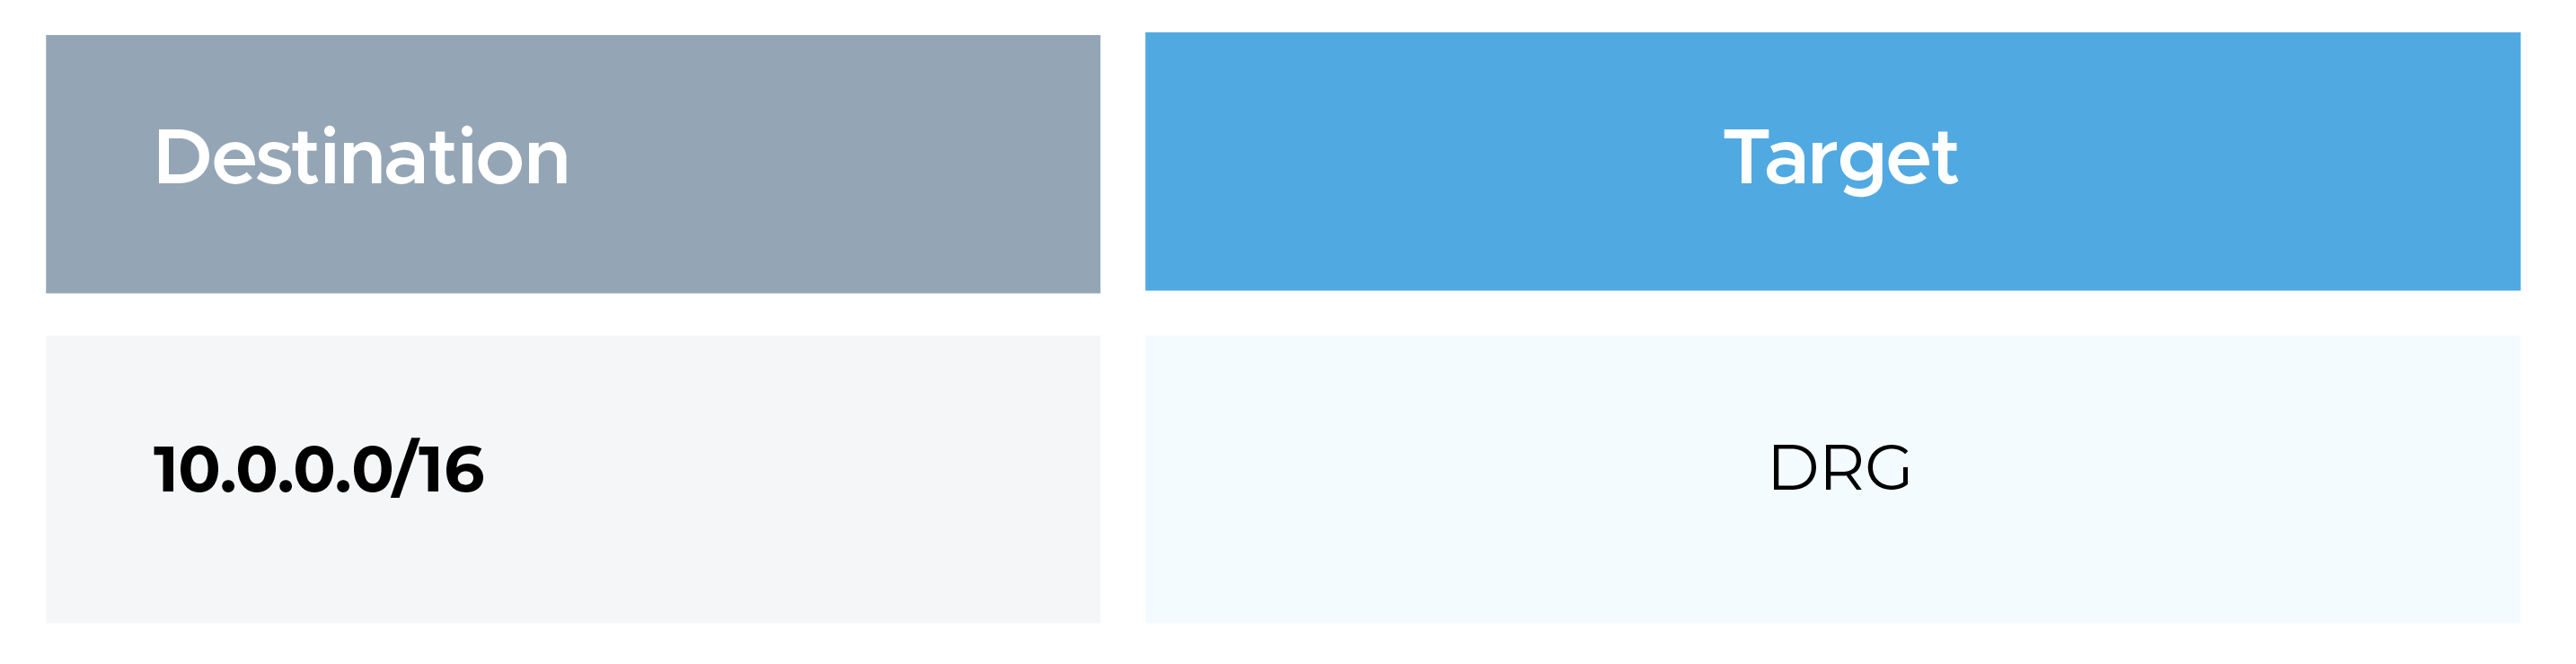
Update the OCI VCN subnet route tables to forward AWS traffic via DRG.
Once the OCI tunnel public IP is available:
After completing the AWS ↔ OCI Site-to-Site VPN configuration, it is critical to validate connectivity at the application and network level.
The most reliable way to test this setup is by deploying compute instances on both sides and verifying private IP communication over the VPN tunnel.
Test Scenario Overview
For validation, we will:
This confirms:
AWS Side (EC2)
Example:
AWS EC2 Private IP: 10.0.1.10
OCI Side (Compute Instance)
Example:
OCI Instance Private IP: 10.20.1.10
By default, cloud firewalls block cross-network traffic.
To allow VPN traffic, security rules must be updated on both AWS and OCI sides.
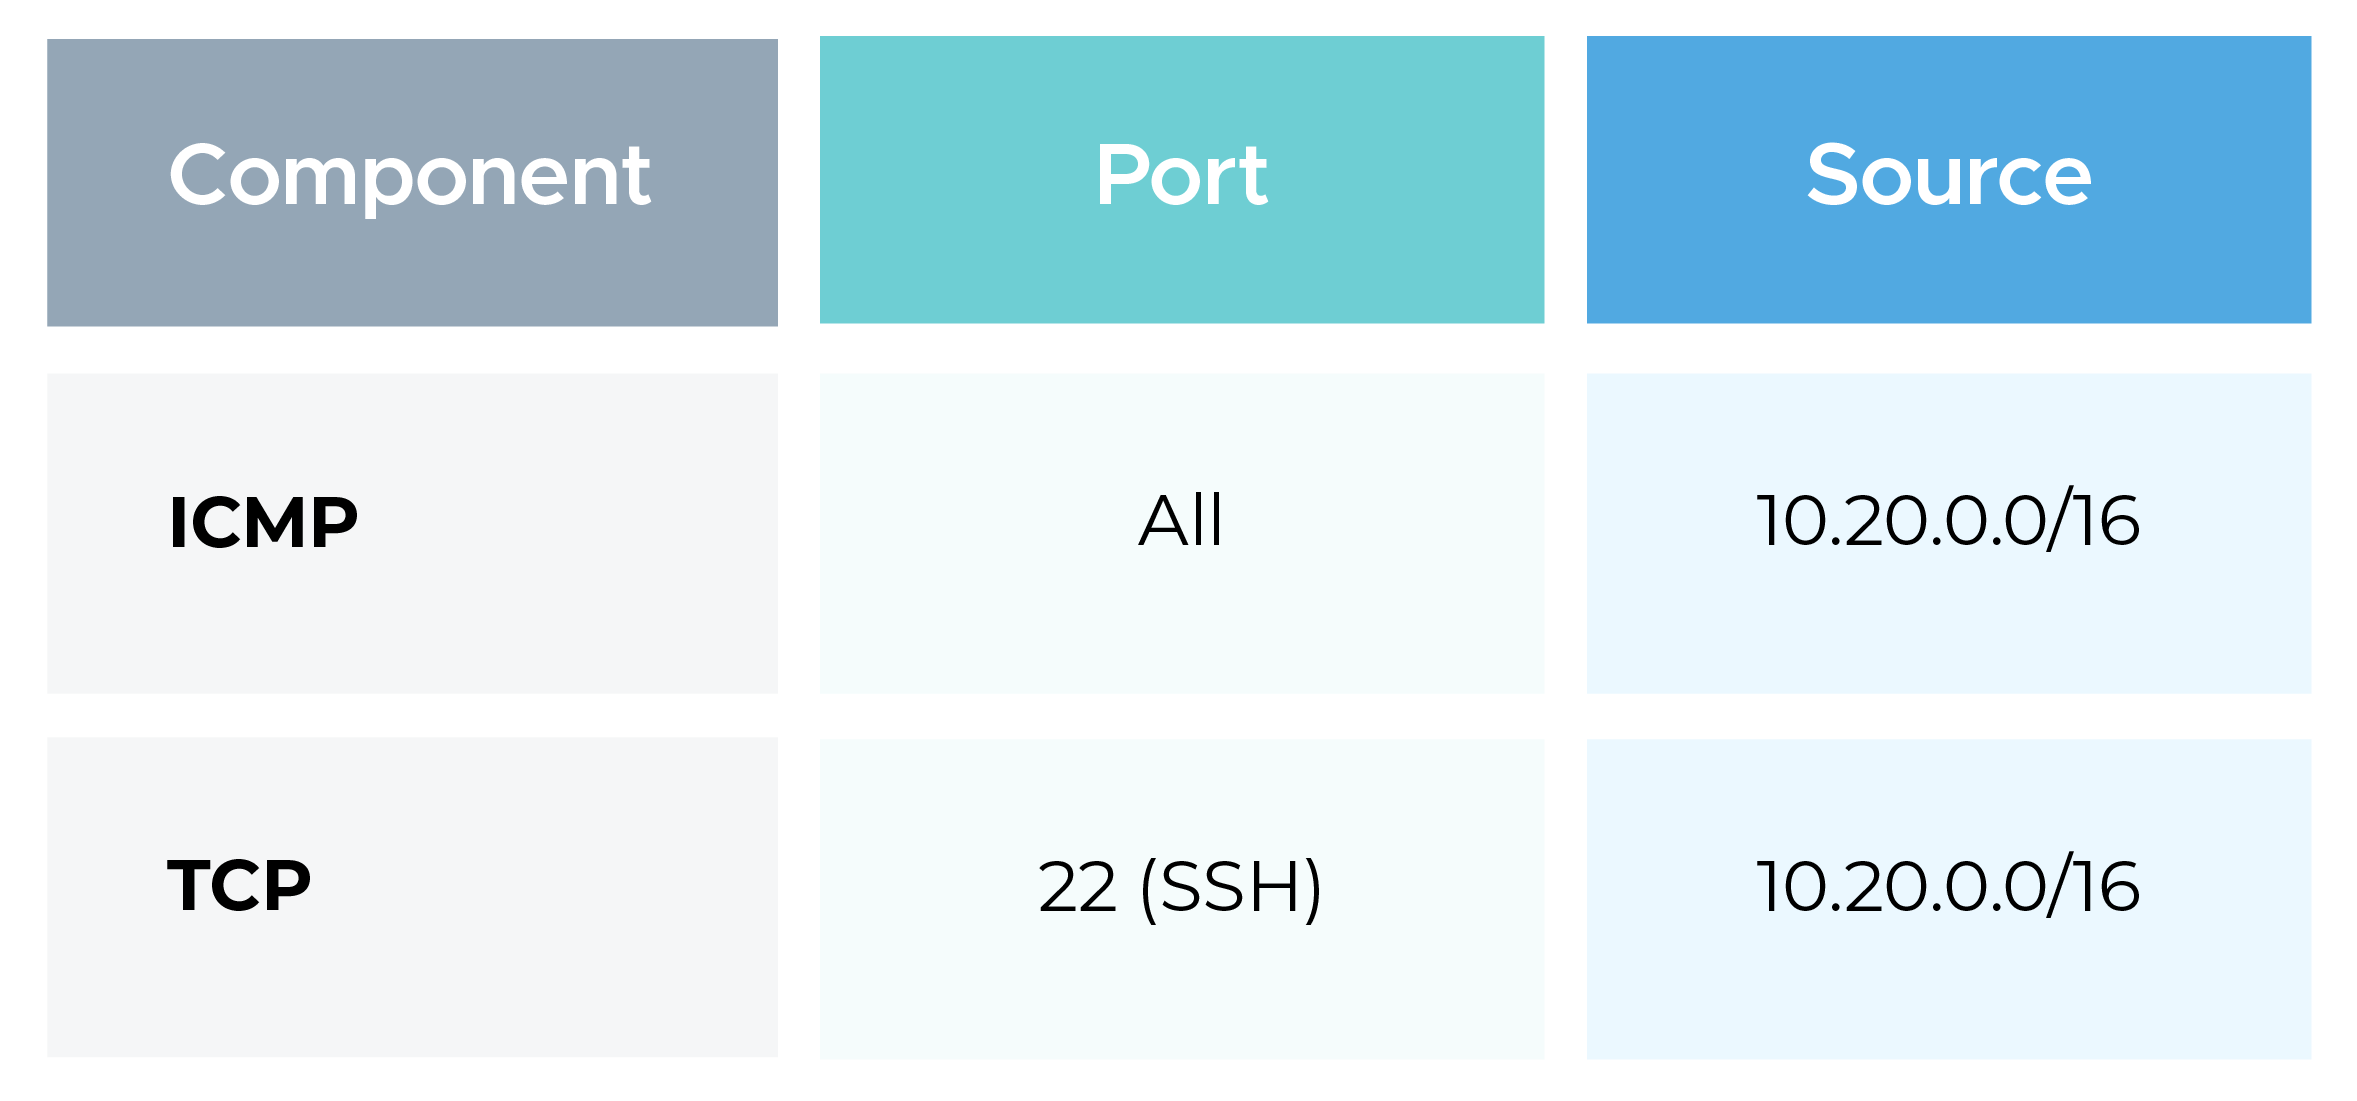
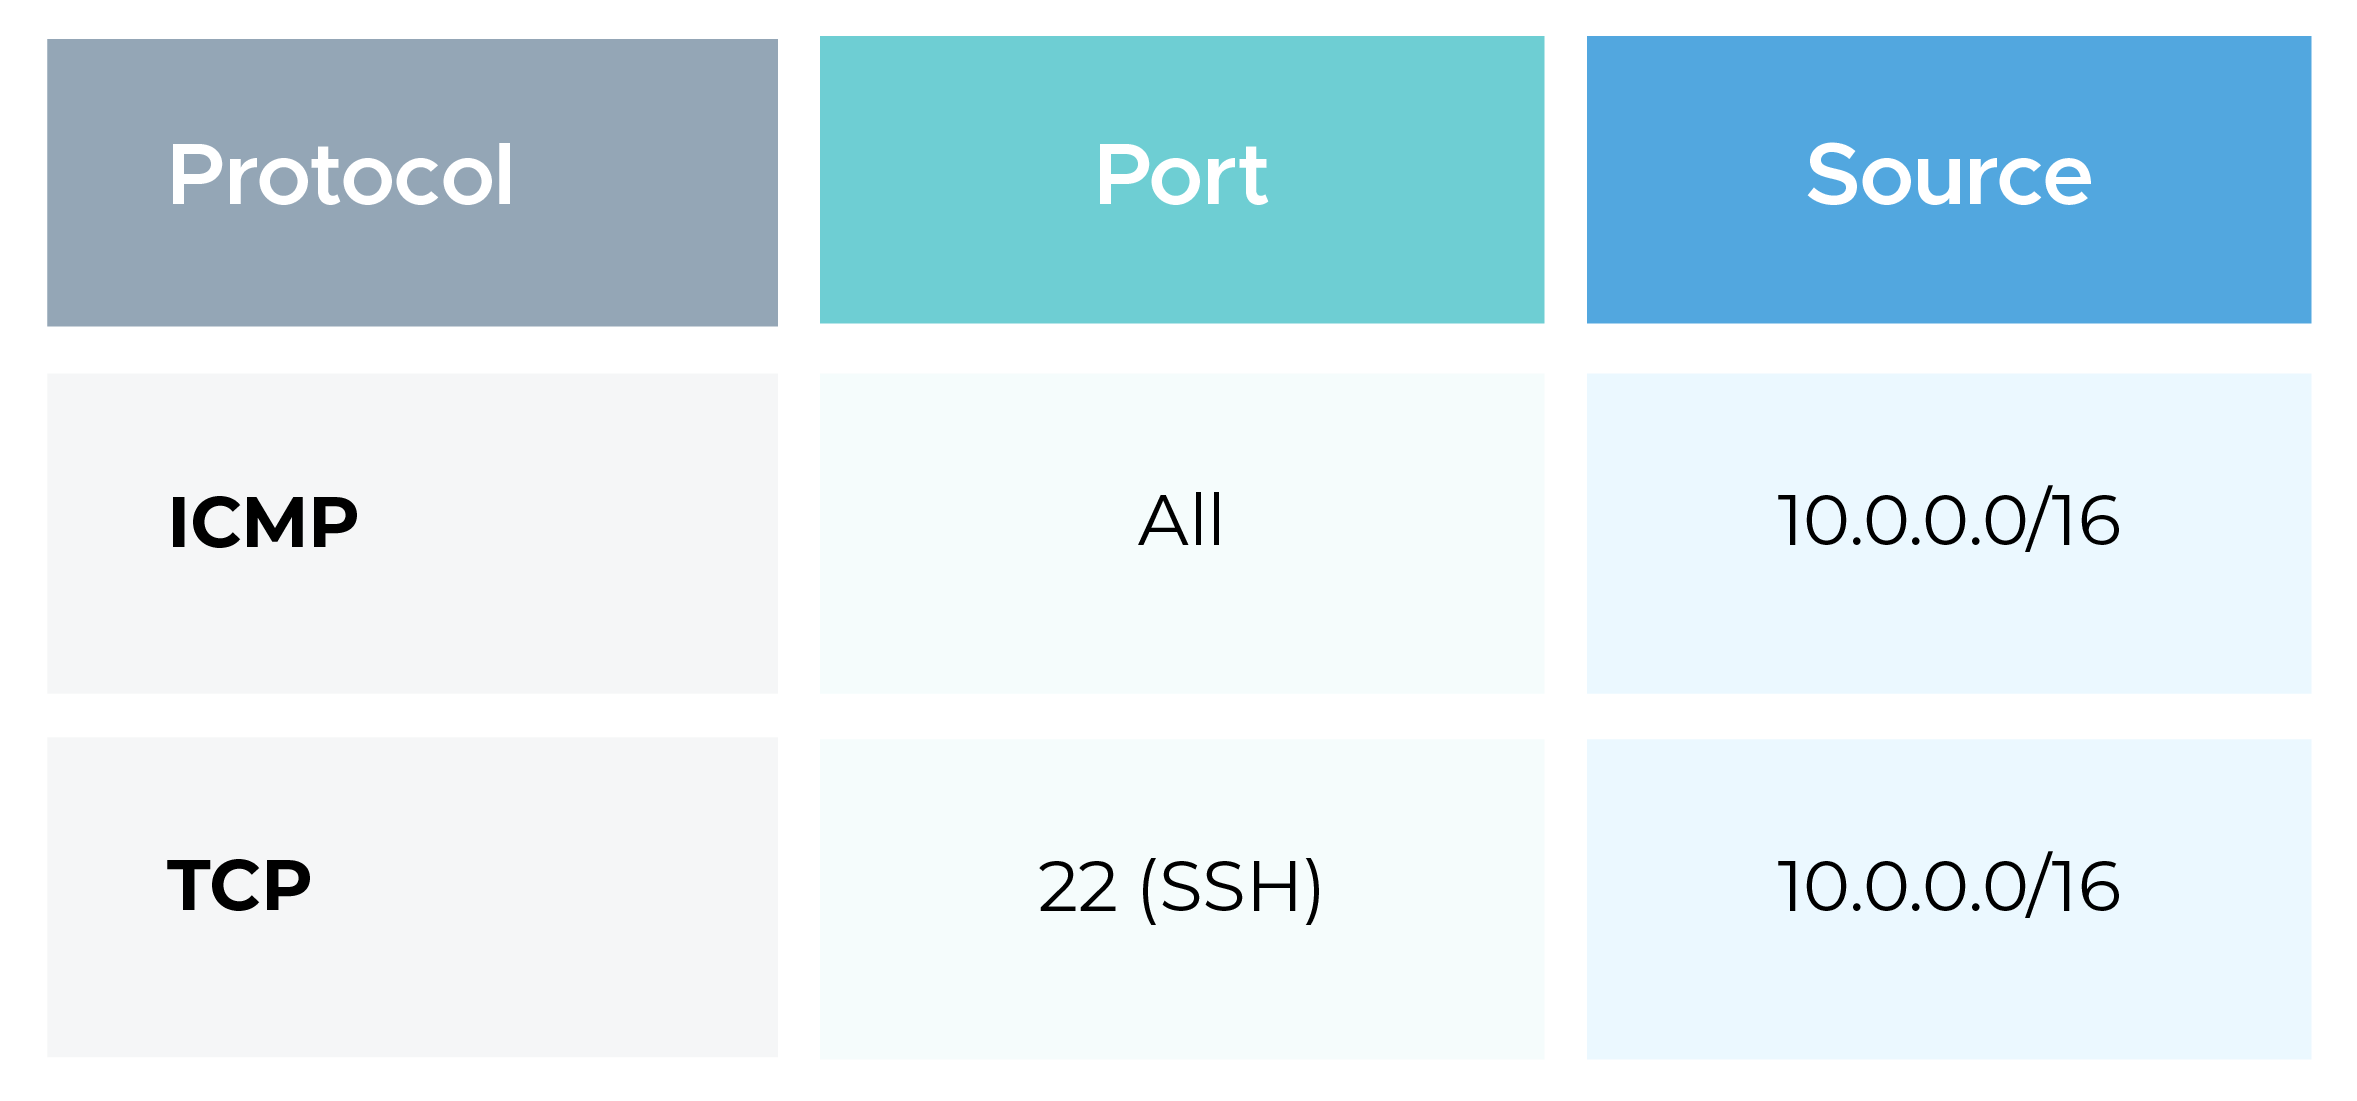
Update the EC2 Security Group attached to the AWS instance.
Inbound Rules:
Outbound Rules:
This allows ping and SSH requests from OCI to AWS.
Update the Security List or NSG associated with the OCI subnet or instance.
Ingress Rules:
Egress Rules:
This allows AWS-originated traffic to reach OCI instances.
Before testing connectivity, double-check routing on both sides.
AWS Route Table
Ensure the subnet route table contains:
OCI Route Table
Ensure the subnet route table contains:
If routes are missing or incorrect, traffic will not traverse the VPN tunnel.
From AWS EC2 → OCI Instance
Login to the AWS EC2 instance and run:
ping 10.20.1.10
Expected result:
From OCI Instance → AWS EC2
Login to the OCI instance and run:
ping 10.0.1.10
If ping works in both directions, it confirms:
An AWS to OCI Site-to-Site VPN using static routing provides a secure and reliable multi-cloud connectivity solution. With correctly aligned tunnel parameters, routing, and security configurations, encrypted communication is established over private IP addresses. Successful validation using private IP ping confirms that the VPN tunnel is operational and traffic is flowing correctly between AWS and OCI with minimal operational overhead.

99% of companies saved up to 15% monthly with this plan & achieved peak performance.

Speak with our advisors to learn how you can take control of your Cloud Cost


