Overview
This guide explains how to configure Single Sign-On (SSO) access to Amazon QuickSight using AWS IAM Identity Center (formerly AWS SSO) via SAML 2.0 federation. Users in a centralized SSO account can authenticate through the IAM Identity Center Access Portal and gain federated access to Amazon QuickSight in a separate AWS account.
Architecture Summary
This setup connects two AWS accounts: (1) the SSO Account housing IAM Identity Center, and (2) the QuickSight Account. IAM Identity Center acts as the SAML Identity Provider, while the QuickSight account trusts the SAML assertions via an IAM Identity Provider and a federated IAM Role.
Prerequisites
Ensure all of the following are in place before starting the configuration.
a) Access & Permissions
- Access to the AWS IAM Identity Center console with permissions to manage applications.
- An active Amazon QuickSight account.
- Administrator access to the AWS account that has the QuickSight subscription.
- Permissions to create IAM Identity Providers and IAM Roles in the QuickSight account.
b) IAM Identity Center Setup
- Enable IAM Identity Center in the SSO account. If it is not yet enabled, navigate to the IAM Identity Center console and enable it before proceeding.
- Users must exist (or be synced from an external directory) in IAM Identity Center before you can assign them to the QuickSight application.
To learn more about IAM security best practices, click here.
High-Level Architecture

Step-by-Step Configuration
Step 1: Create Amazon QuickSight Application in IAM Identity Center (SSO Account)
Log in to the SSO account, then go to IAM Identity Center. If IAM Identity Center isn't enabled, enable it first.
- In the IAM Identity Center console, go to Applications in the left navigation pane.
- Click Add application.
- Select "I want to select an application from the catalog" and search for QuickSight.
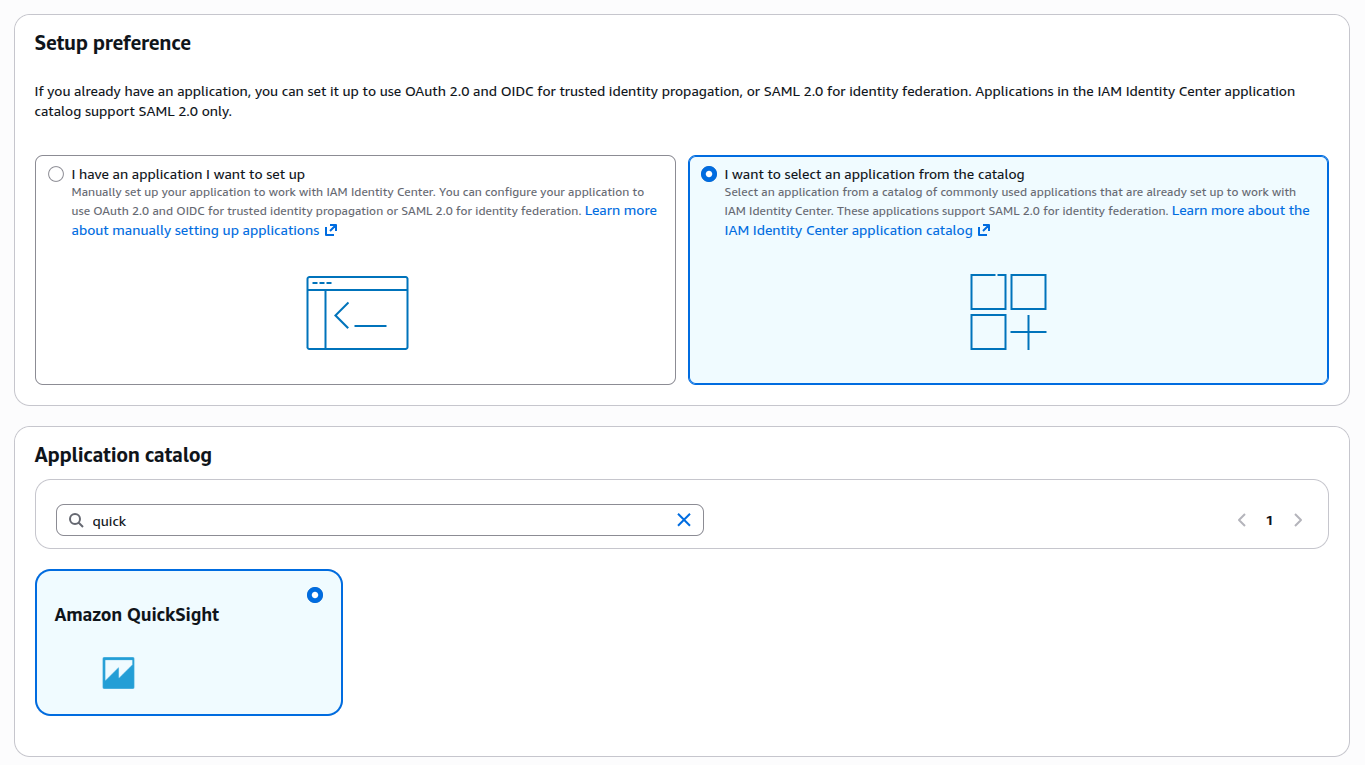
- Select Amazon QuickSight from the search results and click Next.
- In the Configure section, provide a unique Display Name for the application. Optionally add a Description.
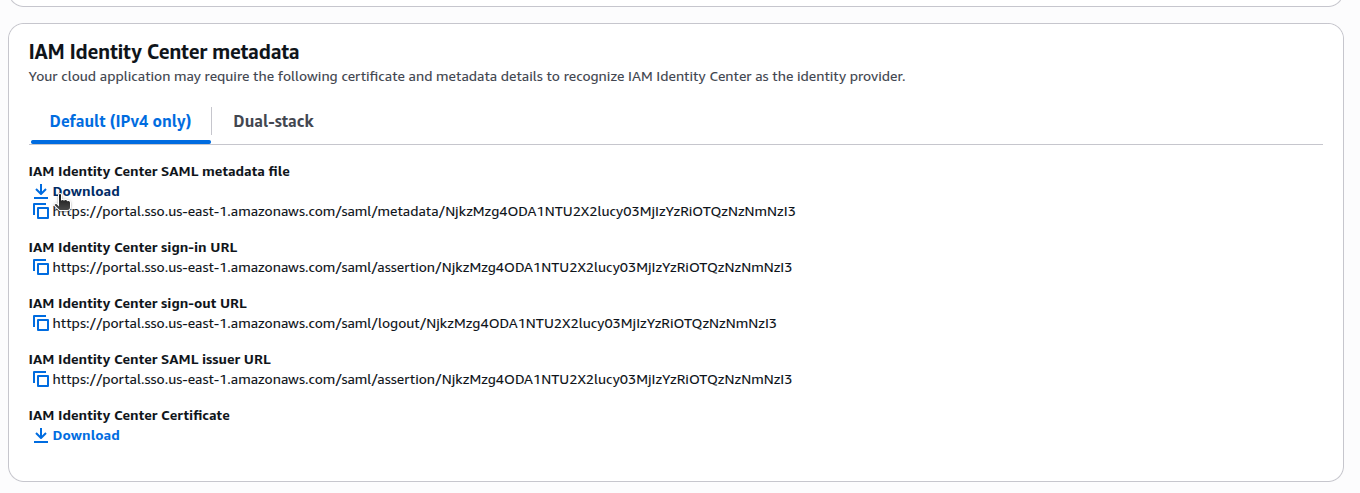
- Under IAM Identity Center metadata, click Download to save the IAM Identity Center SAML metadata file. You will upload this file in the Amazon QuickSight (IAM) account later.
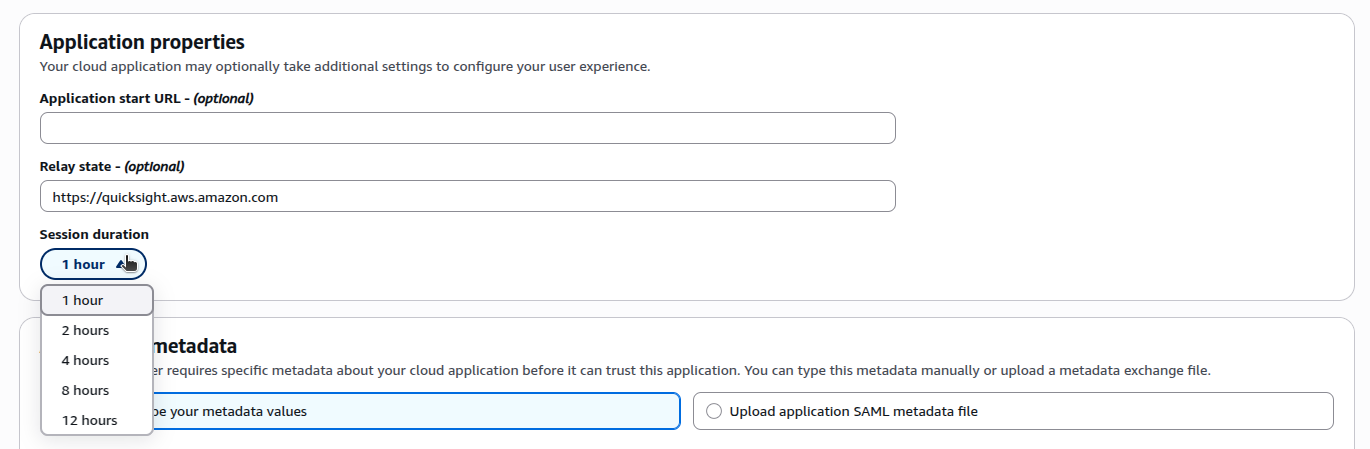
- Under Session duration, set the desired SSO session length.
- Set Relay state to: https://quicksight.aws.amazon.com
- Under Application metadata, choose "If you don't have a metadata file, you can manually type your metadata values" and enter:
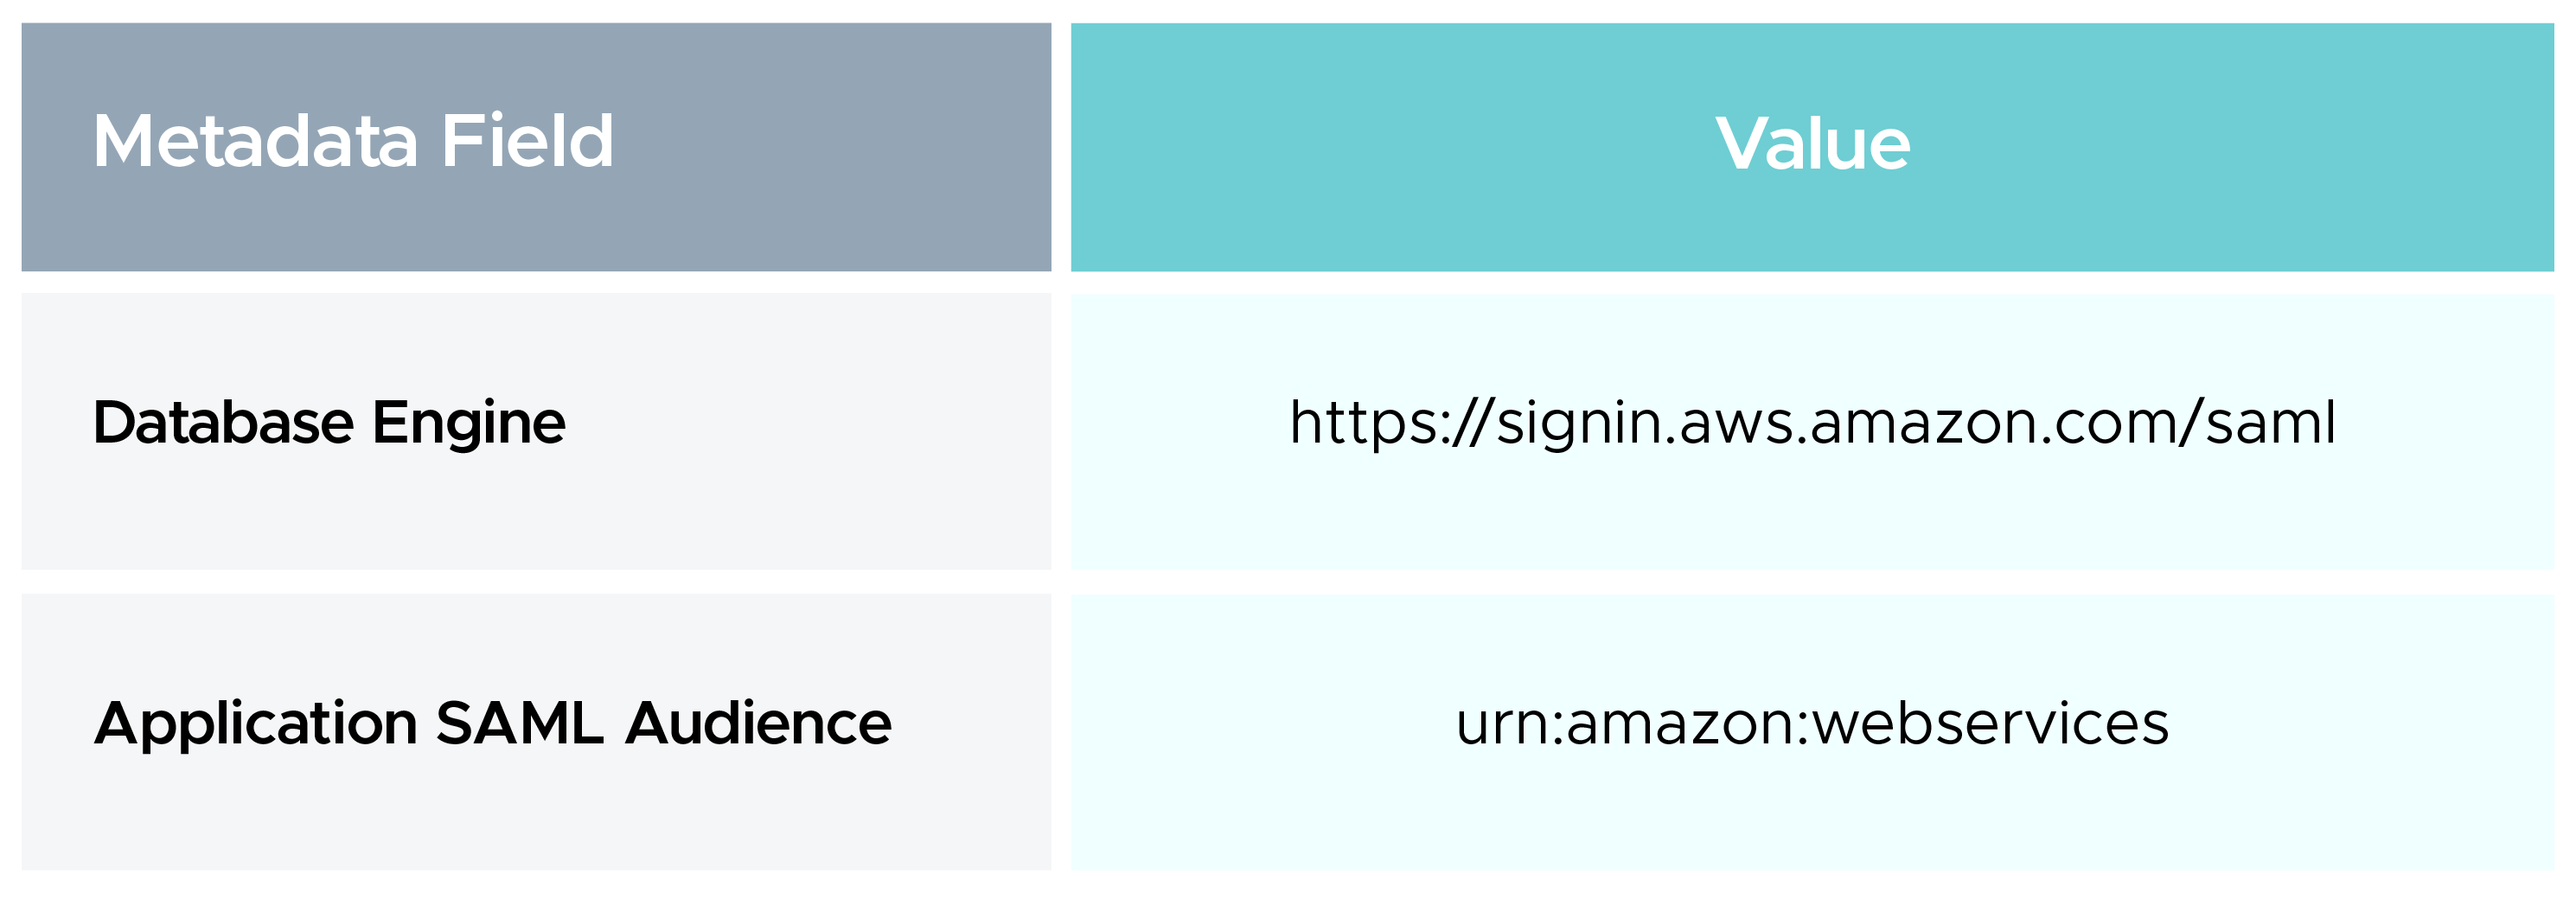
- Click Save changes.
Step 2: Create IAM Identity Provider in the QuickSight Account
Switch to the AWS account where QuickSight is configured.
- Go to IAM → Identity providers → Add provider.
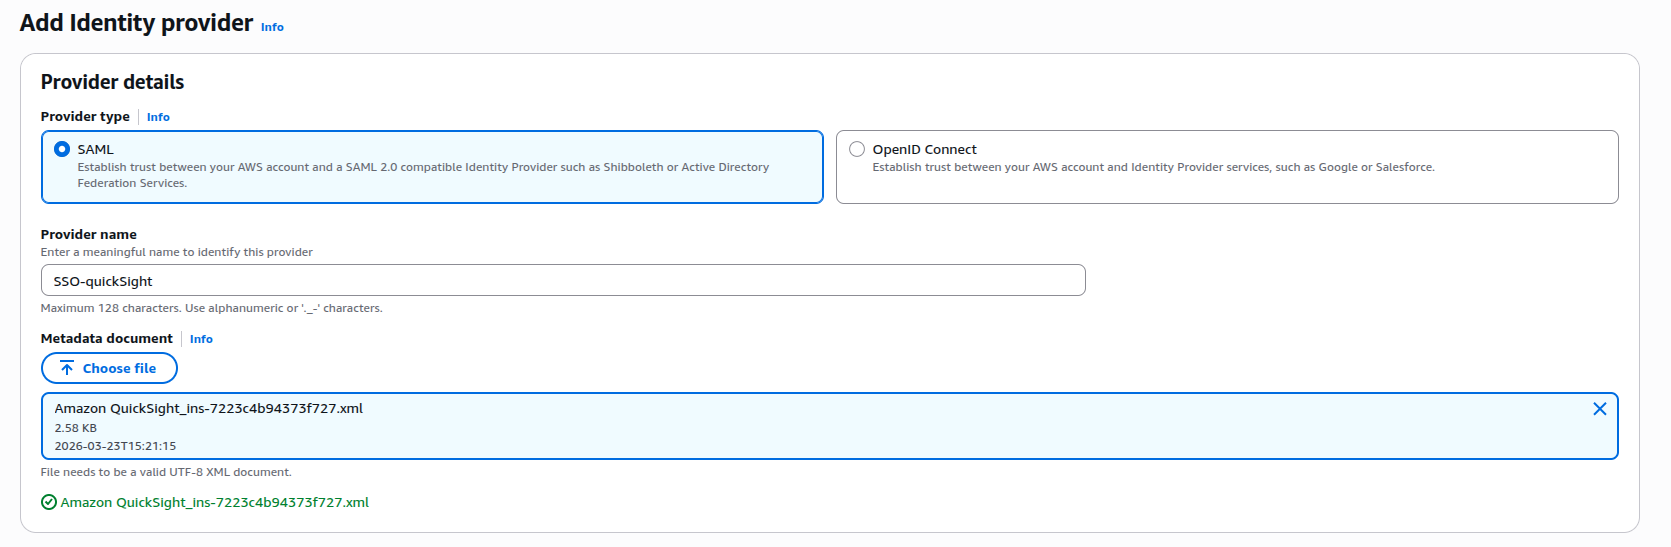
- Select SAML as the provider type.
- Enter a unique Provider name (e.g., QuickSightSSO).
- Under Metadata document, upload the SAML metadata file downloaded from IAM Identity Center in Step 1.
- Click Add provider.
- Note the ARN of the newly created Identity Provider — you will need it in the Trust Policy and Attribute Mapping steps.
Step 3: Create IAM Role for SAML 2.0 Federation
Still in the QuickSight account, create an IAM role that establishes trust with the IAM Identity Provider.
- Go to IAM → Roles → Create role.
- Under Trusted entity type, select SAML 2.0 federation.
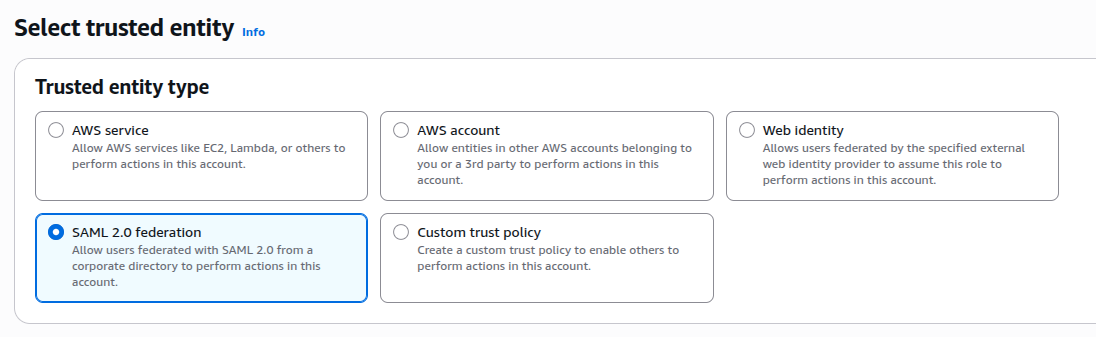
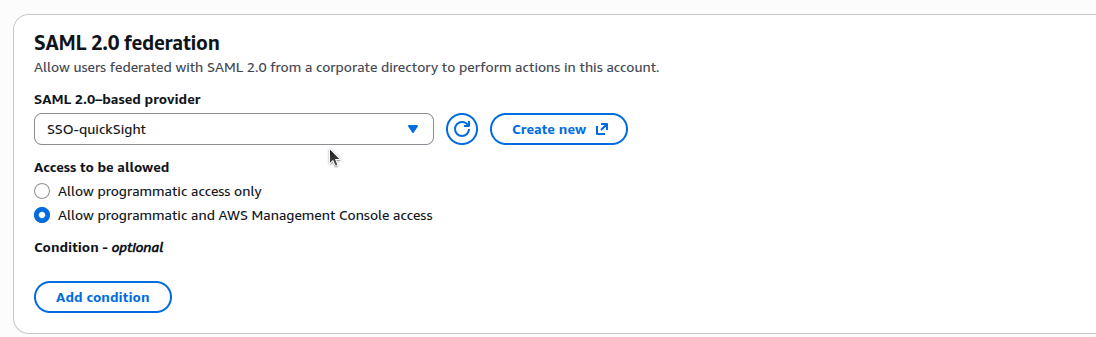
- In the SAML provider drop-down, select the Identity Provider you created in Step 2.
- Select Allow programmatic and AWS Management Console access.
- Verify the Condition shows SAML:aud = https://signin.aws.amazon.com/saml, then click Next.
- Skip attaching managed policies for now (add the inline policy after creating the role). Click Next, name the role, and click Create role.
Step 4: Attach Inline Policy to the IAM Role
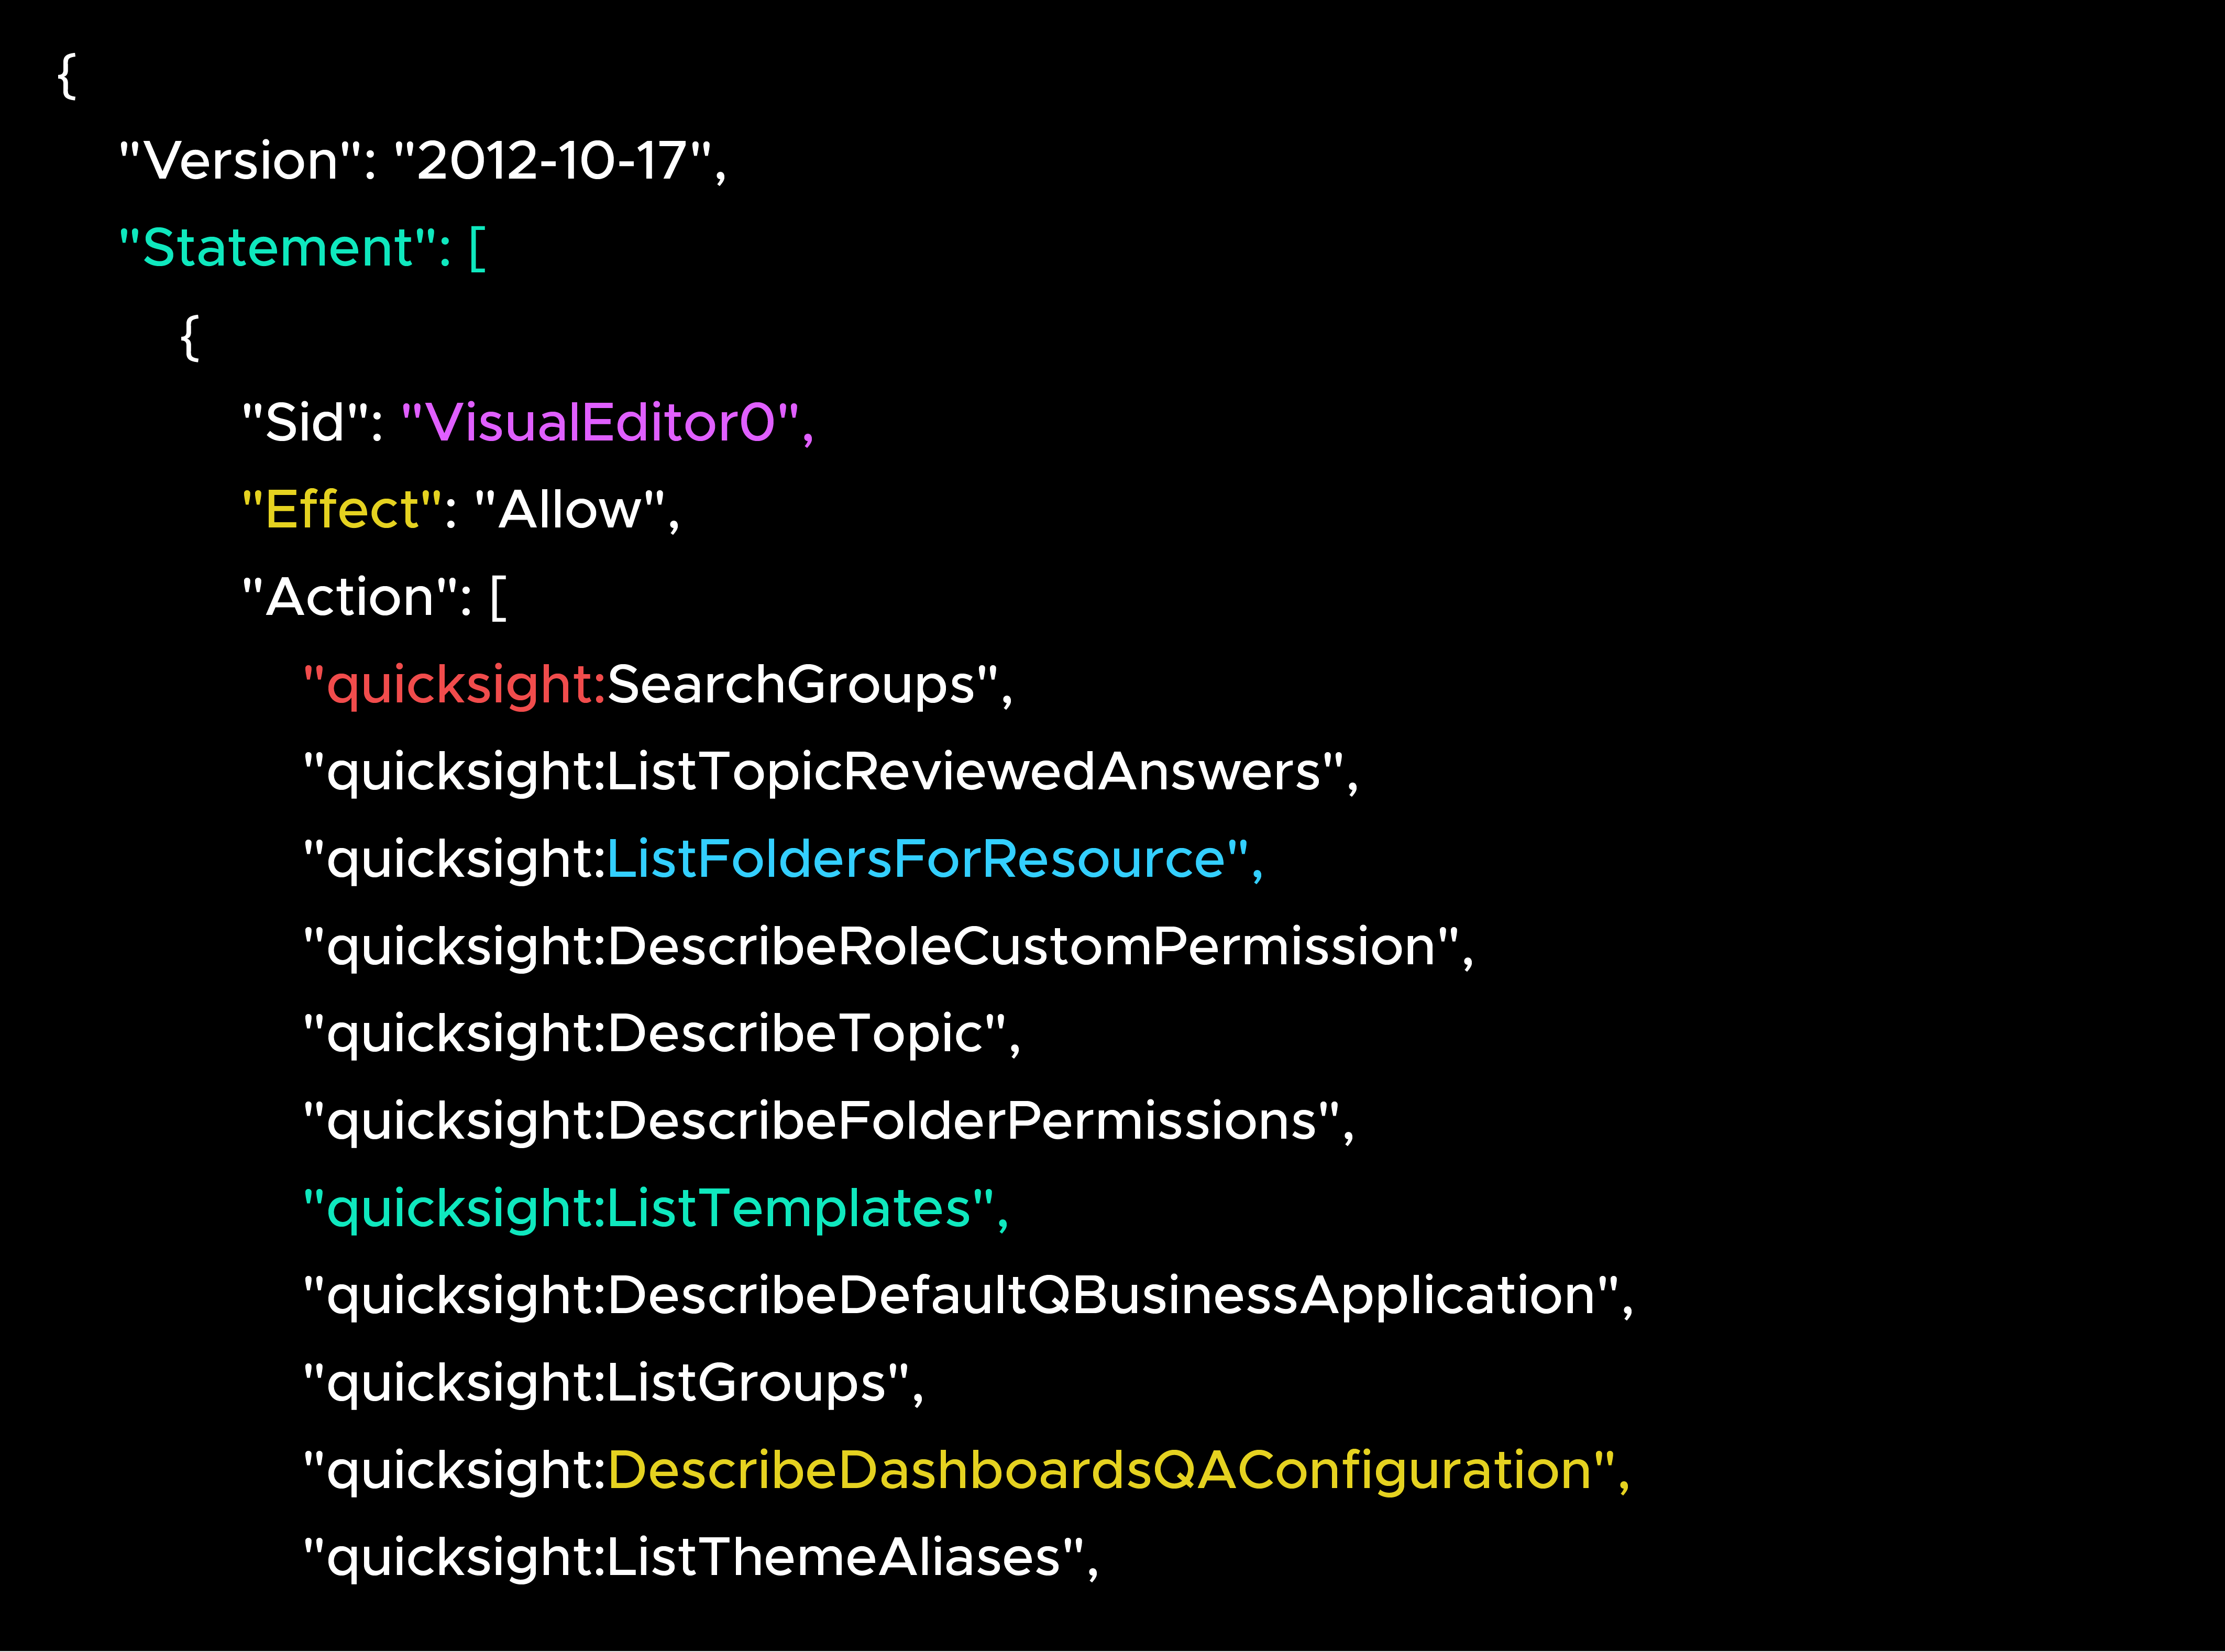
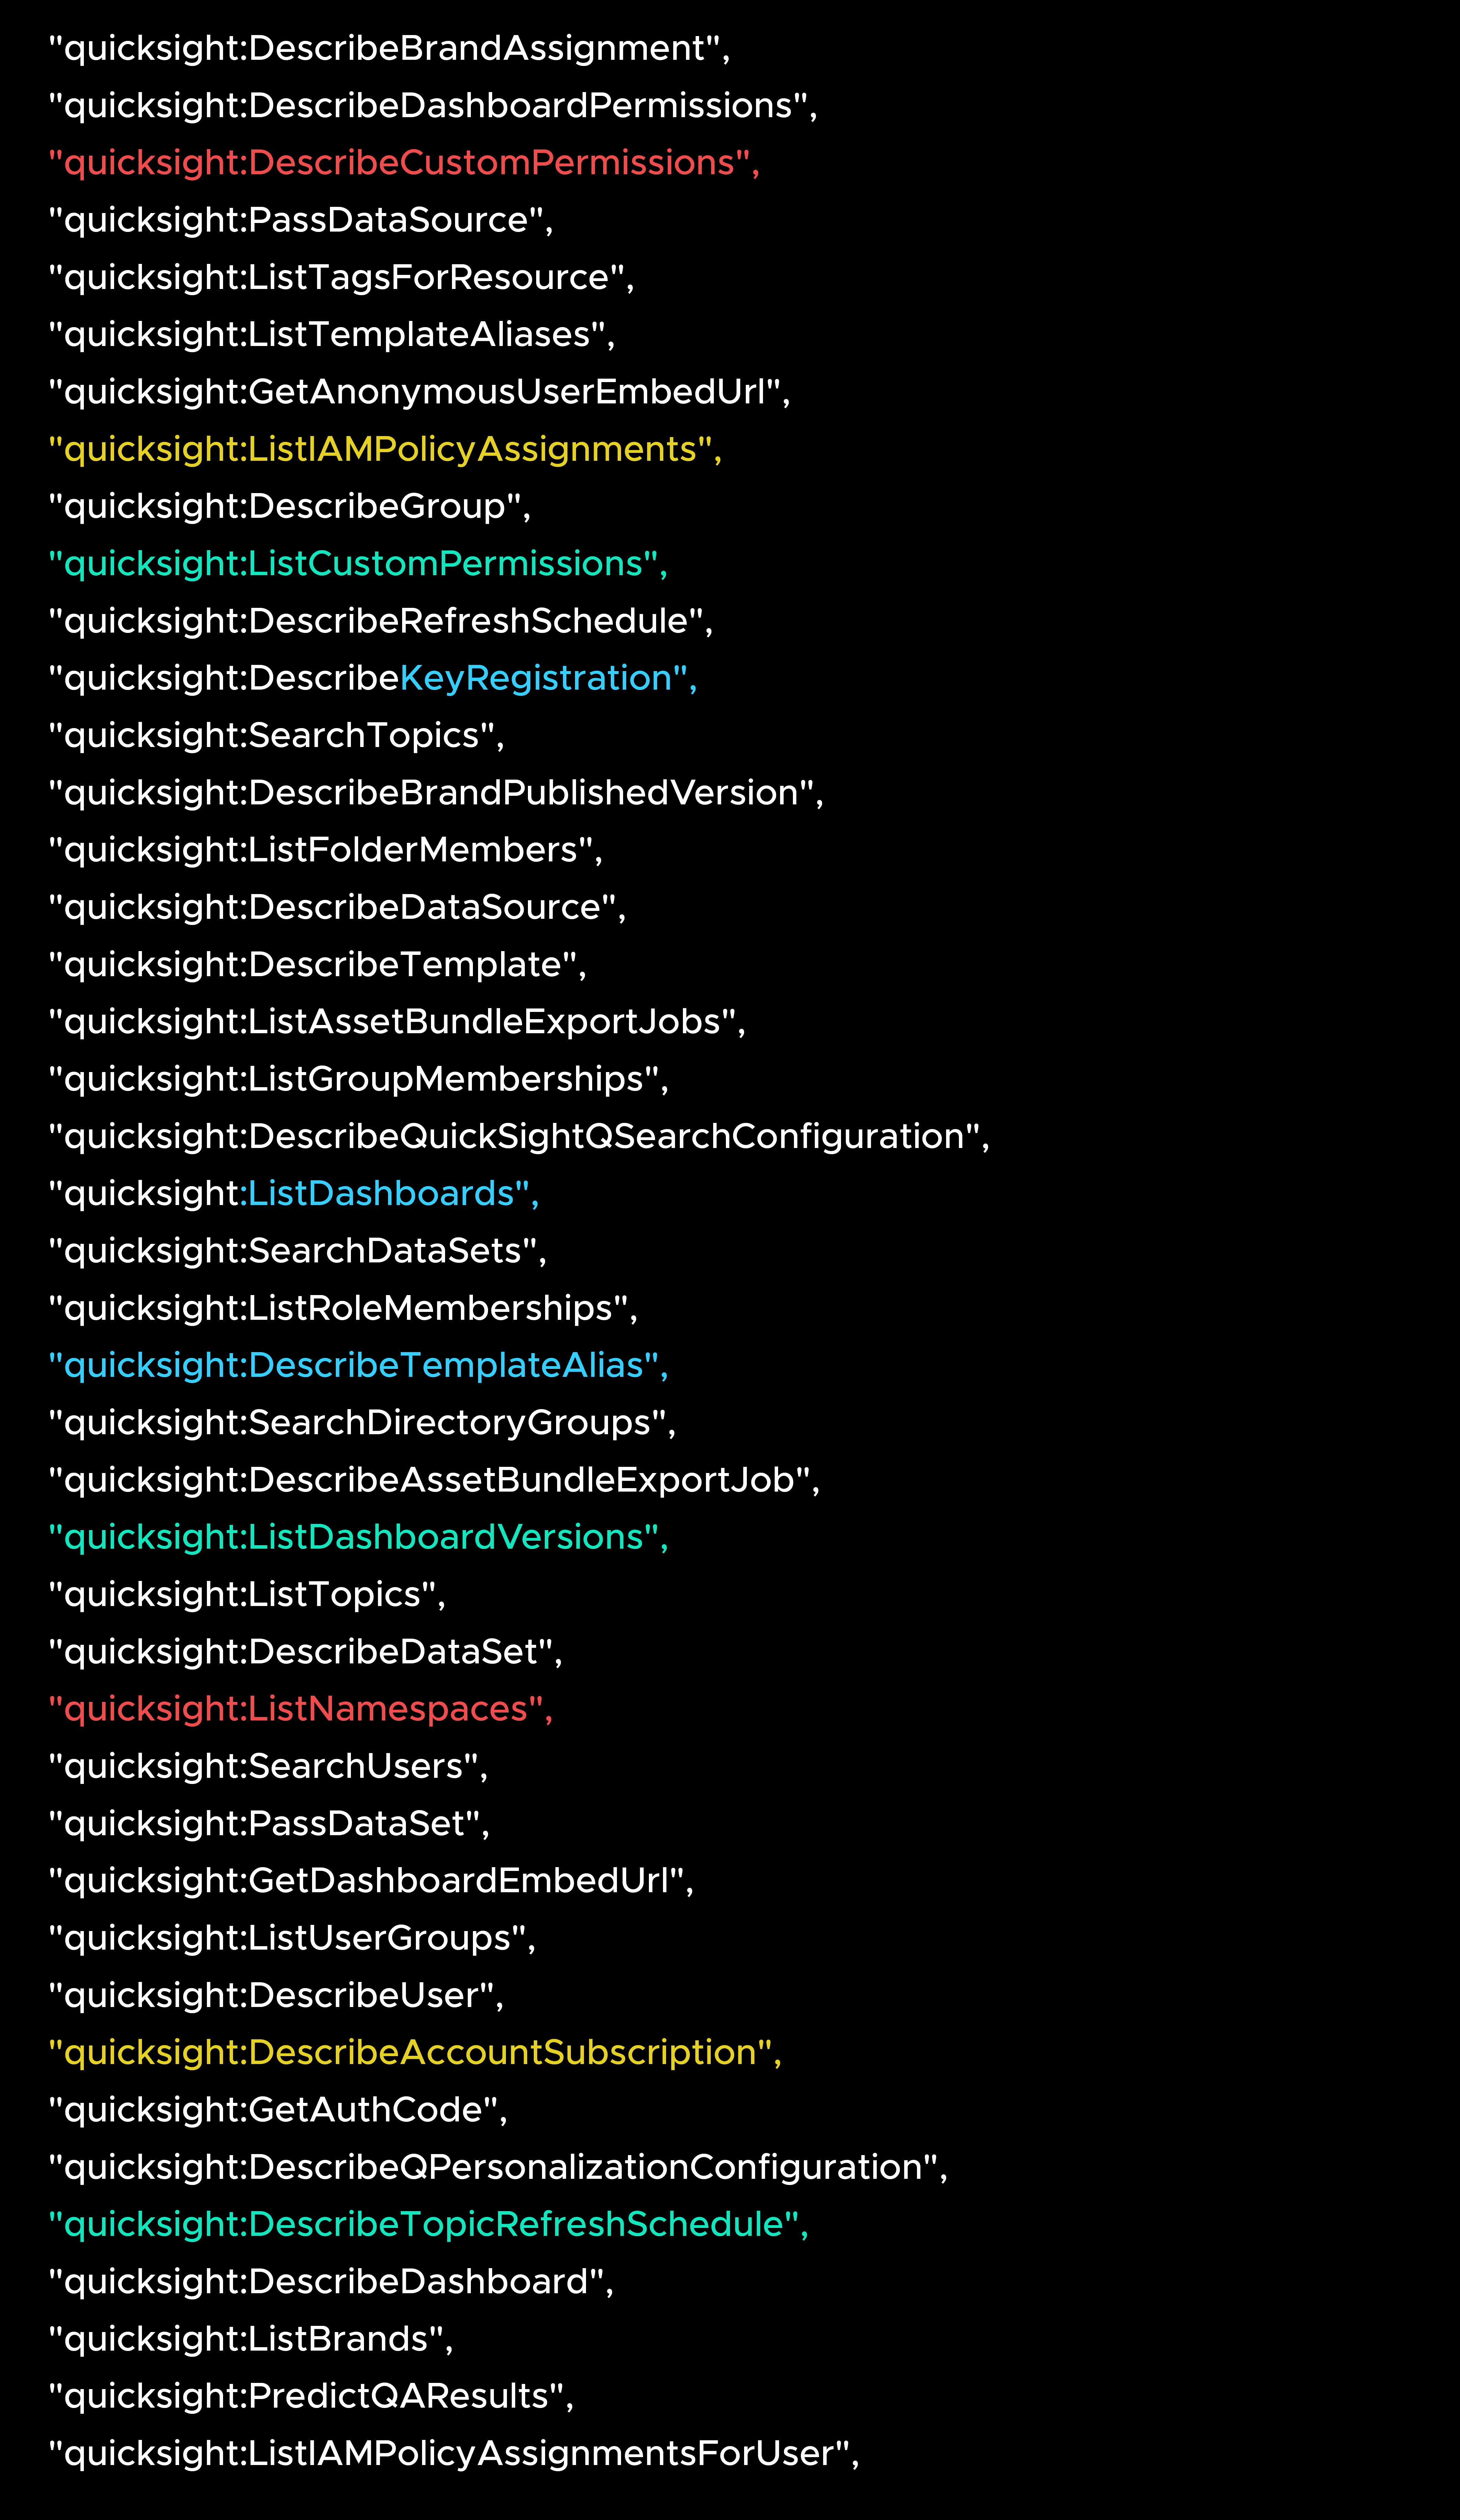
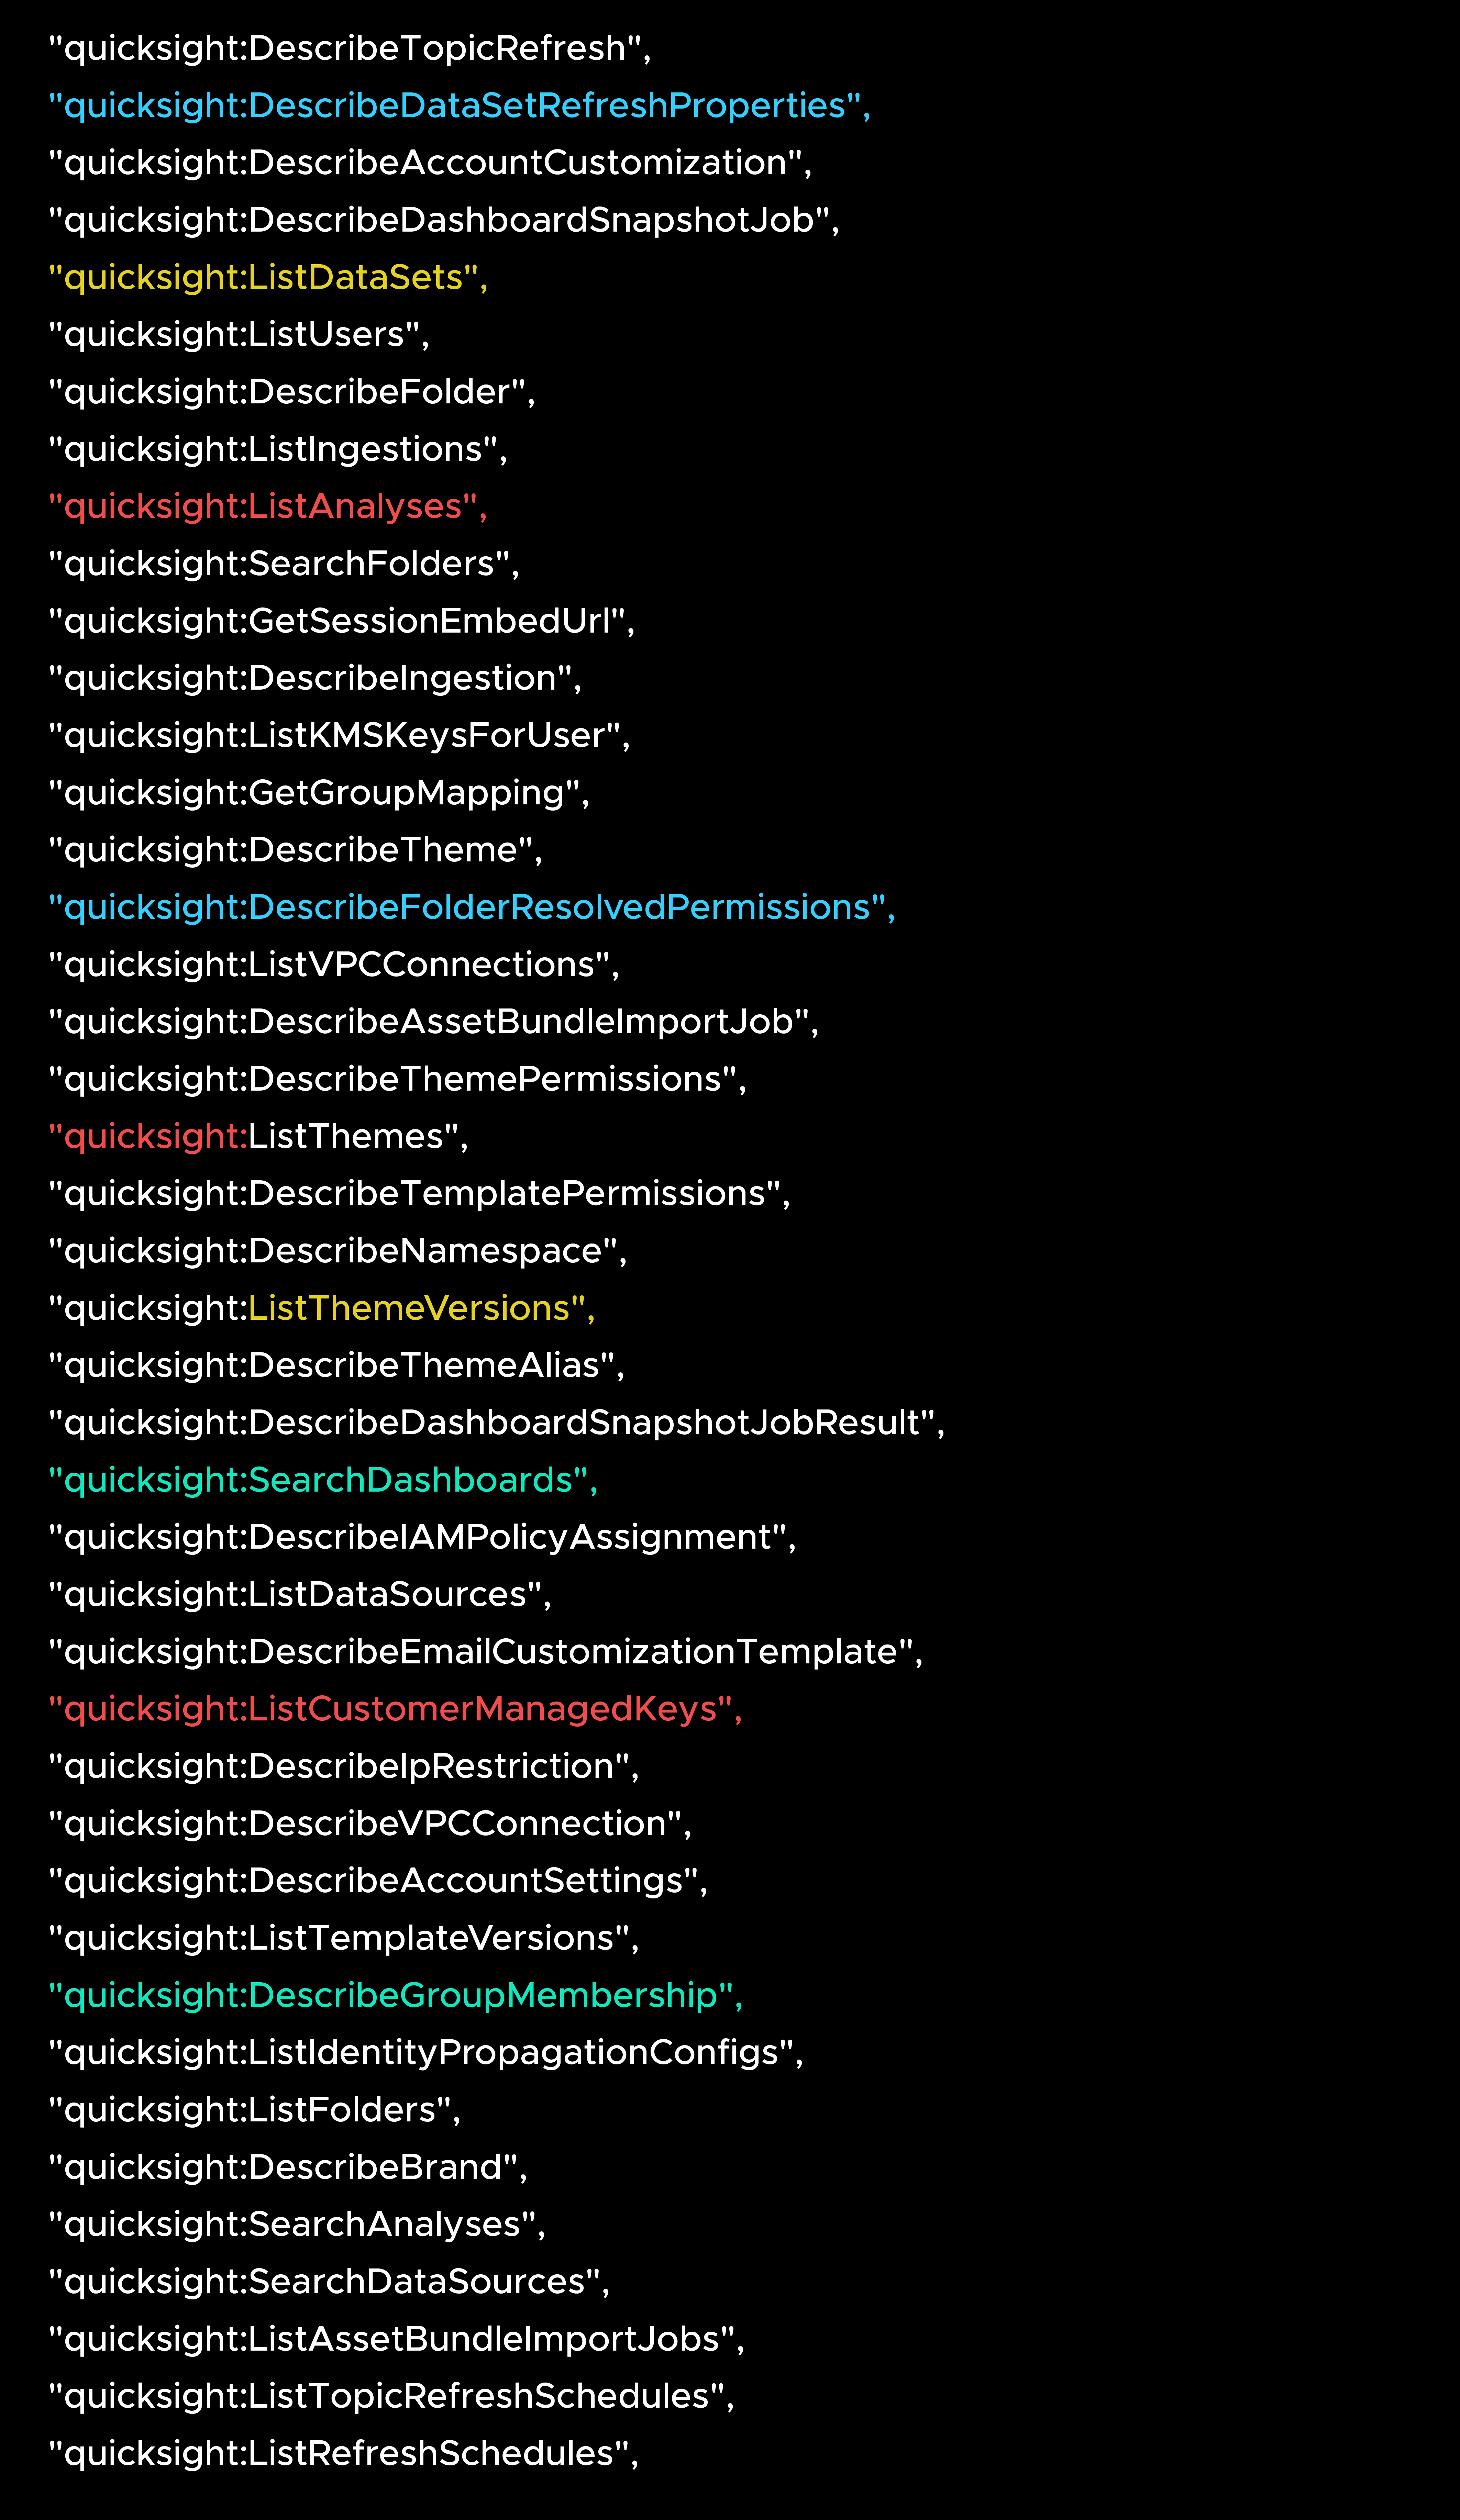
After creating the role, attach an inline policy that grants federated users QuickSight access. The policy below is the full permissions set referenced in the original document.
Minimal policy (AWS recommended):

Step 5: Update Trust Relationship on the IAM Role
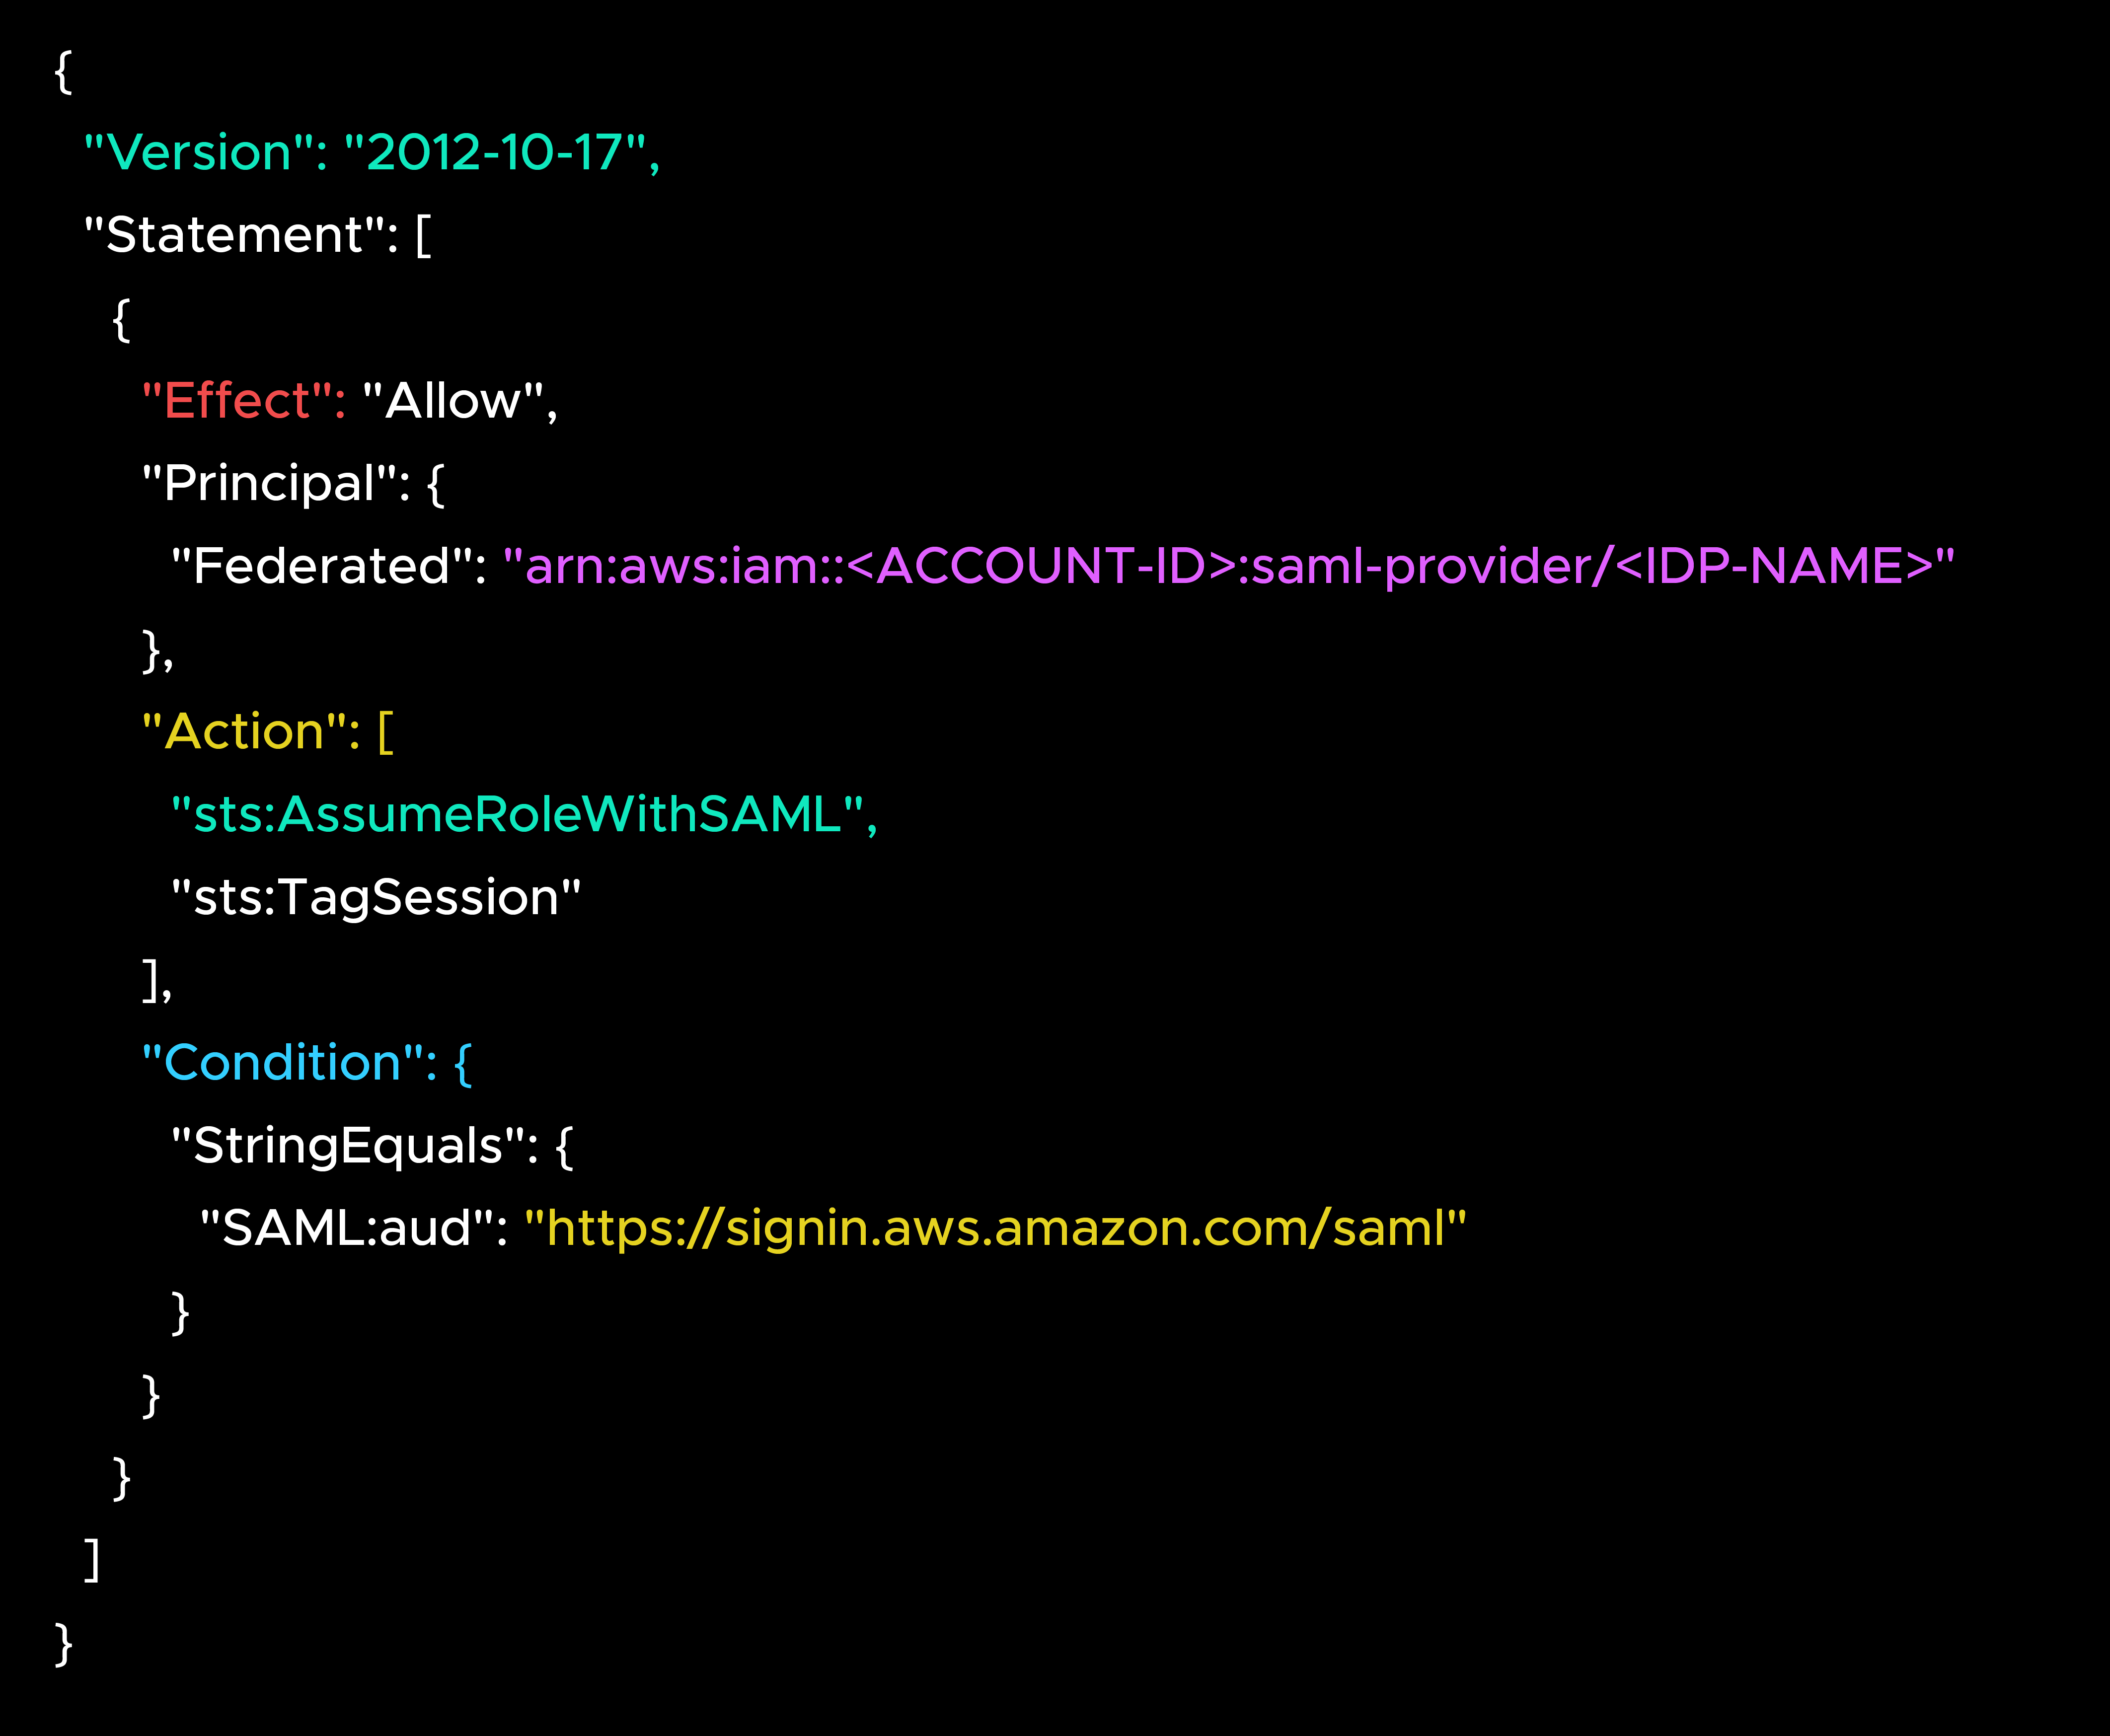
Update the role's trust policy to allow STS federation from the IAM Identity Provider.
Step 6: Configure QuickSight SSO Settings
Log in to the QuickSight account as an Amazon QuickSight Administrator and navigate to the QuickSight console.
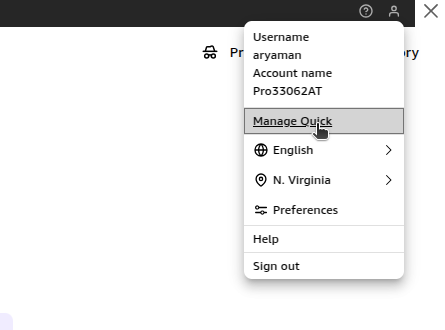
- From the top-right user menu, select Manage QuickSight.
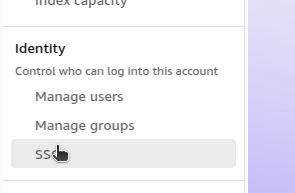
- In the left navigation, select Single sign-on (SSO) under Identity.
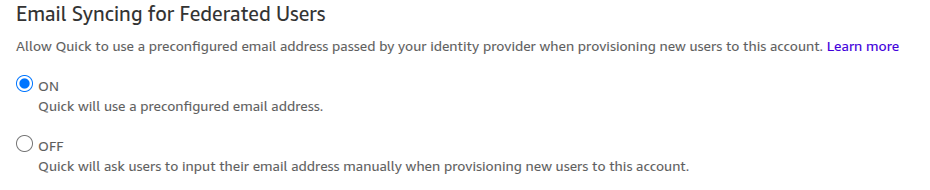
- Enable Email Syncing for Federated Users. When enabled, AWS QuickSight uses the email address from the enterprise IdP instead of asking the user to provide it.
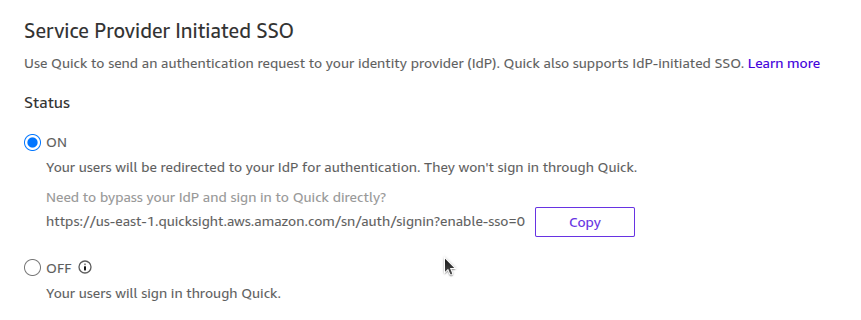
To enable Service Provider (SP) Initiated SSO:
- Still in the SSO settings page, locate the Service Provider Initiated SSO section.
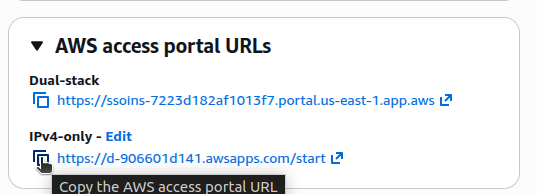
- In the IdP URL field, enter the AWS access portal URL from IAM Identity Center. To find this URL, go to the SSO account → IAM Identity Center → Dashboard → copy the AWS access portal URL.
- In the IdP redirect URL parameter field, enter the relay state parameter name your IdP uses (e.g., RelayState).
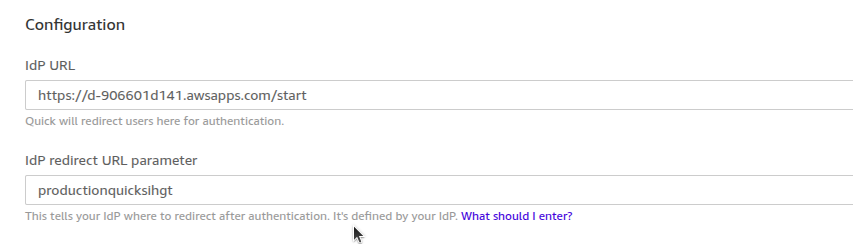
- Click Save, then enable Service Provider Initiated SSO.
Step 7: Configure Attribute Mapping in IAM Identity Center
Switch back to the SSO account. In IAM Identity Center, open the QuickSight application you created in Step 1.
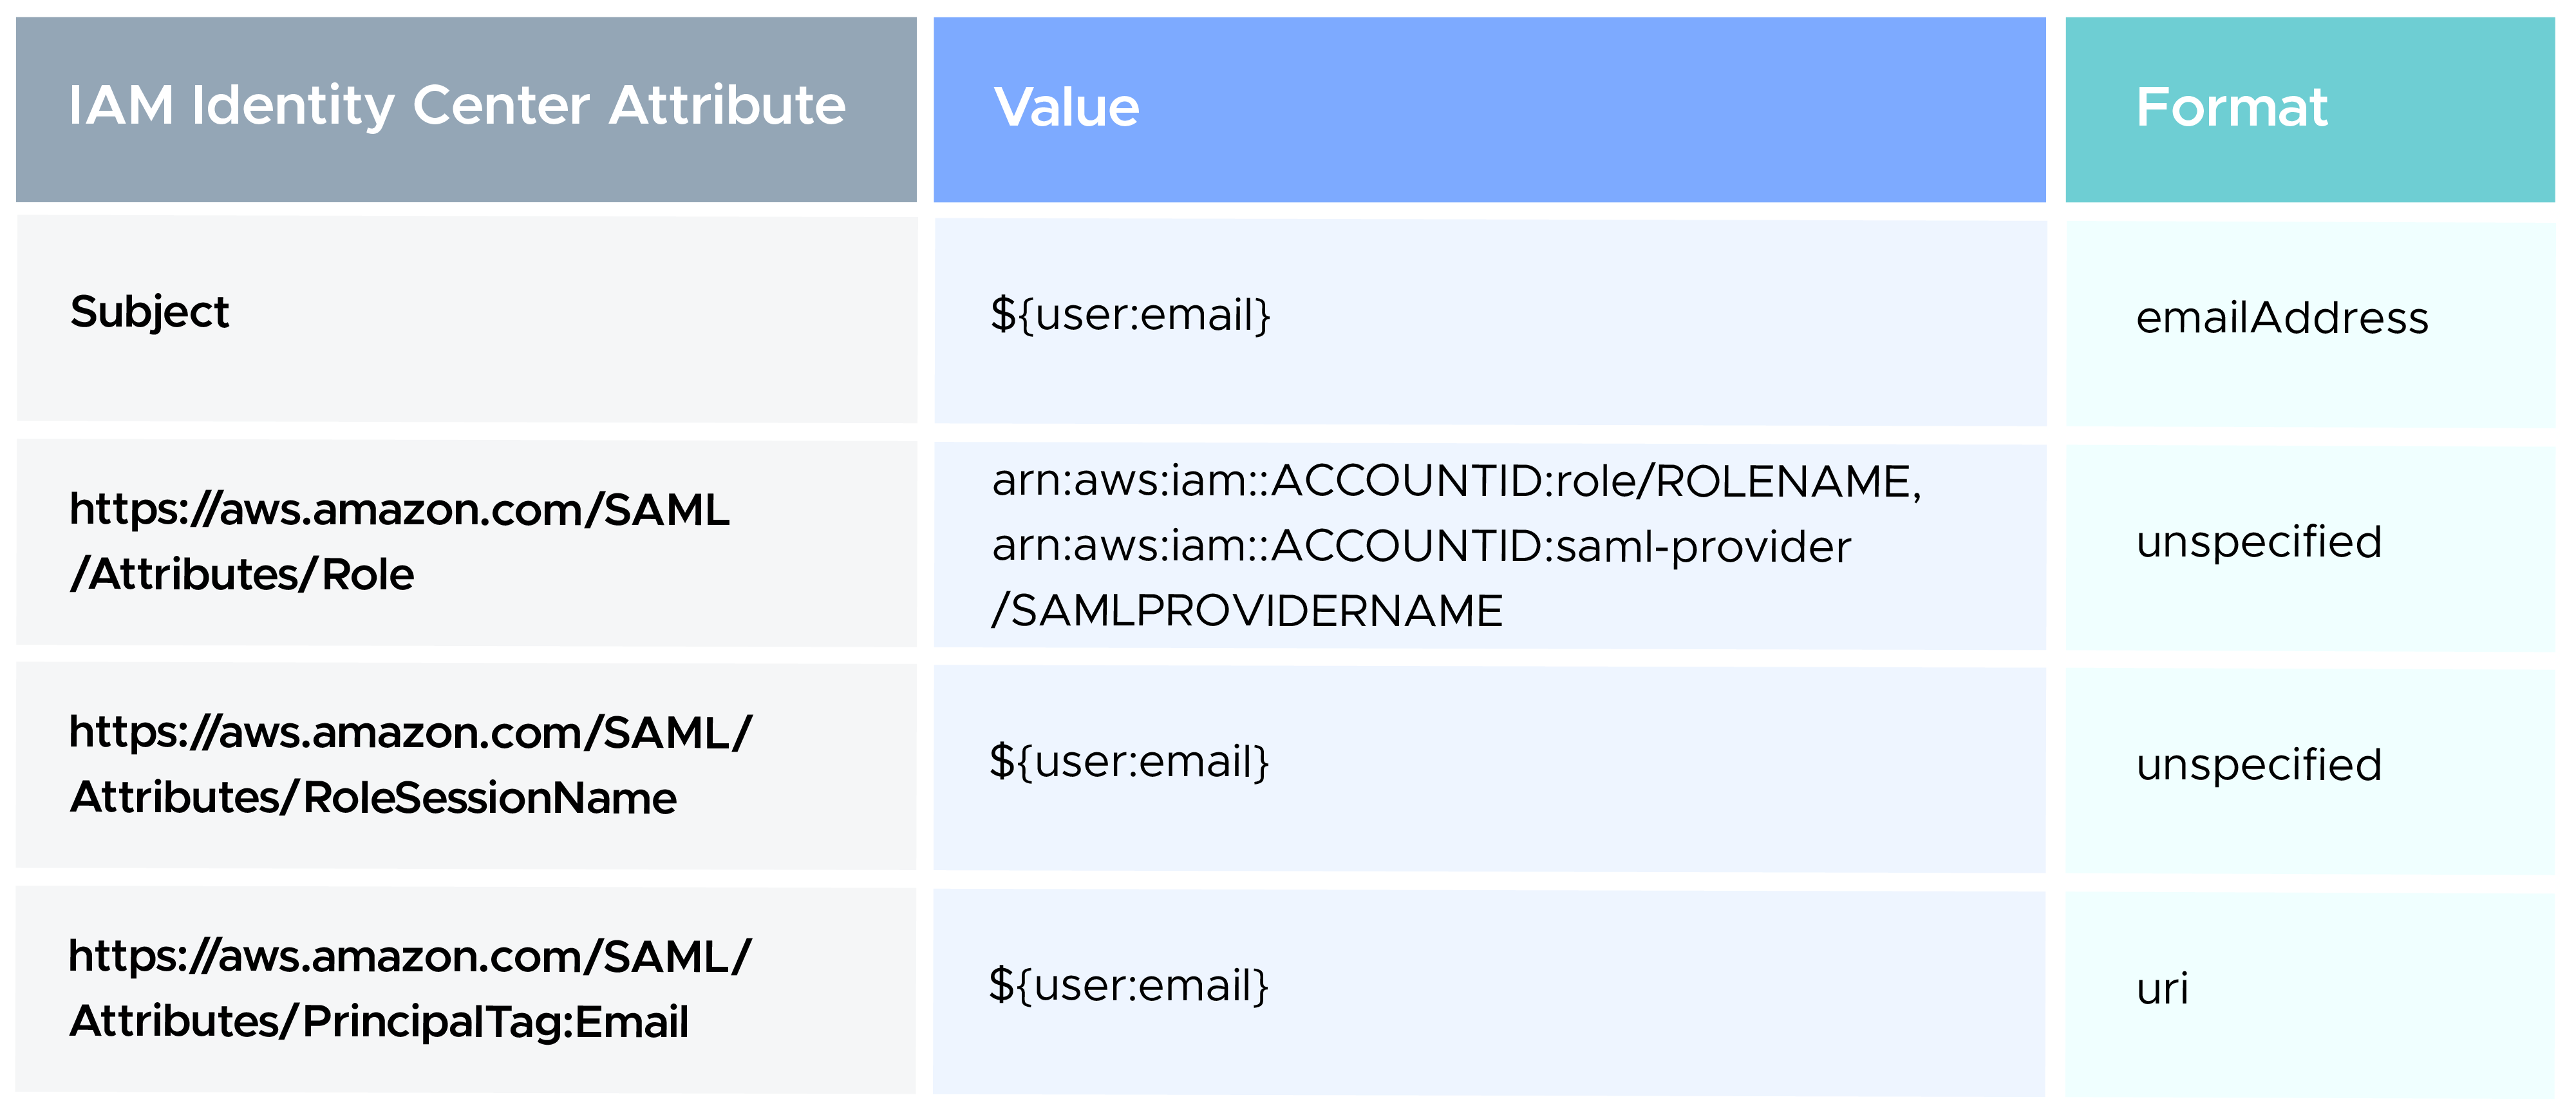
- Go to the Attribute mappings tab.

- Click Add a new attribute mapping.
- Add the following attribute mappings:
Step 8: Assign Users to the Application
- In IAM Identity Center, go to Applications and select your QuickSight application.
- Go to the Assigned users and groups tab.
- Click Assign users and groups and select the users or groups that should have access to QuickSight.
Emergency Bypass URL
QuickSight provides a bypass URL that lets administrators log in using direct IAM credentials if SSO is misconfigured and standard login isn't possible.
Testing the Integration
After completing all configuration steps, verify the SSO integration as follows.
IdP-Initiated Login Test (Primary Method)
- Log out of all AWS sessions.
- Navigate to the IAM Identity Center Access Portal URL.
- Log in with a user assigned to the QuickSight application.
- In the Applications list, click Amazon QuickSight.
- Confirm that you are redirected to and signed in to the QuickSight console.
- Verify the user appears in QuickSight → Manage QuickSight → Manage users, with the Reader role.




 Webinar