


DevOps Engineer
Vikas specializes in AWS cloud infrastructure, DevOps engineering, and automation, with a focus on building reliable, scalable, and secure cloud environments.


Find your cloud savings in under 5 minutes

Get a $100 reward on signup


This blog shows how users can sign in to AWS through JumpCloud, without creating a separate IAM user for every employee.
You will also learn how one JumpCloud application can give access to many AWS IAM roles. After login, the user simply picks the role they need.
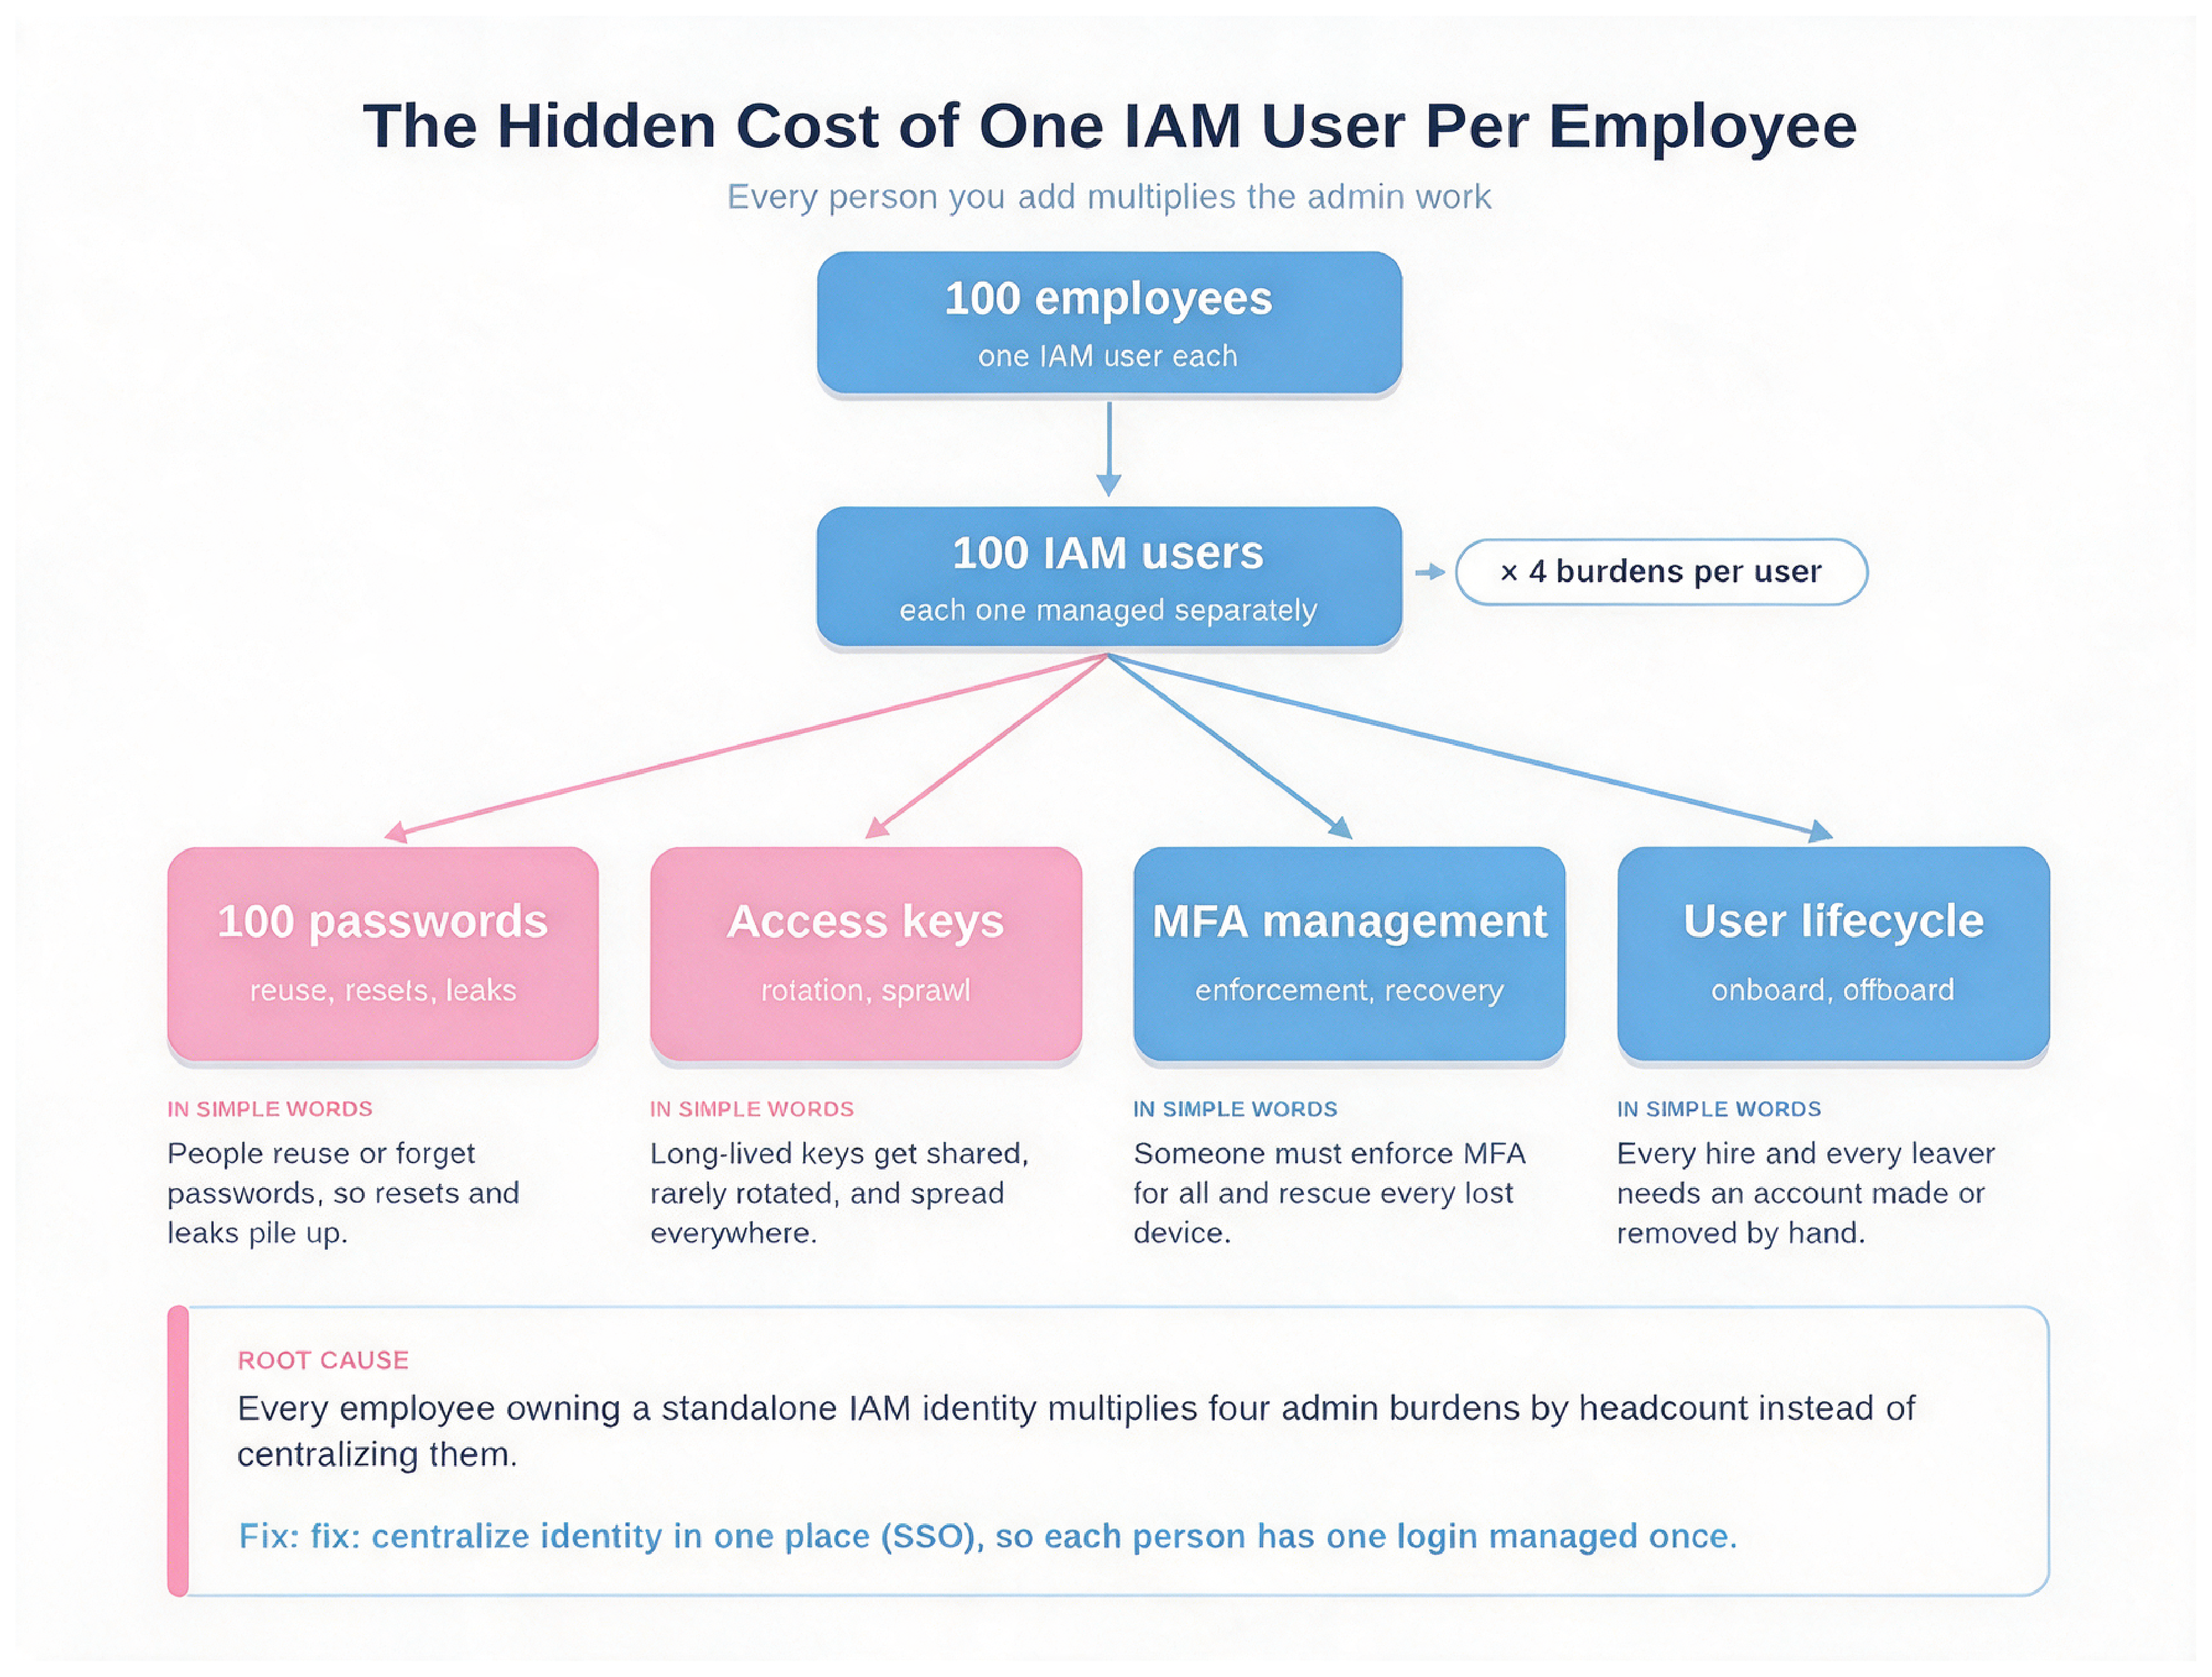
Traditionally, people use IAM users with a password and access keys. This is hard to manage when a company has many employees. With SSO, JumpCloud keeps the users, and AWS gives short-lived access only when needed.
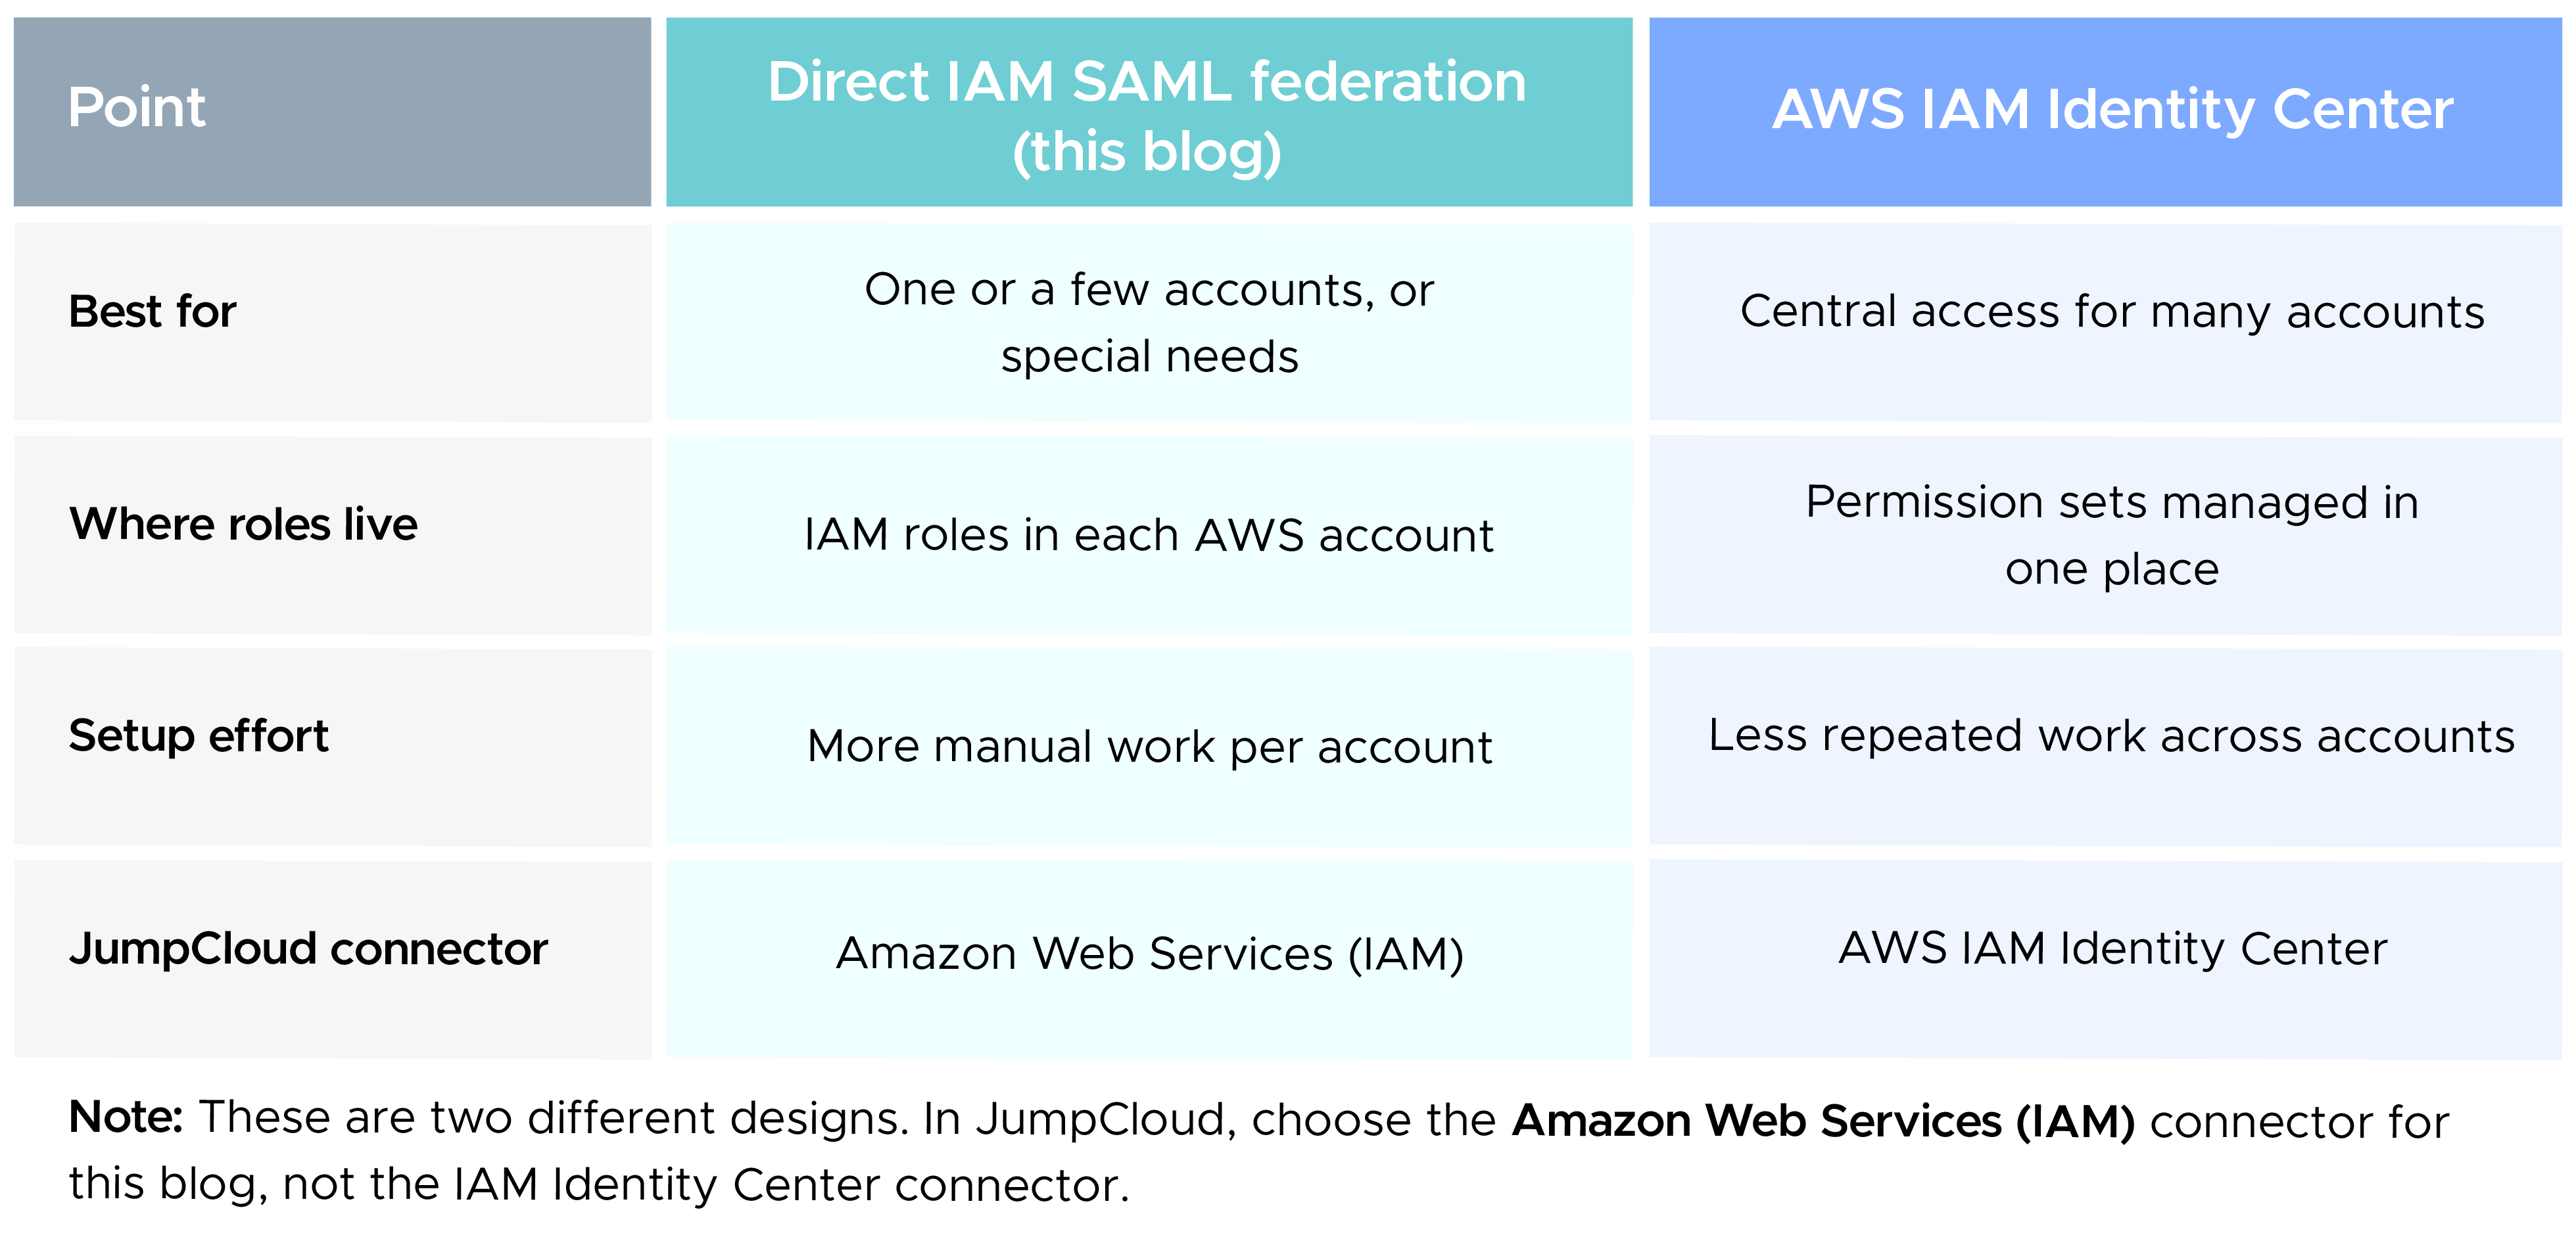
This blog uses direct SAML 2.0 federation between JumpCloud and AWS IAM. It works well when you need SAML sign-in to a specific AWS account, or when you want full control of the IAM roles and trust policies.
If you need one central place to manage workforce access across many AWS accounts, AWS recommends AWS IAM Identity Center. Please compare both options before you choose your design.
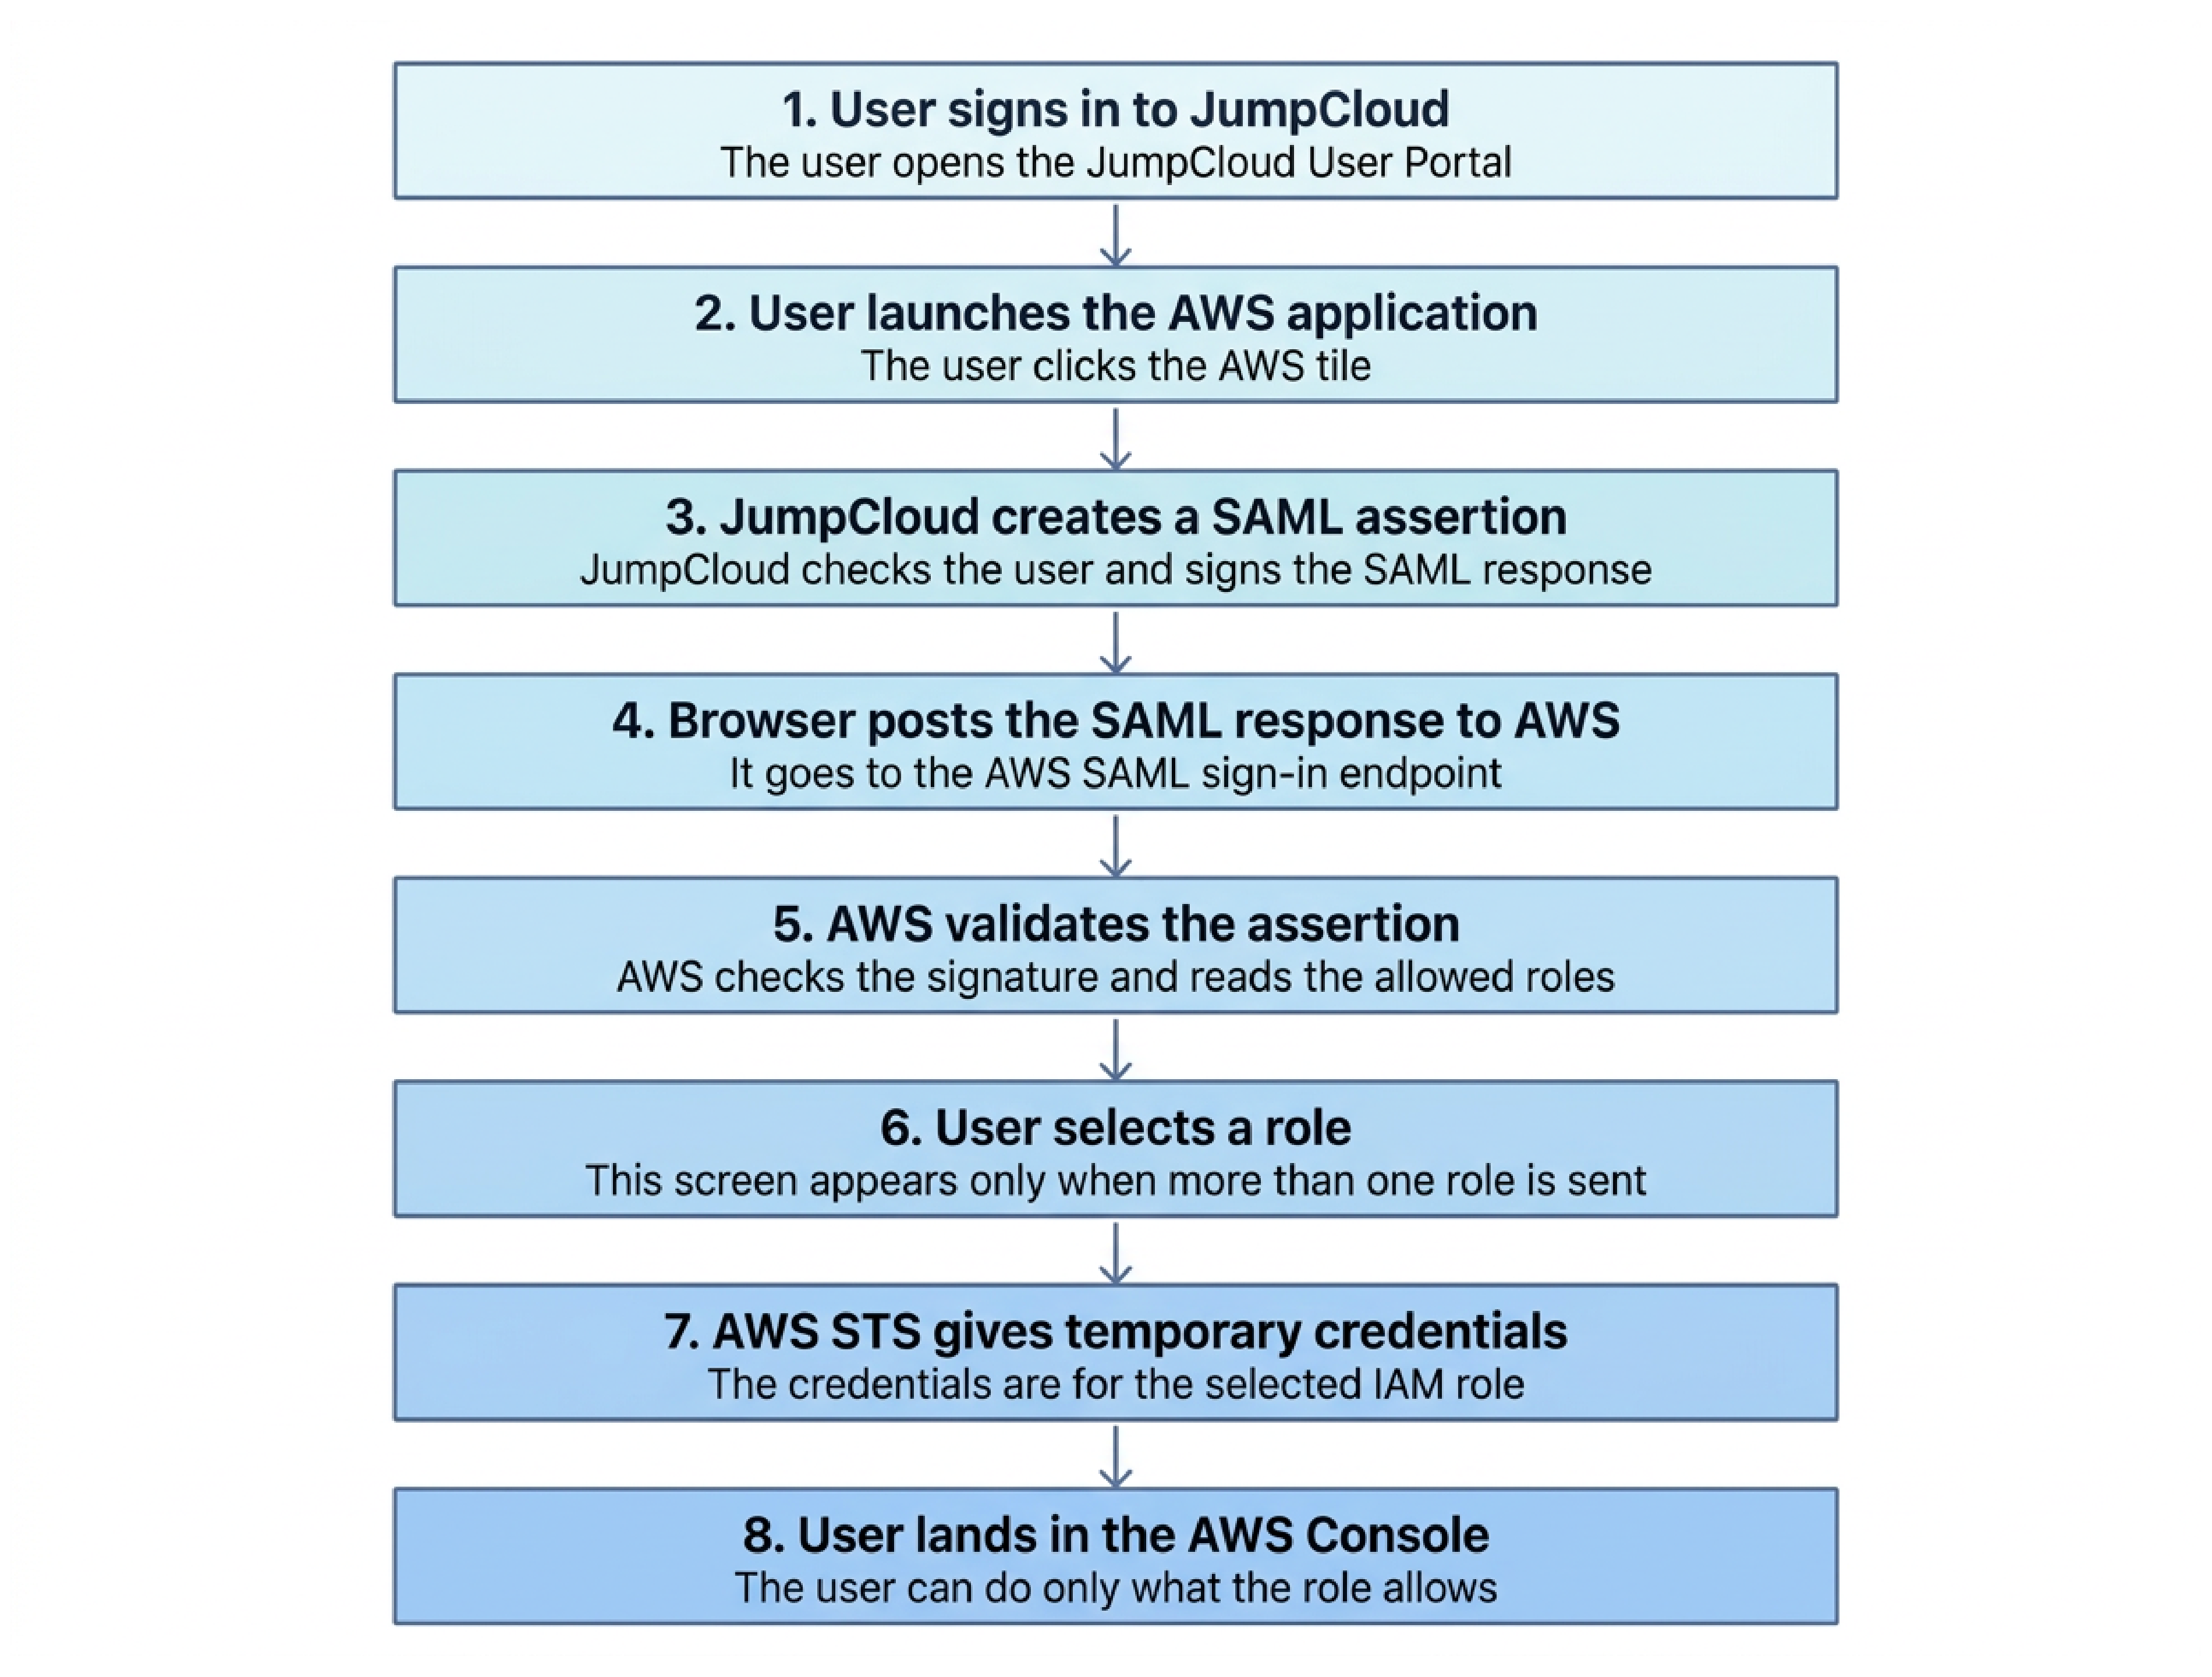
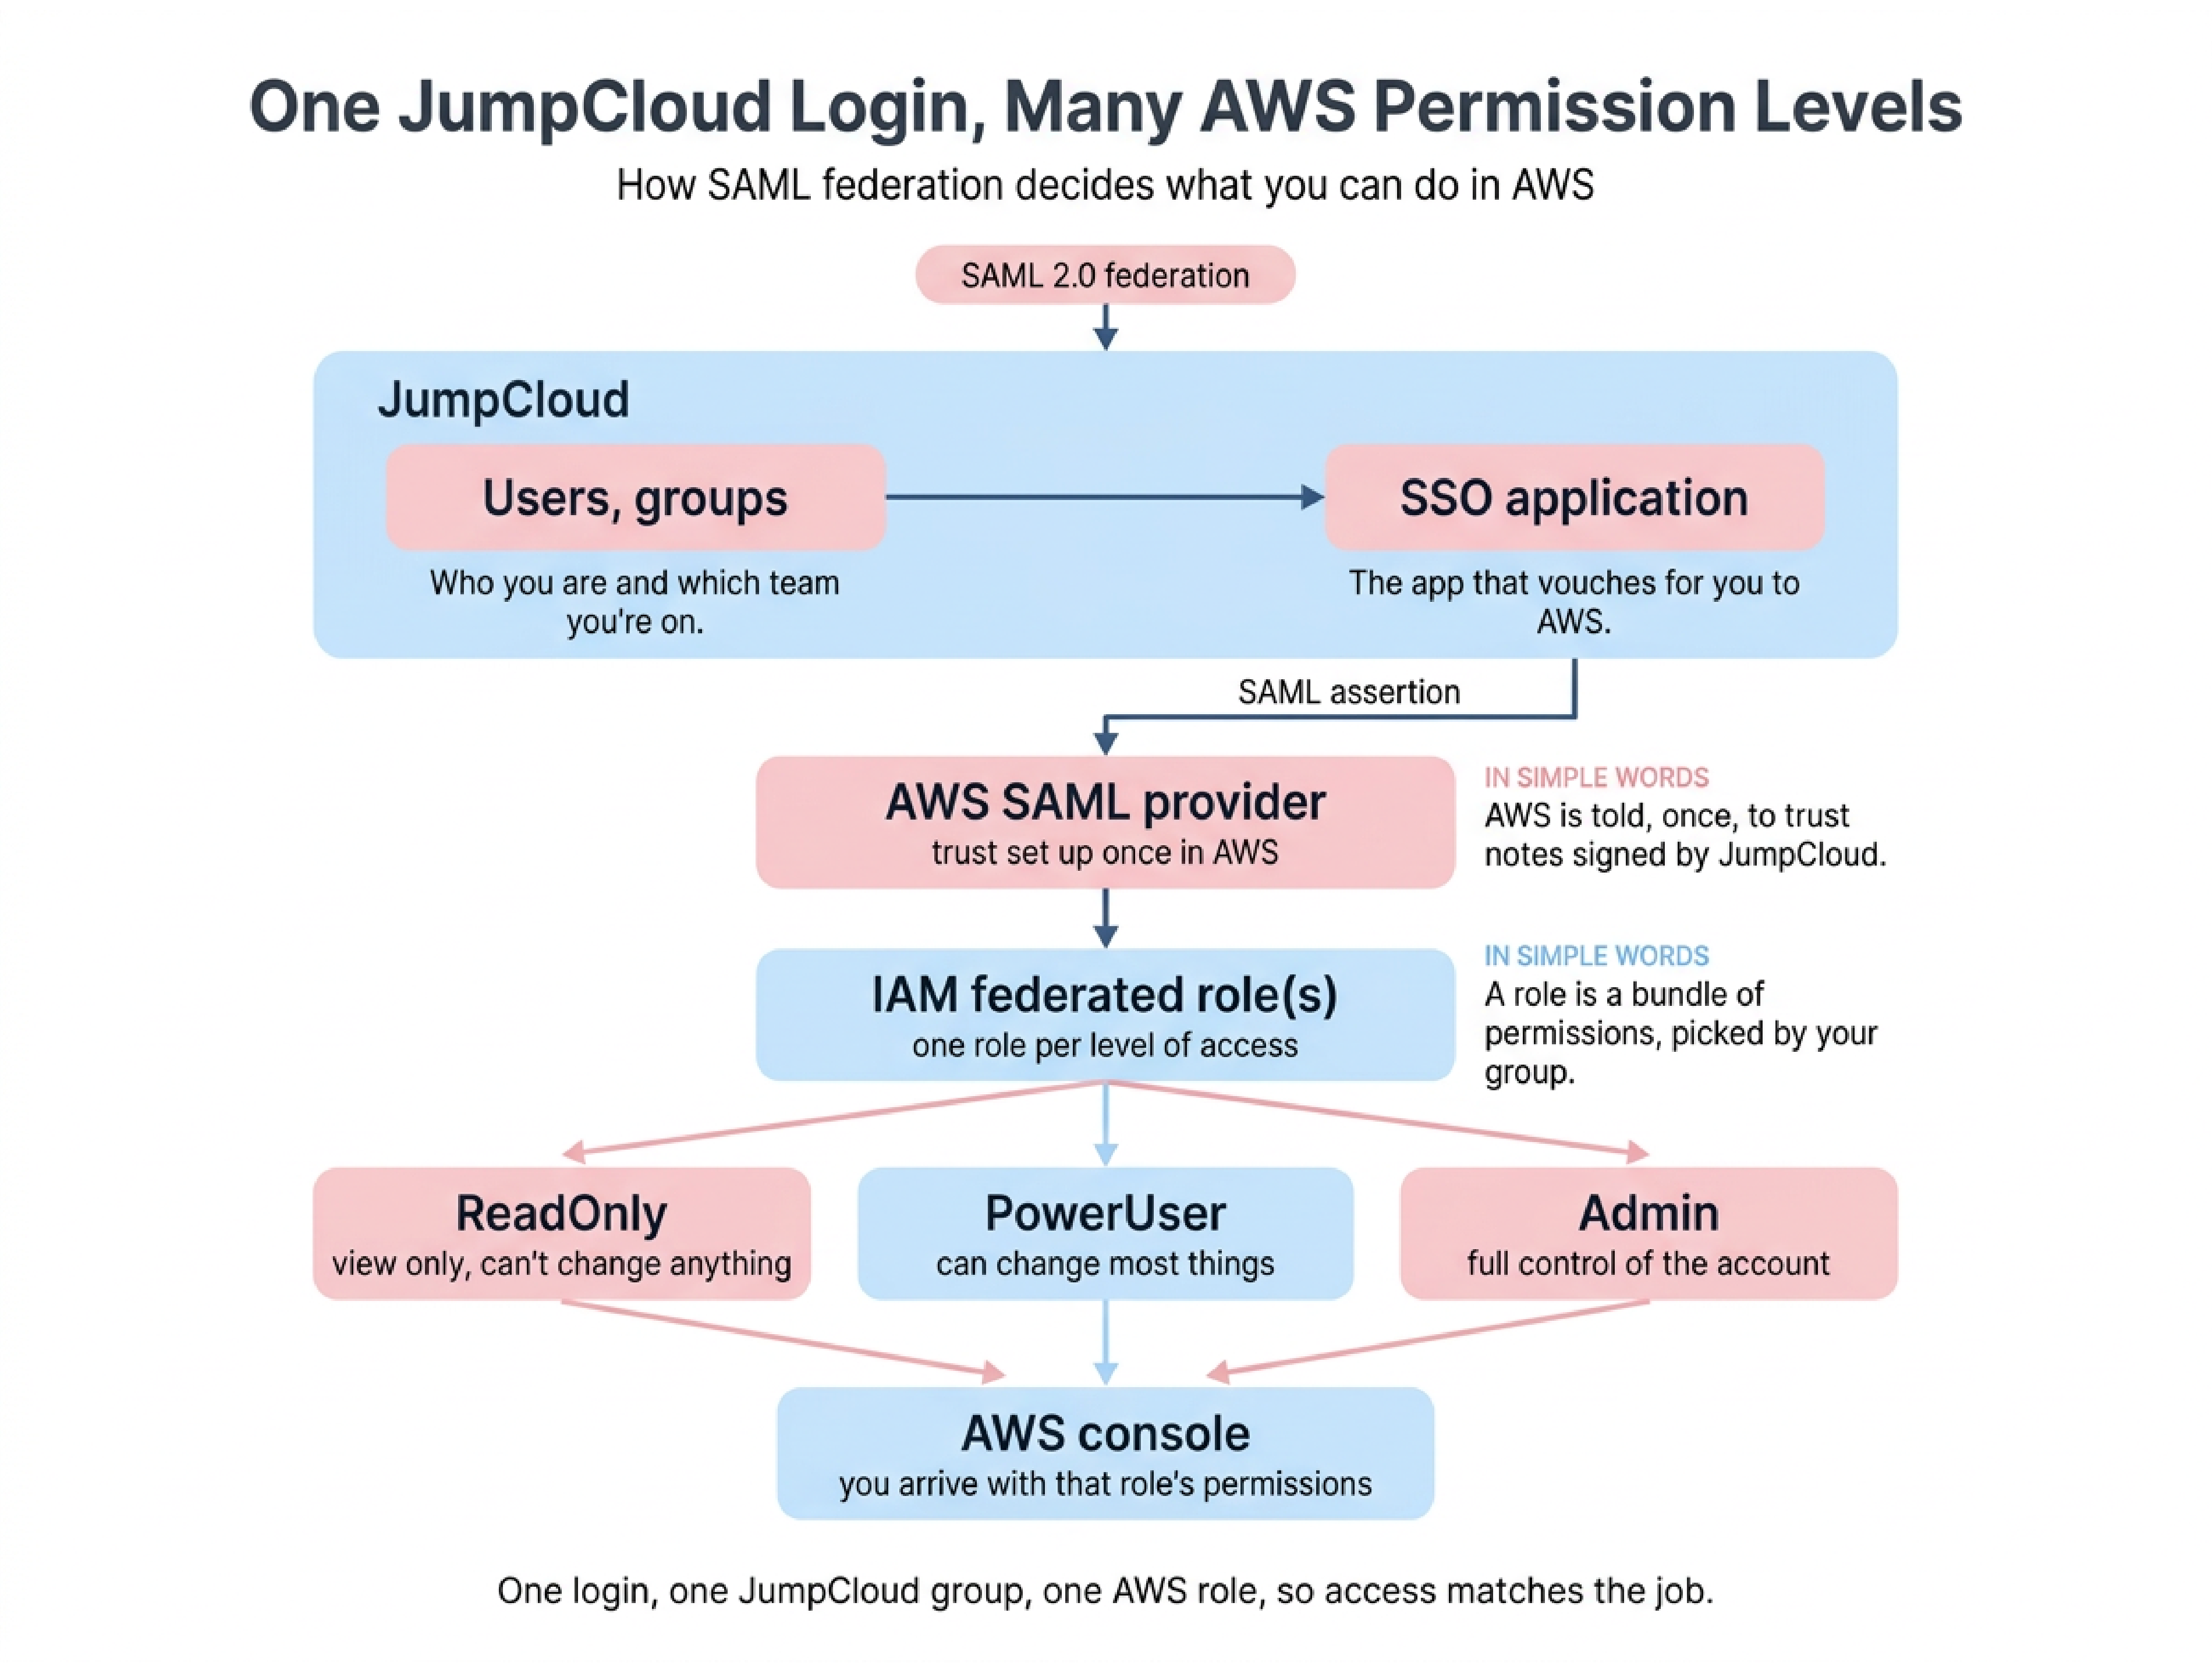
Behind a simple click, there are a few clear steps. The key point is that the browser carries the SAML response from JumpCloud to AWS.
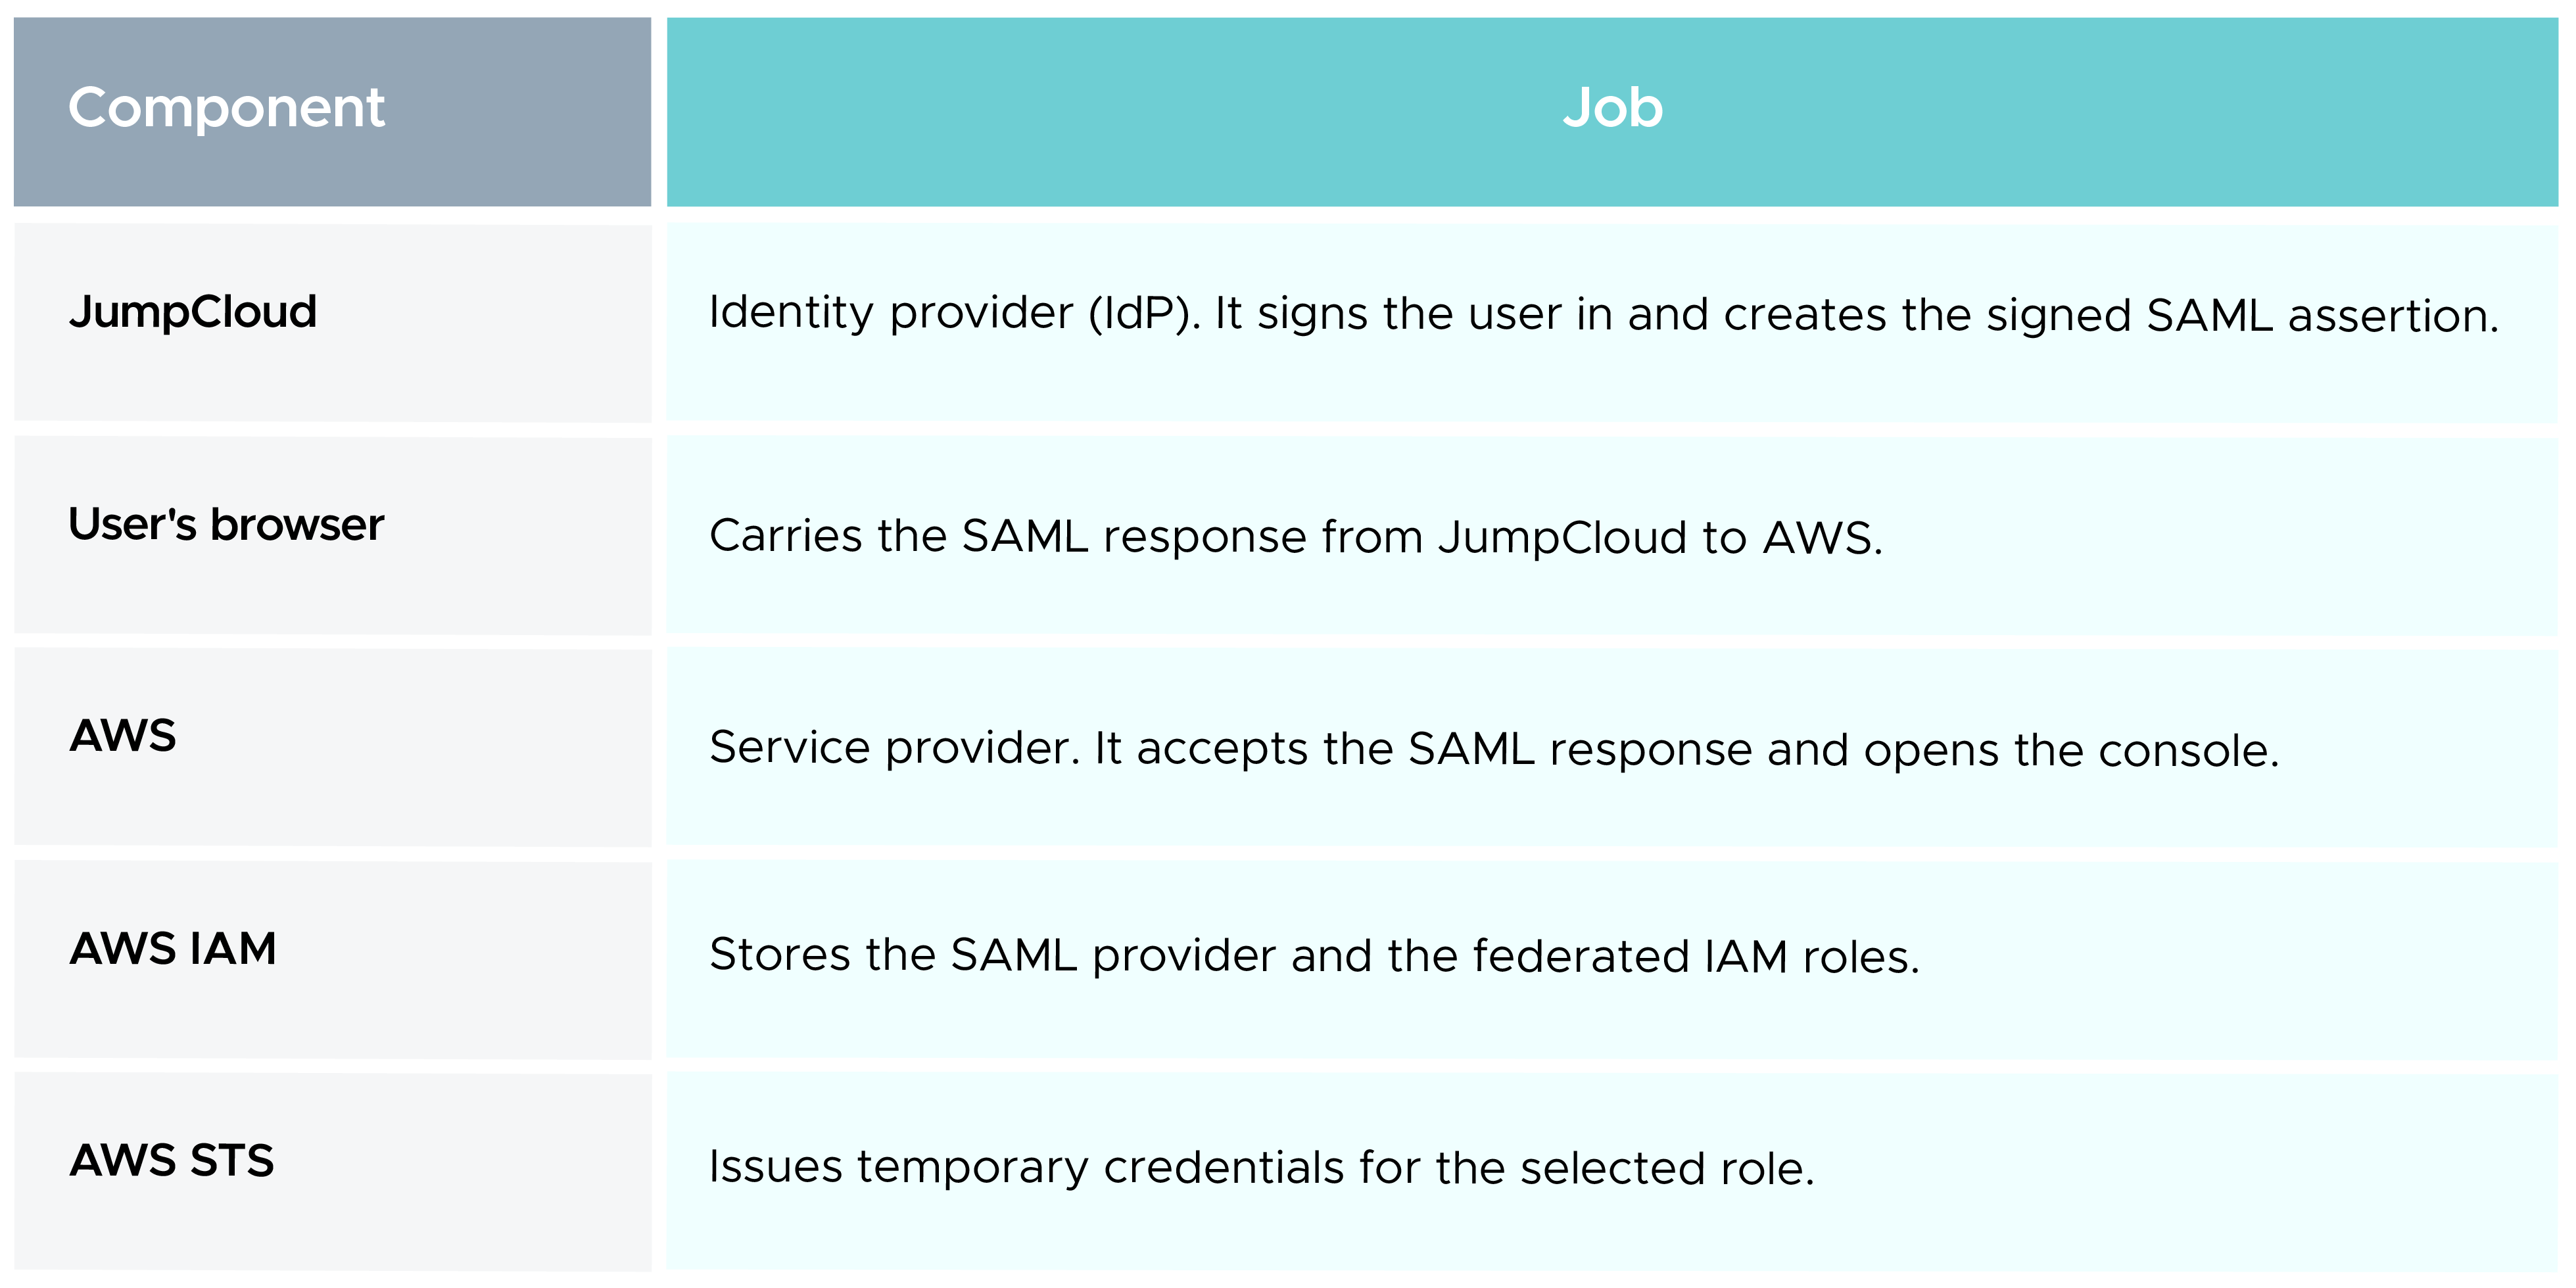

Keep these ready before you start.
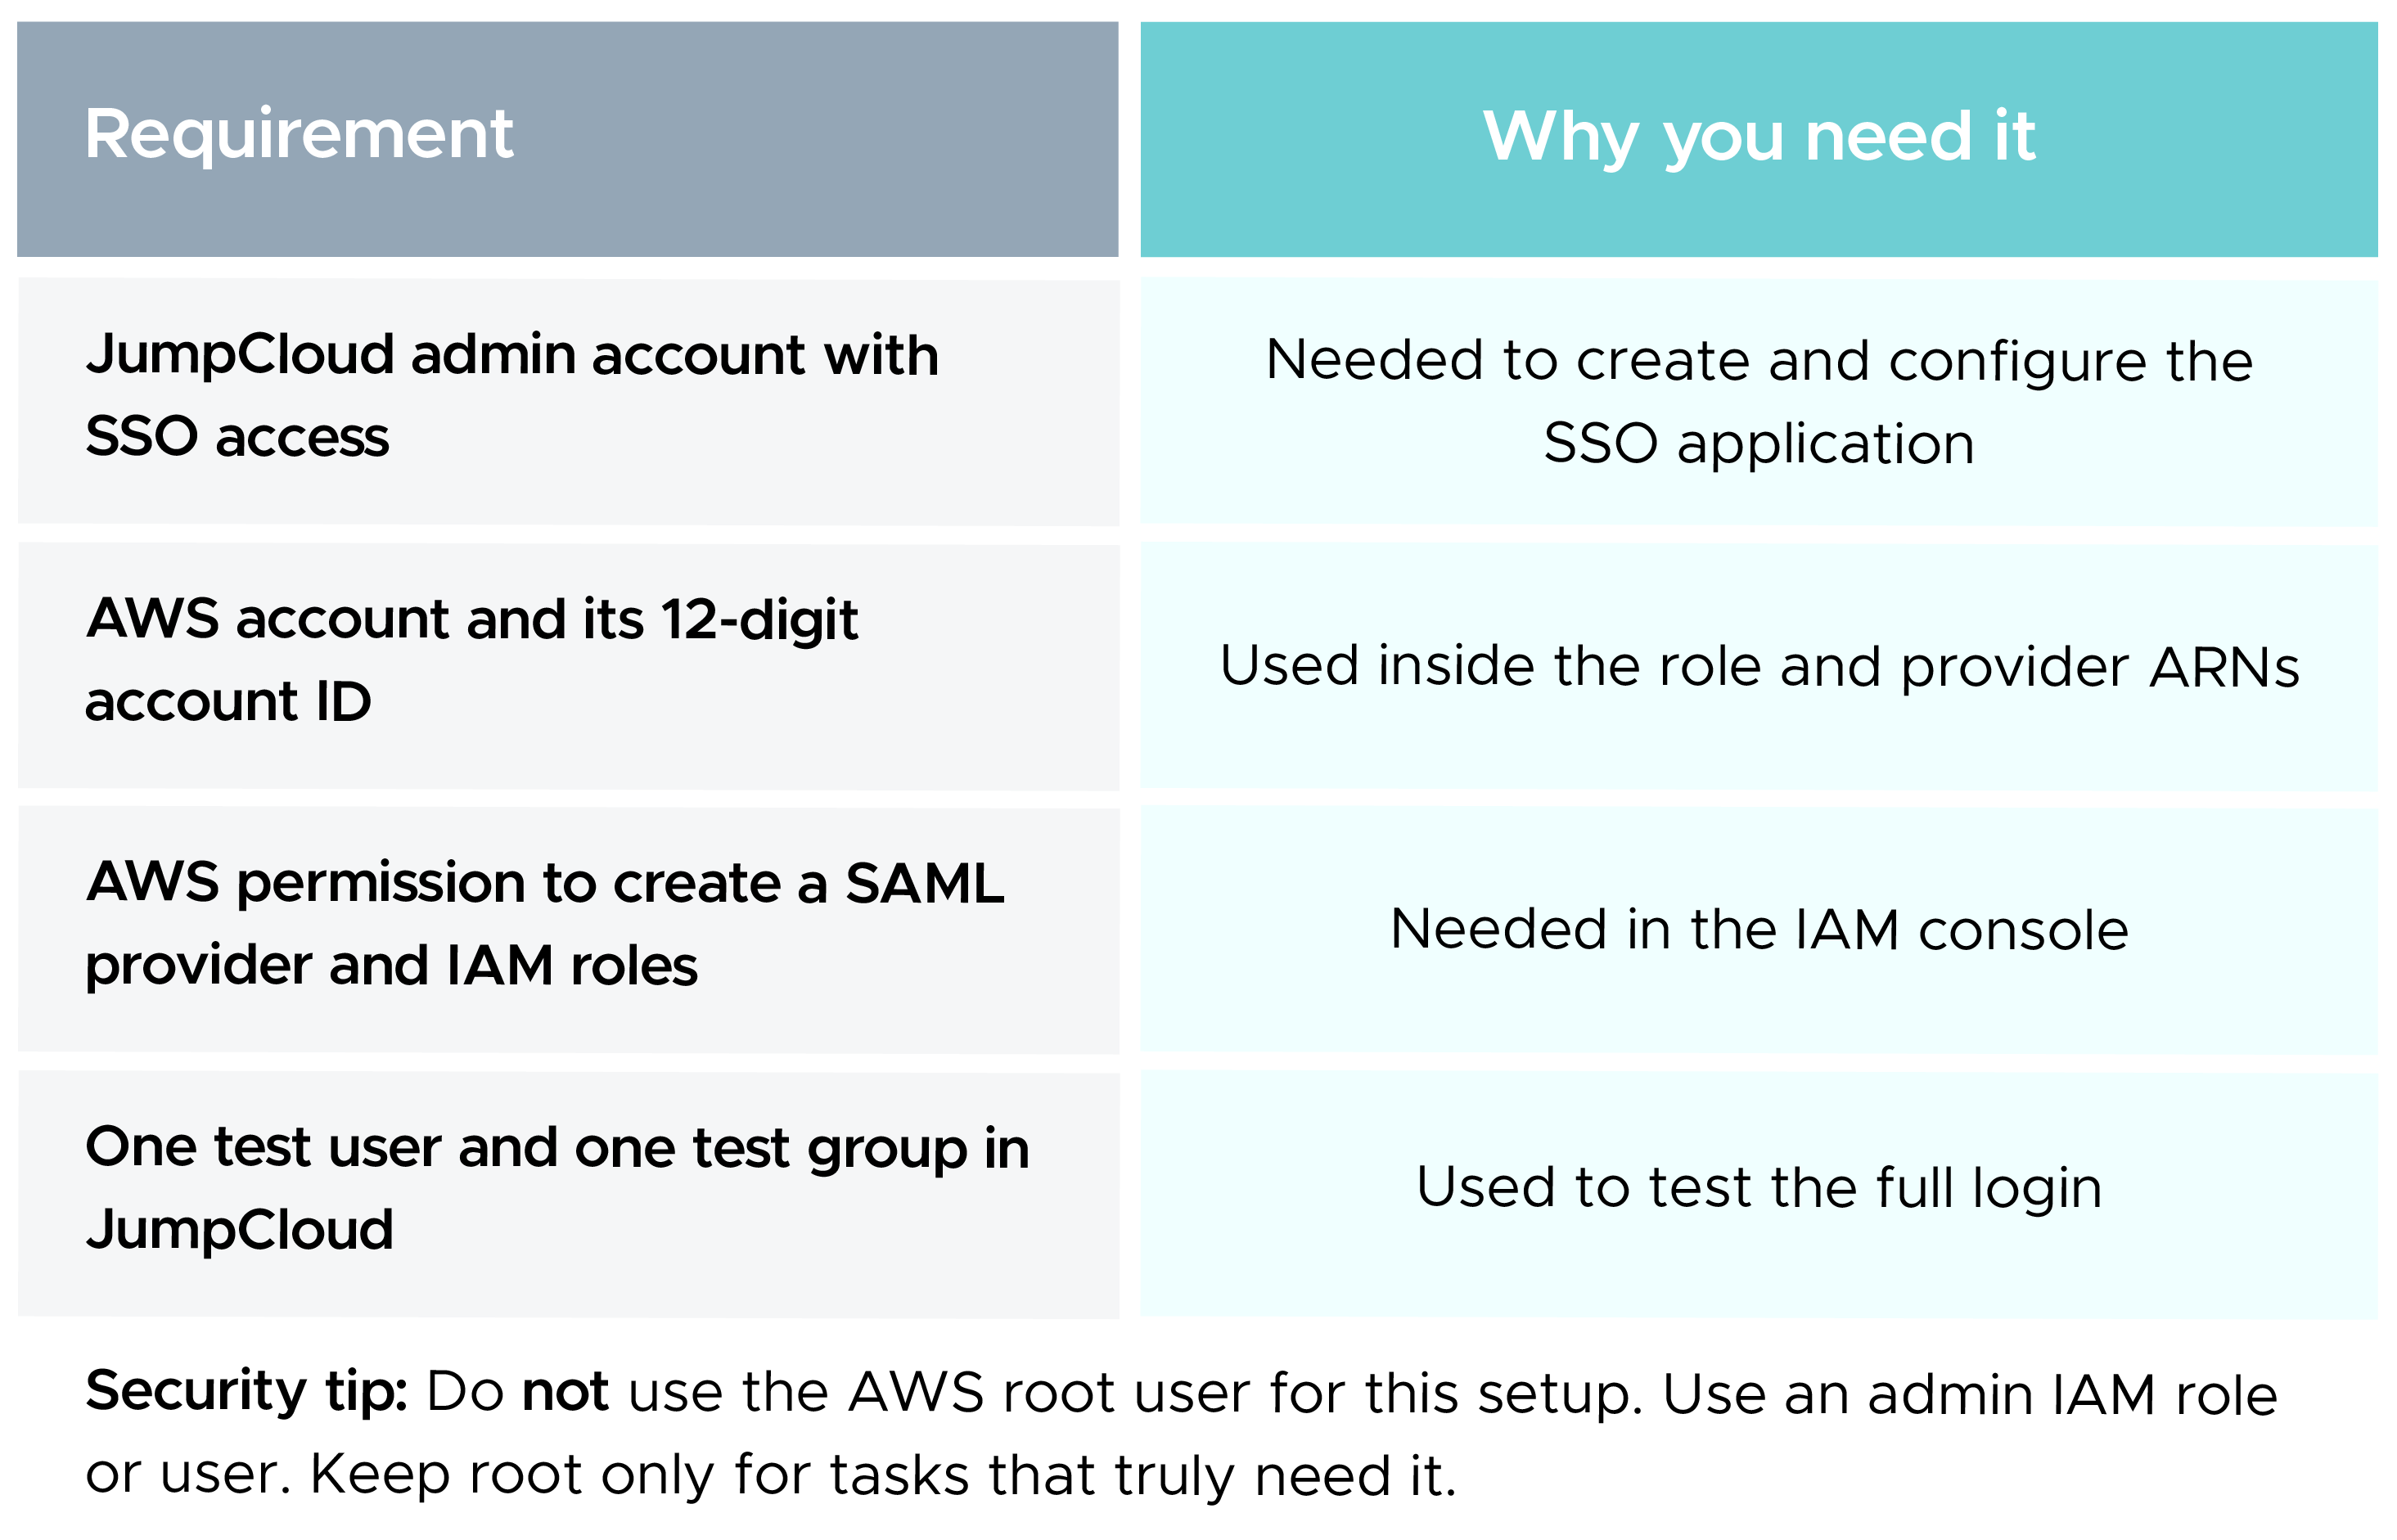
In this blog, the sample AWS account ID is 123456789012. Replace it with your own account ID.
Go to the official JumpCloud website and create your organization. You need administrator access, because SSO application settings need admin rights. JumpCloud also lists an admin account and the SSO entitlement as requirements for the AWS IAM connector.
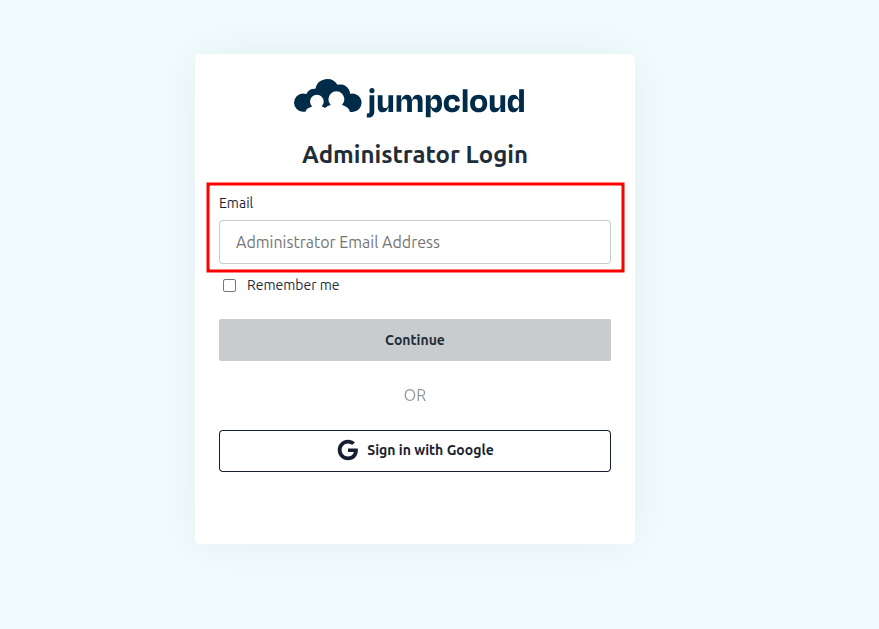
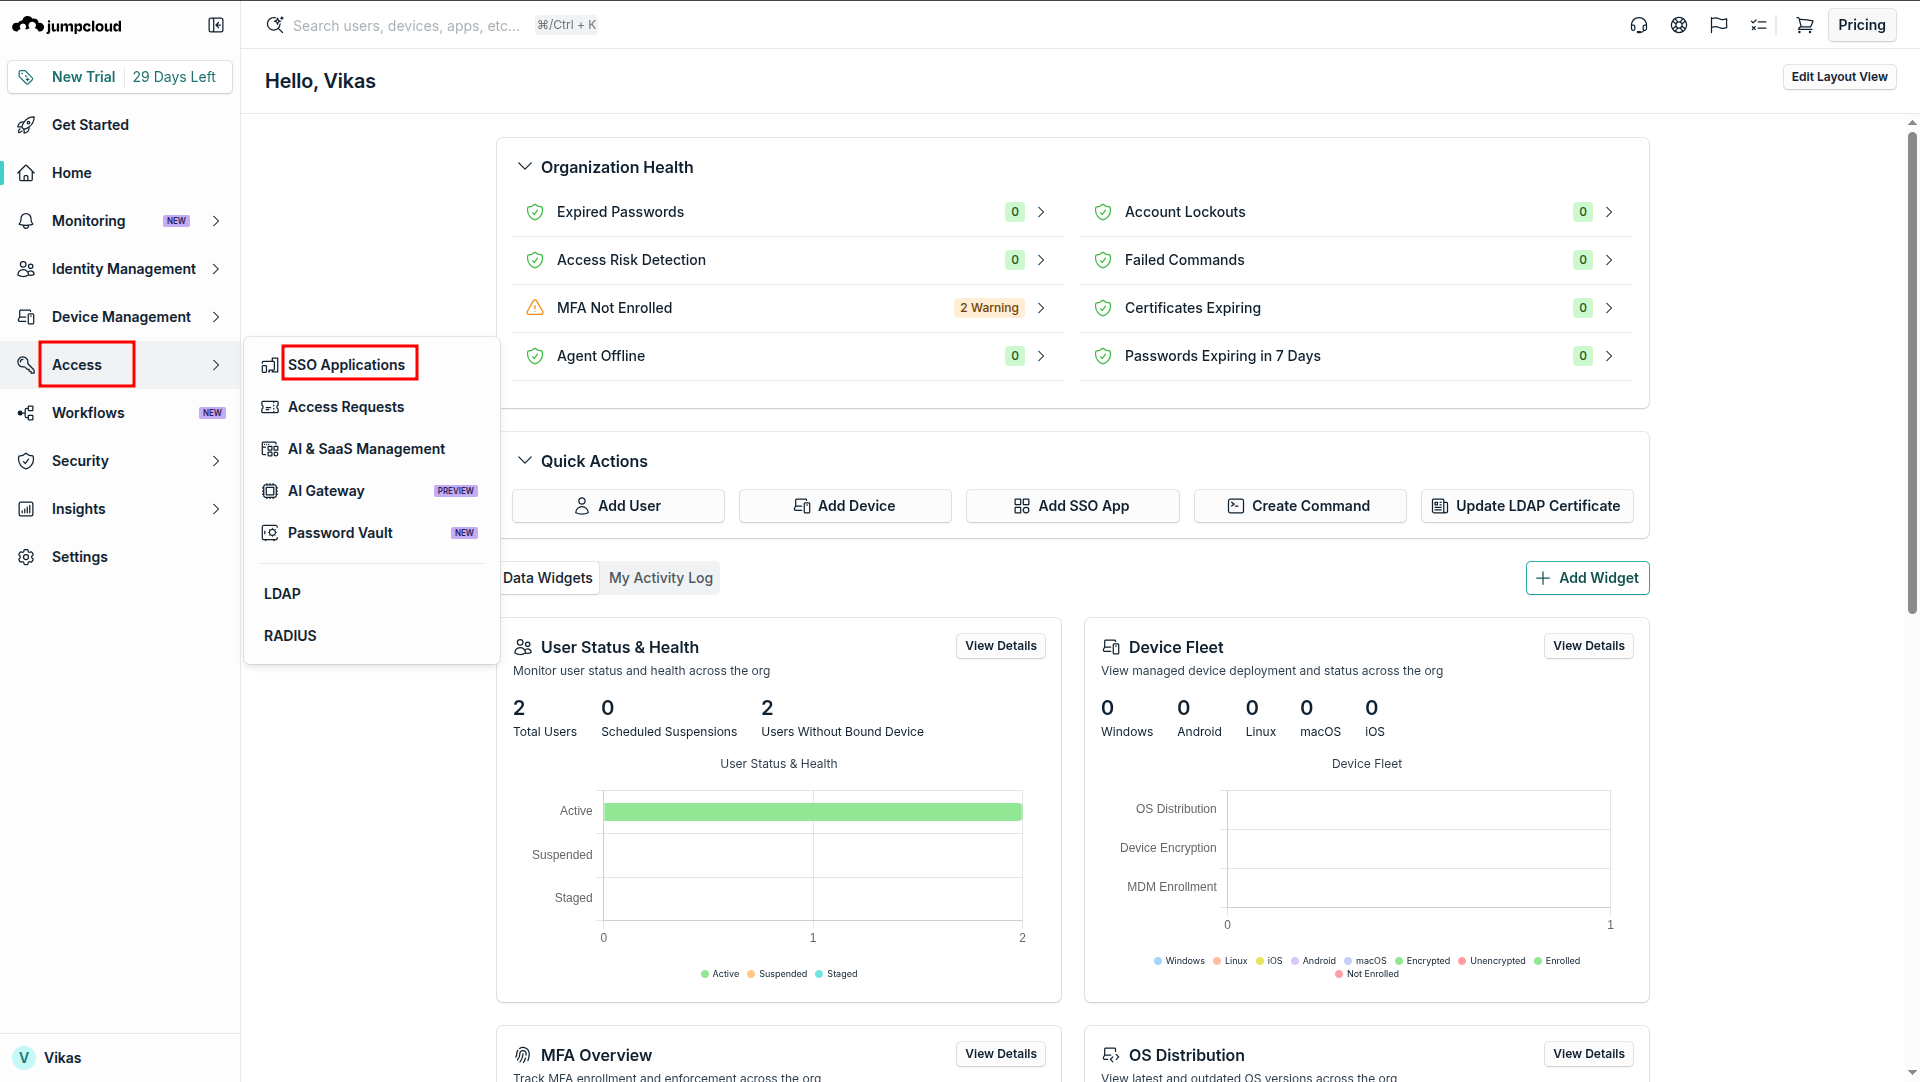
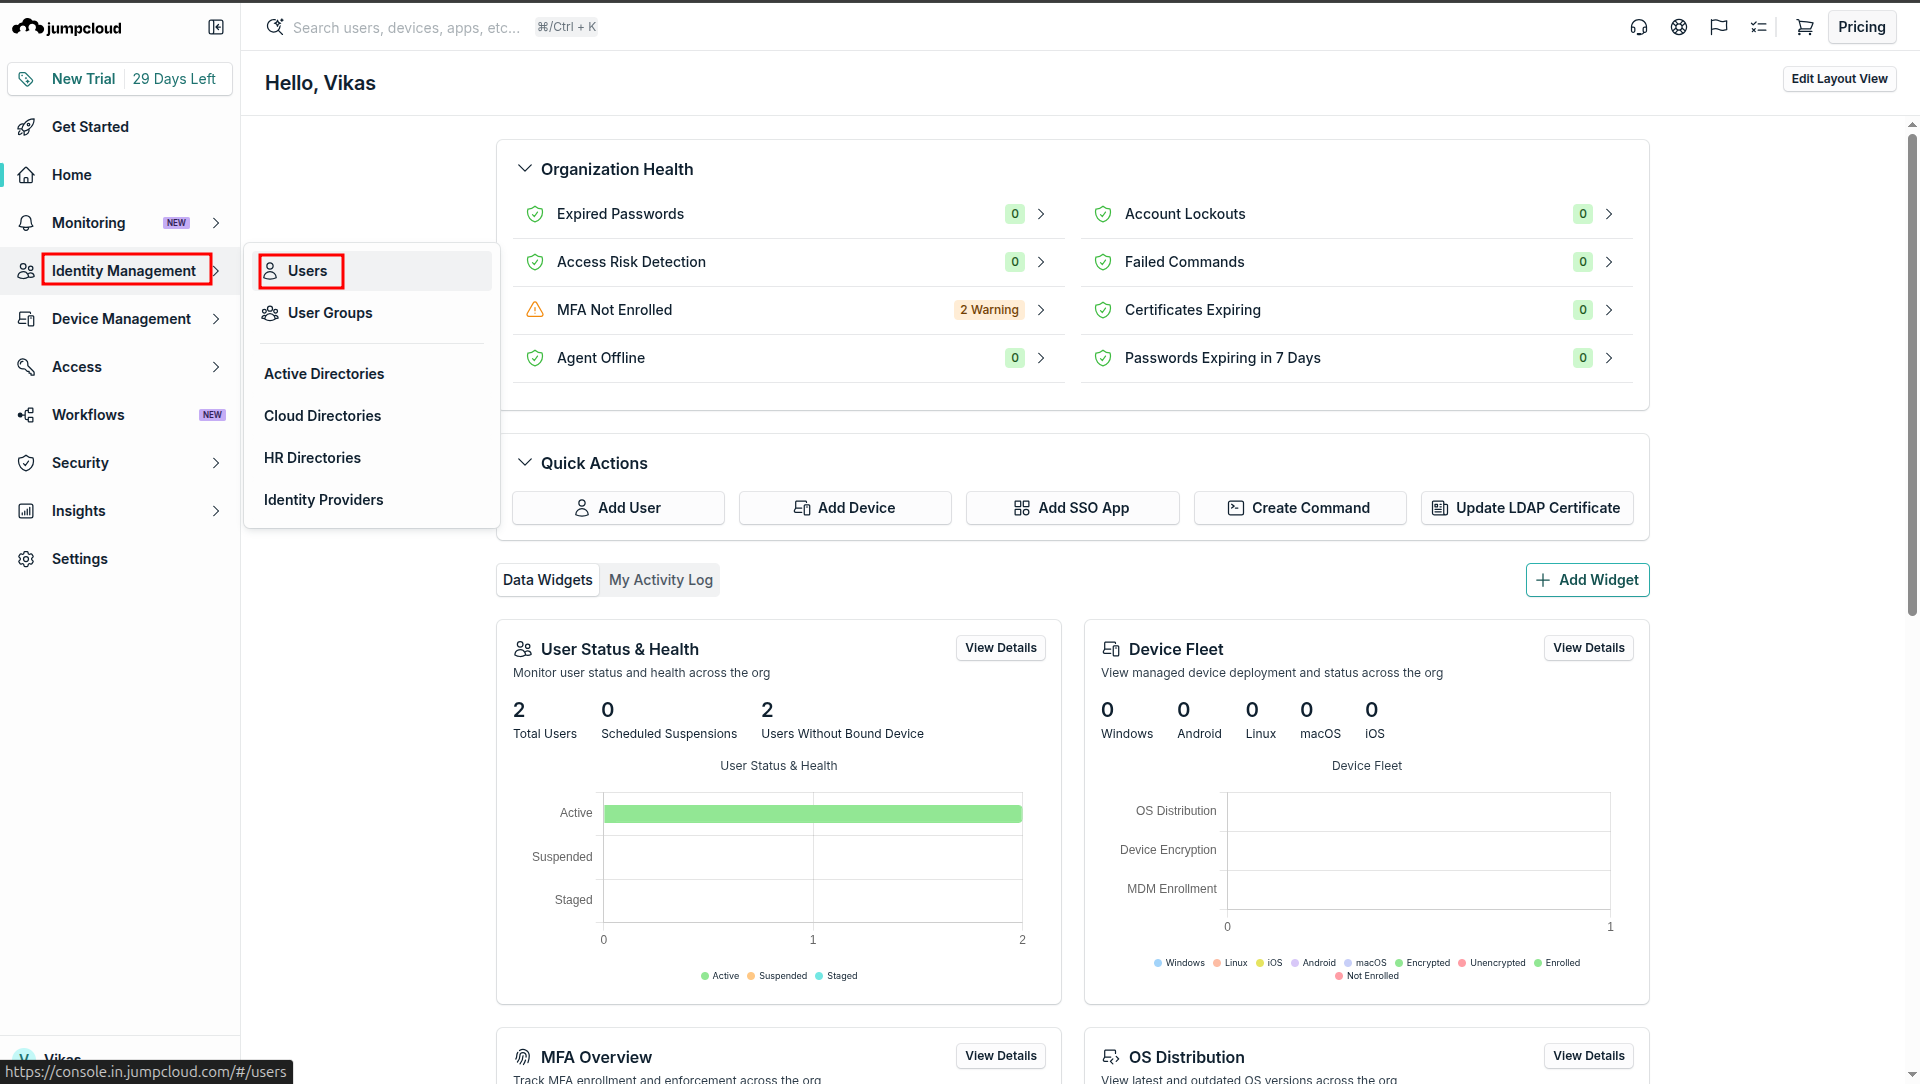
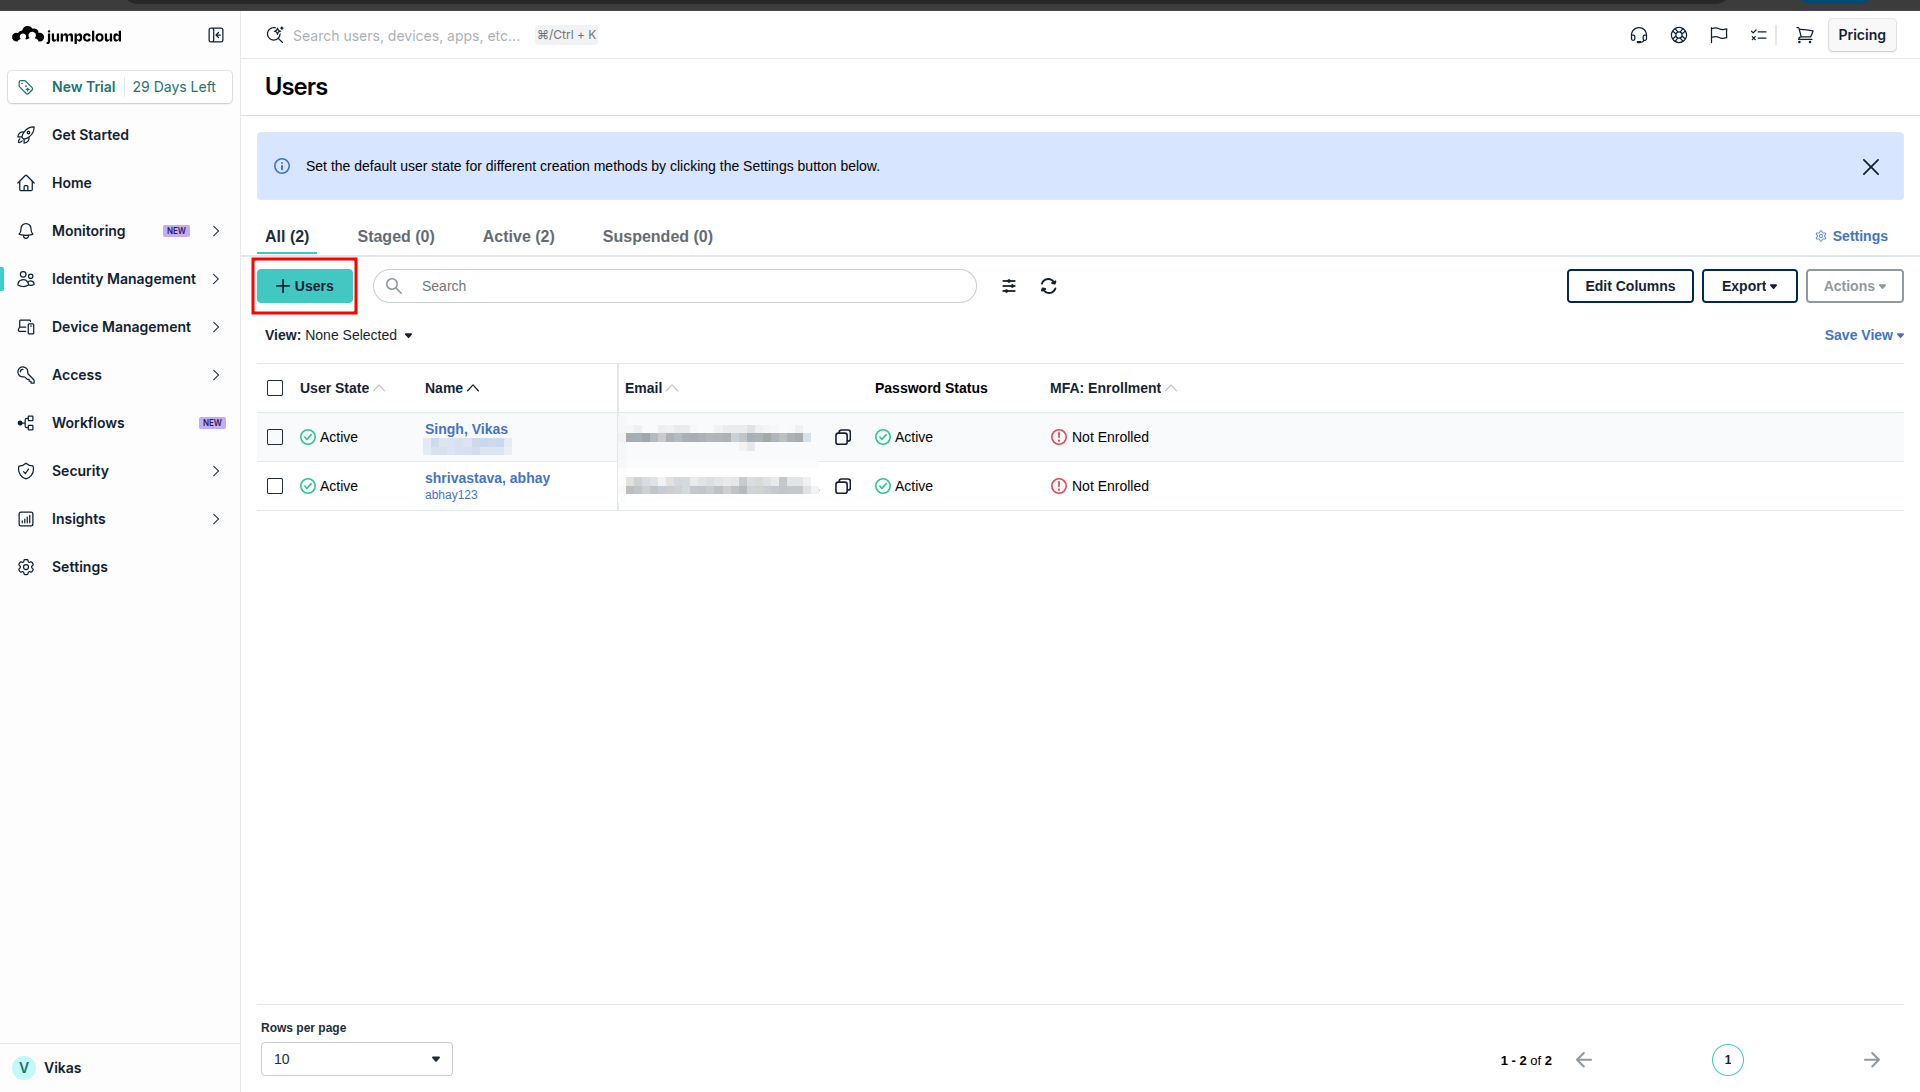
In the JumpCloud Admin Console, open this path:
 Use demo details like these:
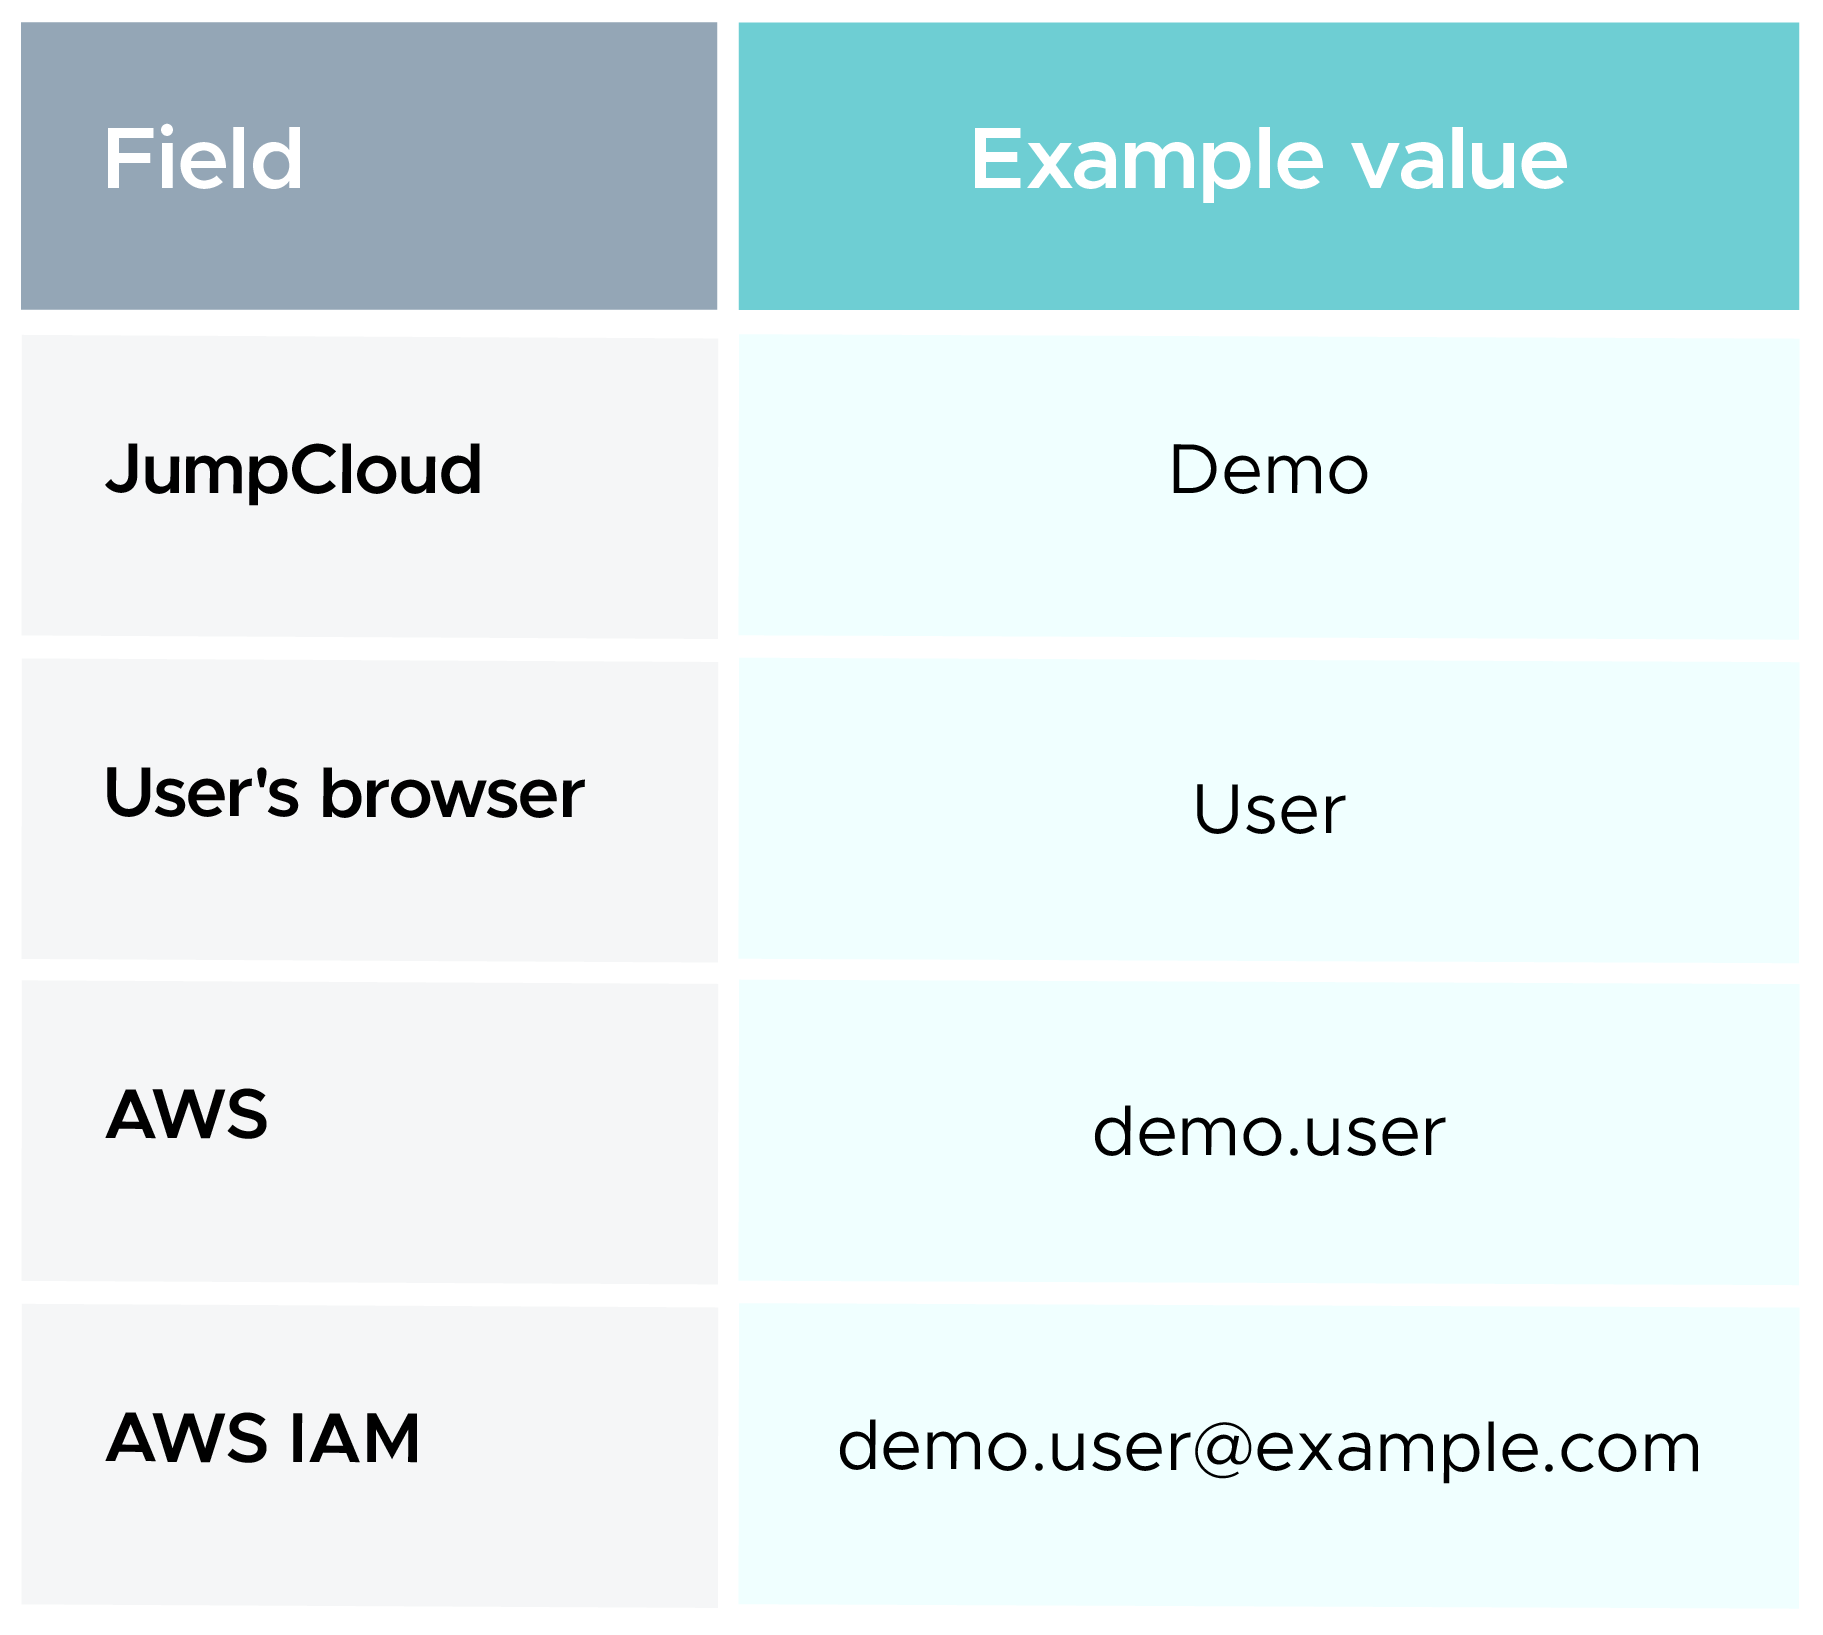
Save the user. Later, this user will be allowed to open the AWS application.
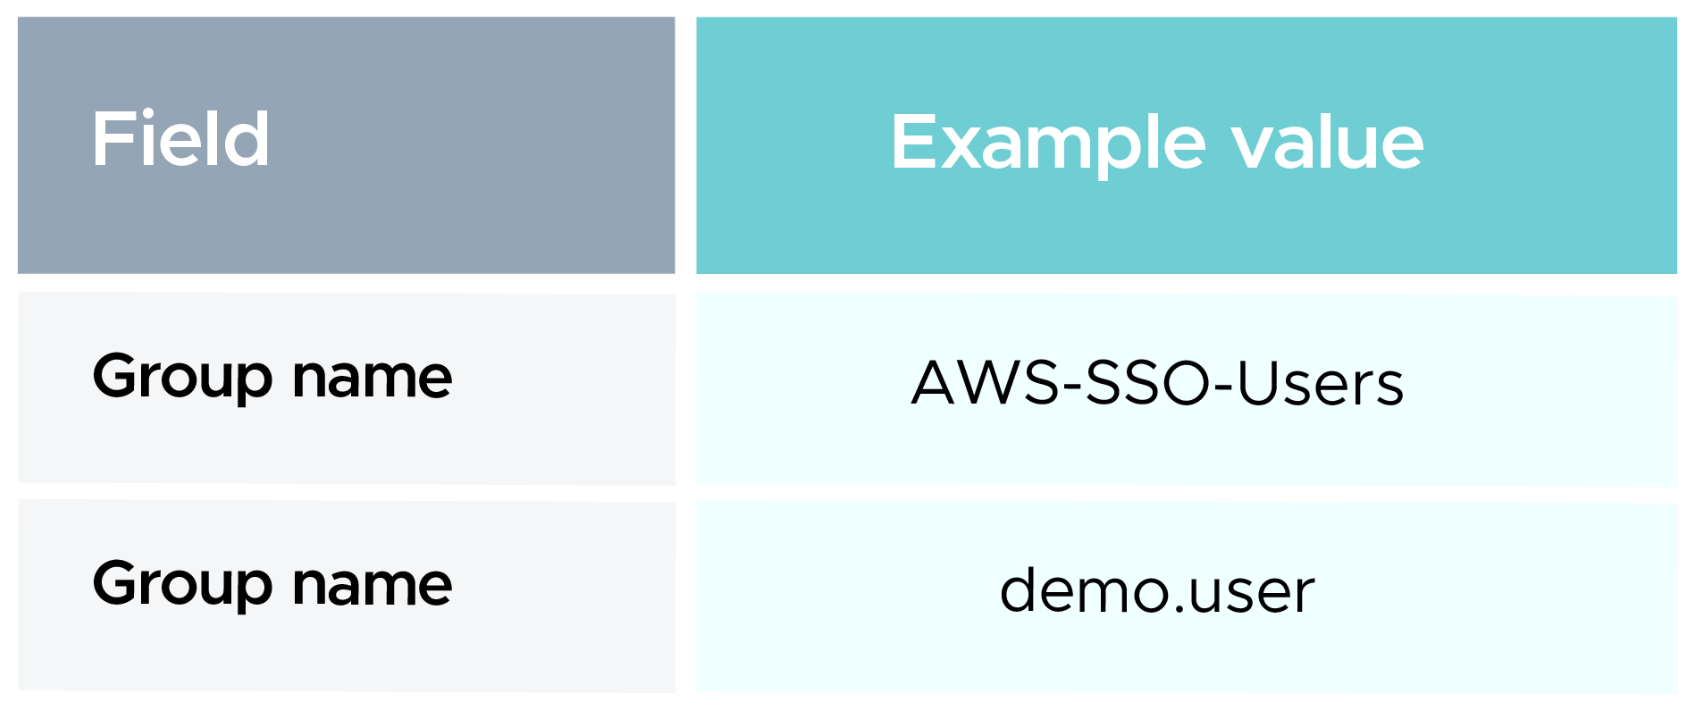
Groups make access easy to manage. Create one group for the people who can use AWS.
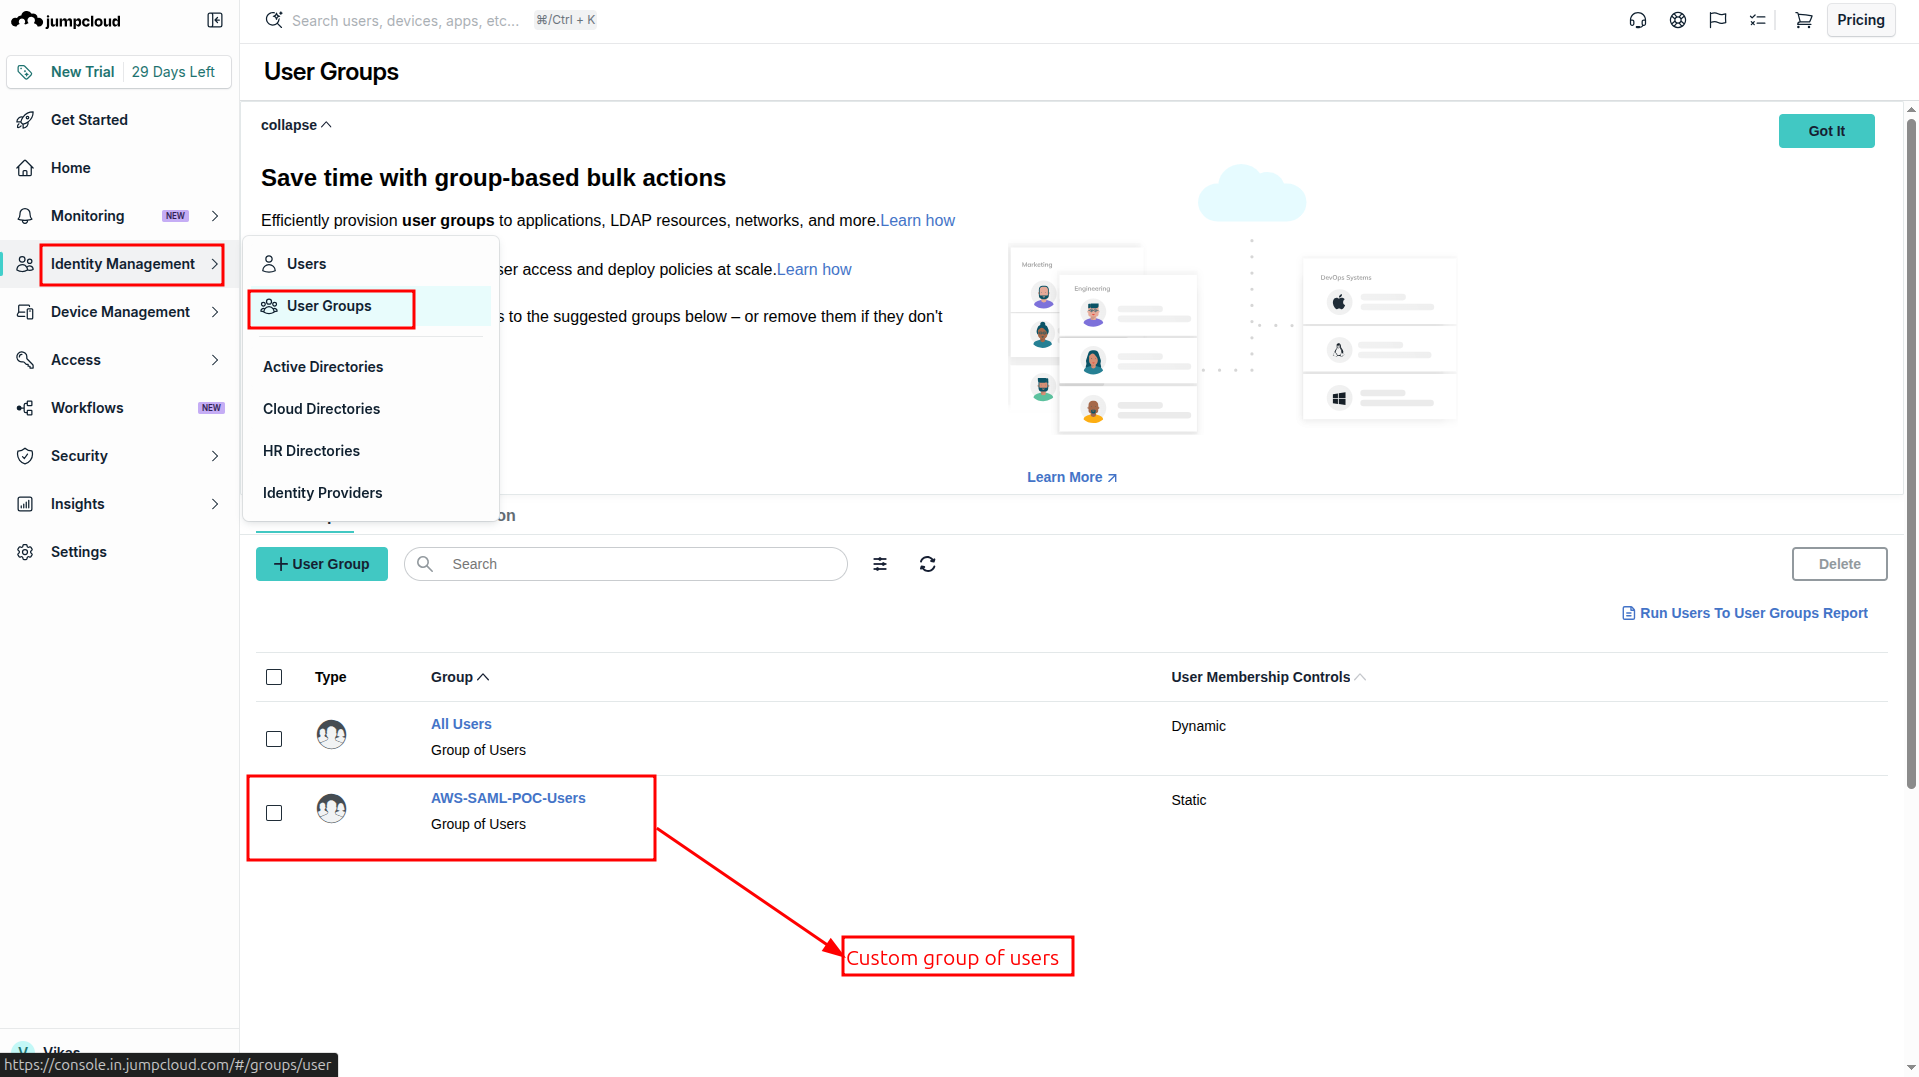
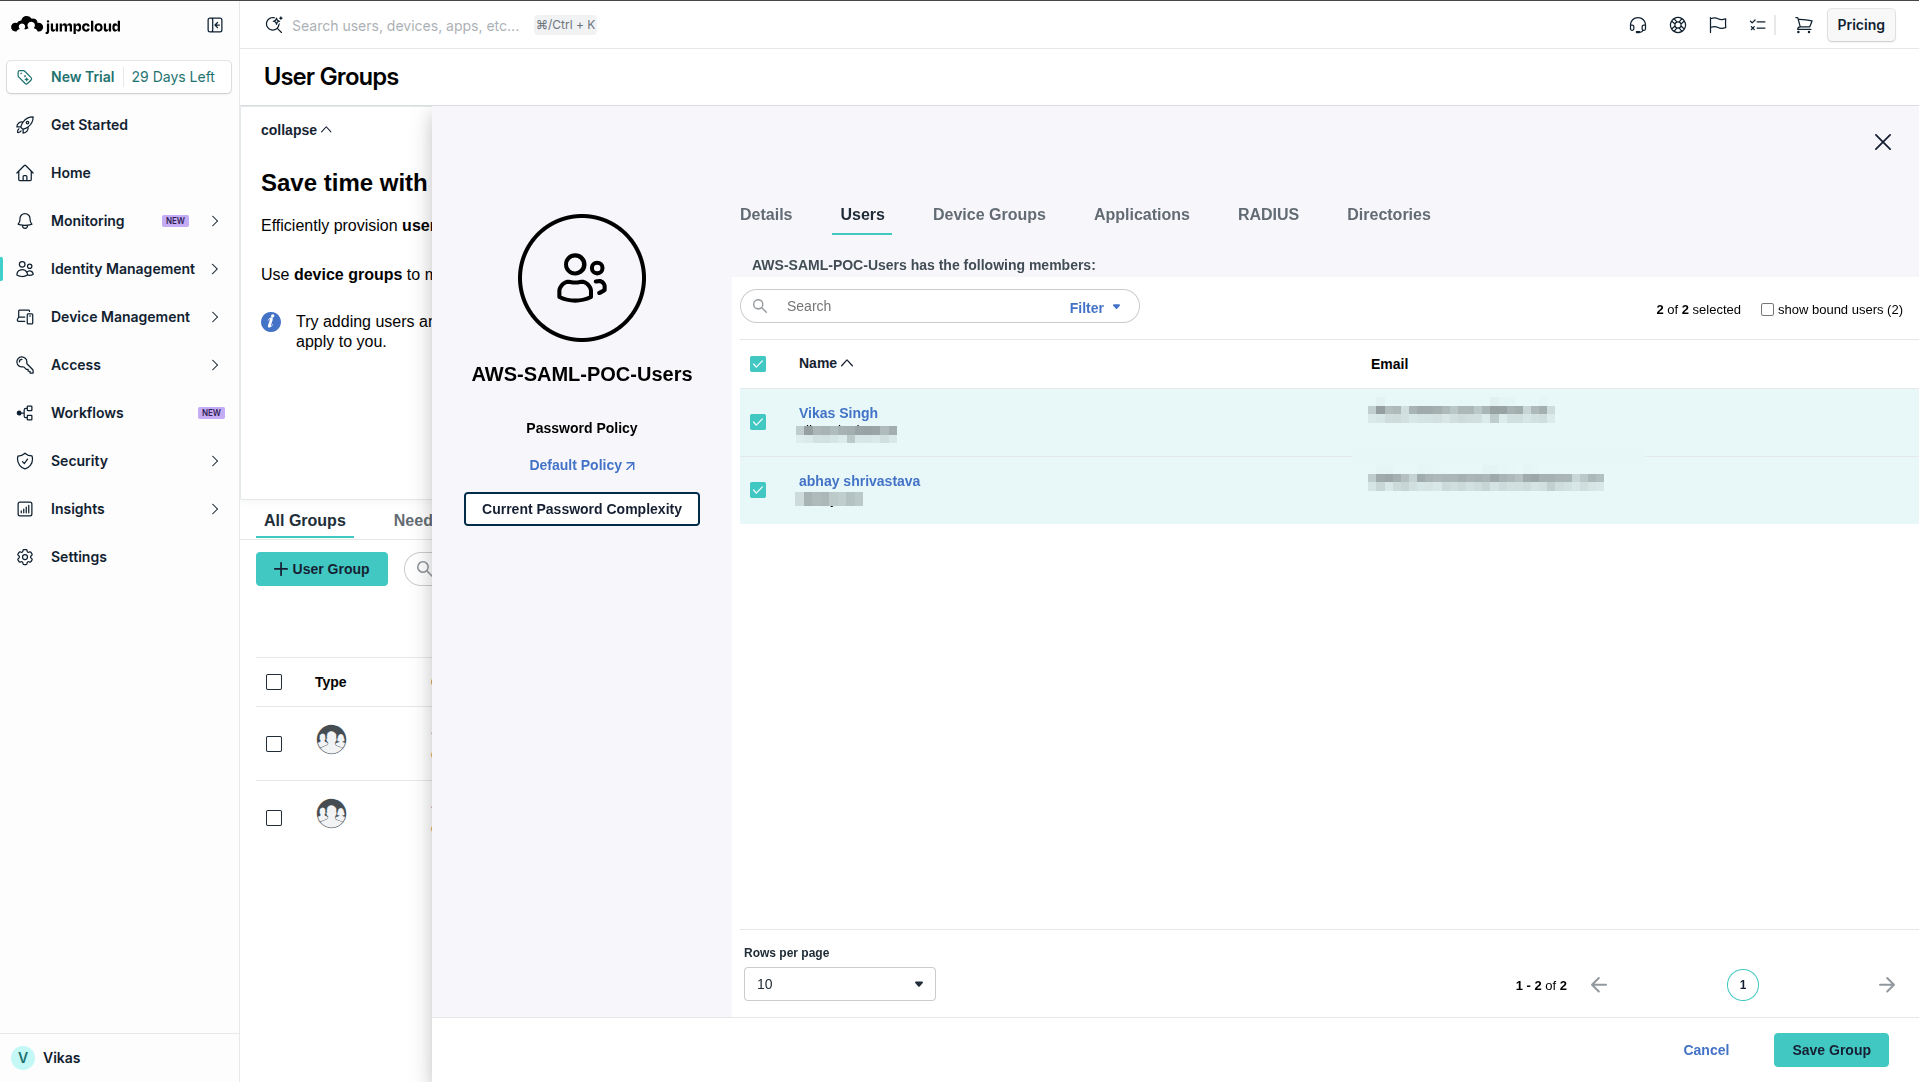
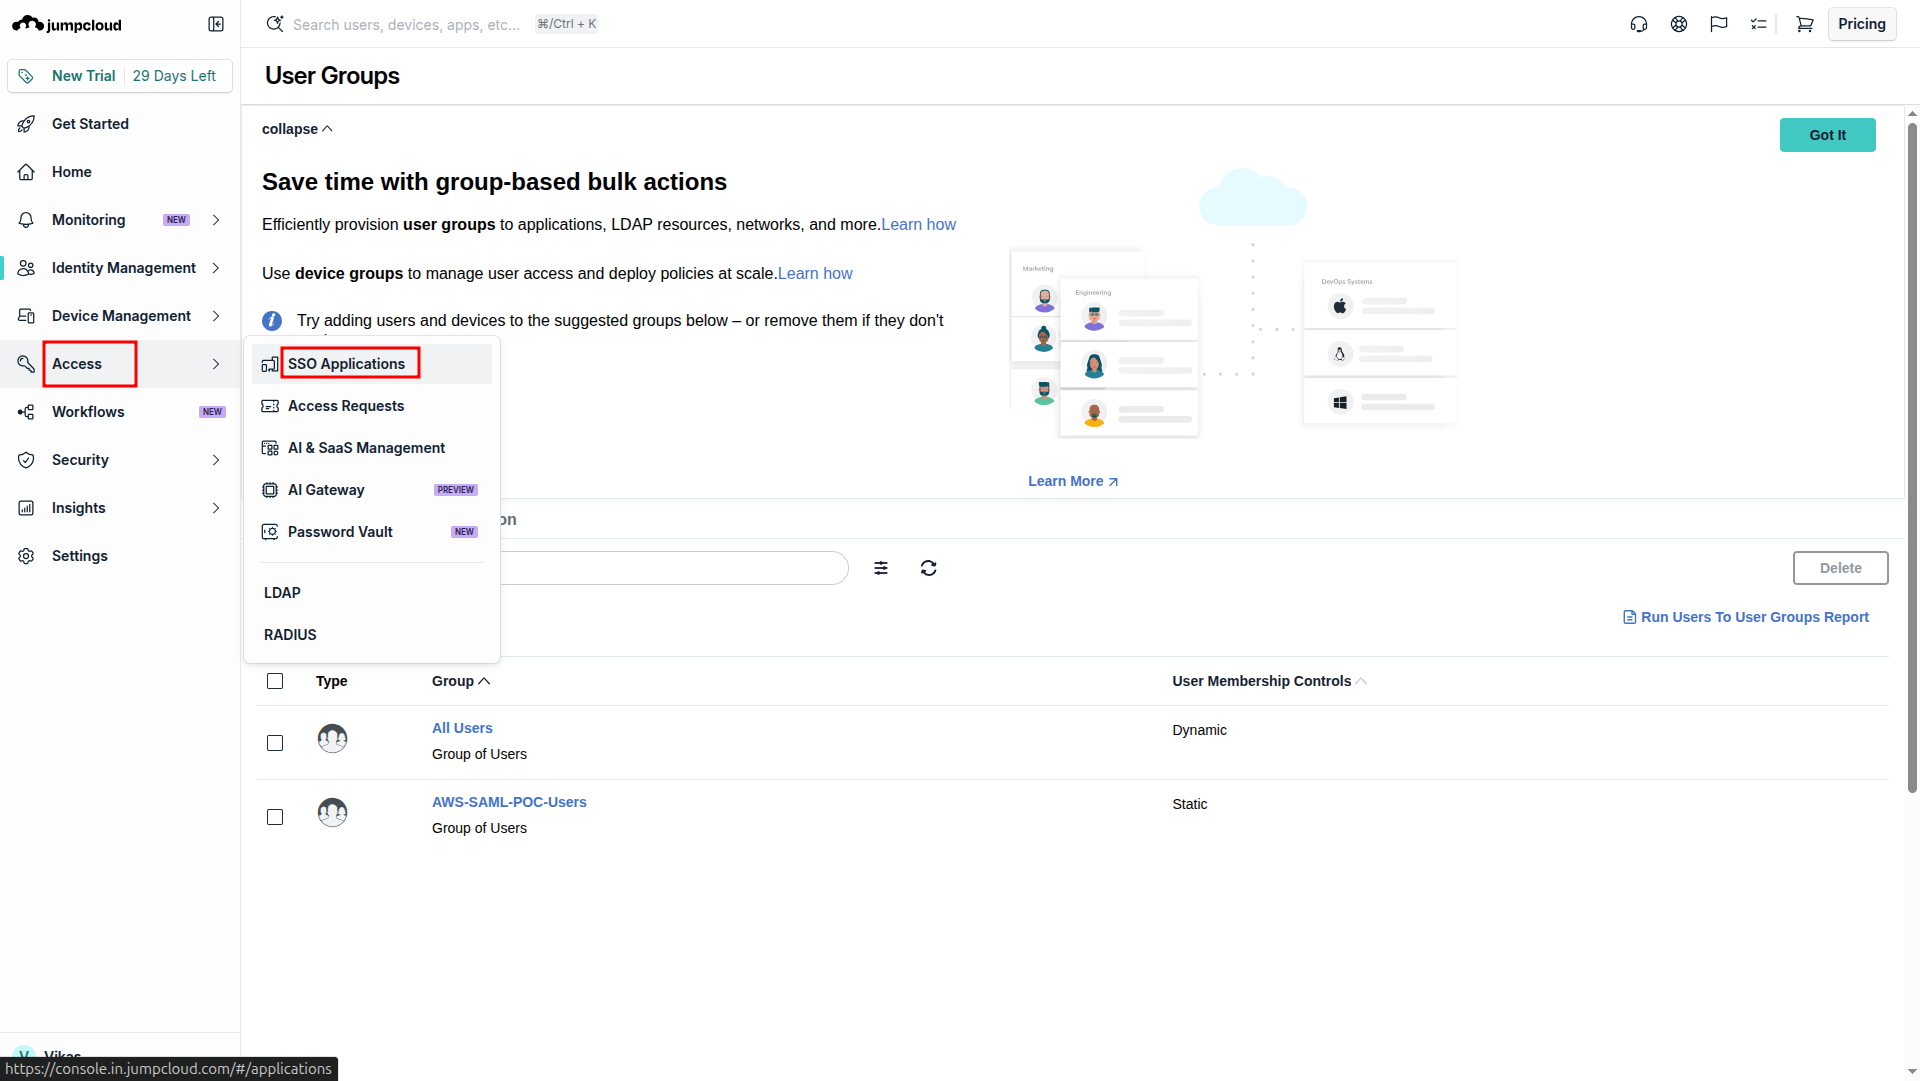
This is the main JumpCloud setting. Open this path and search for the AWS connector:
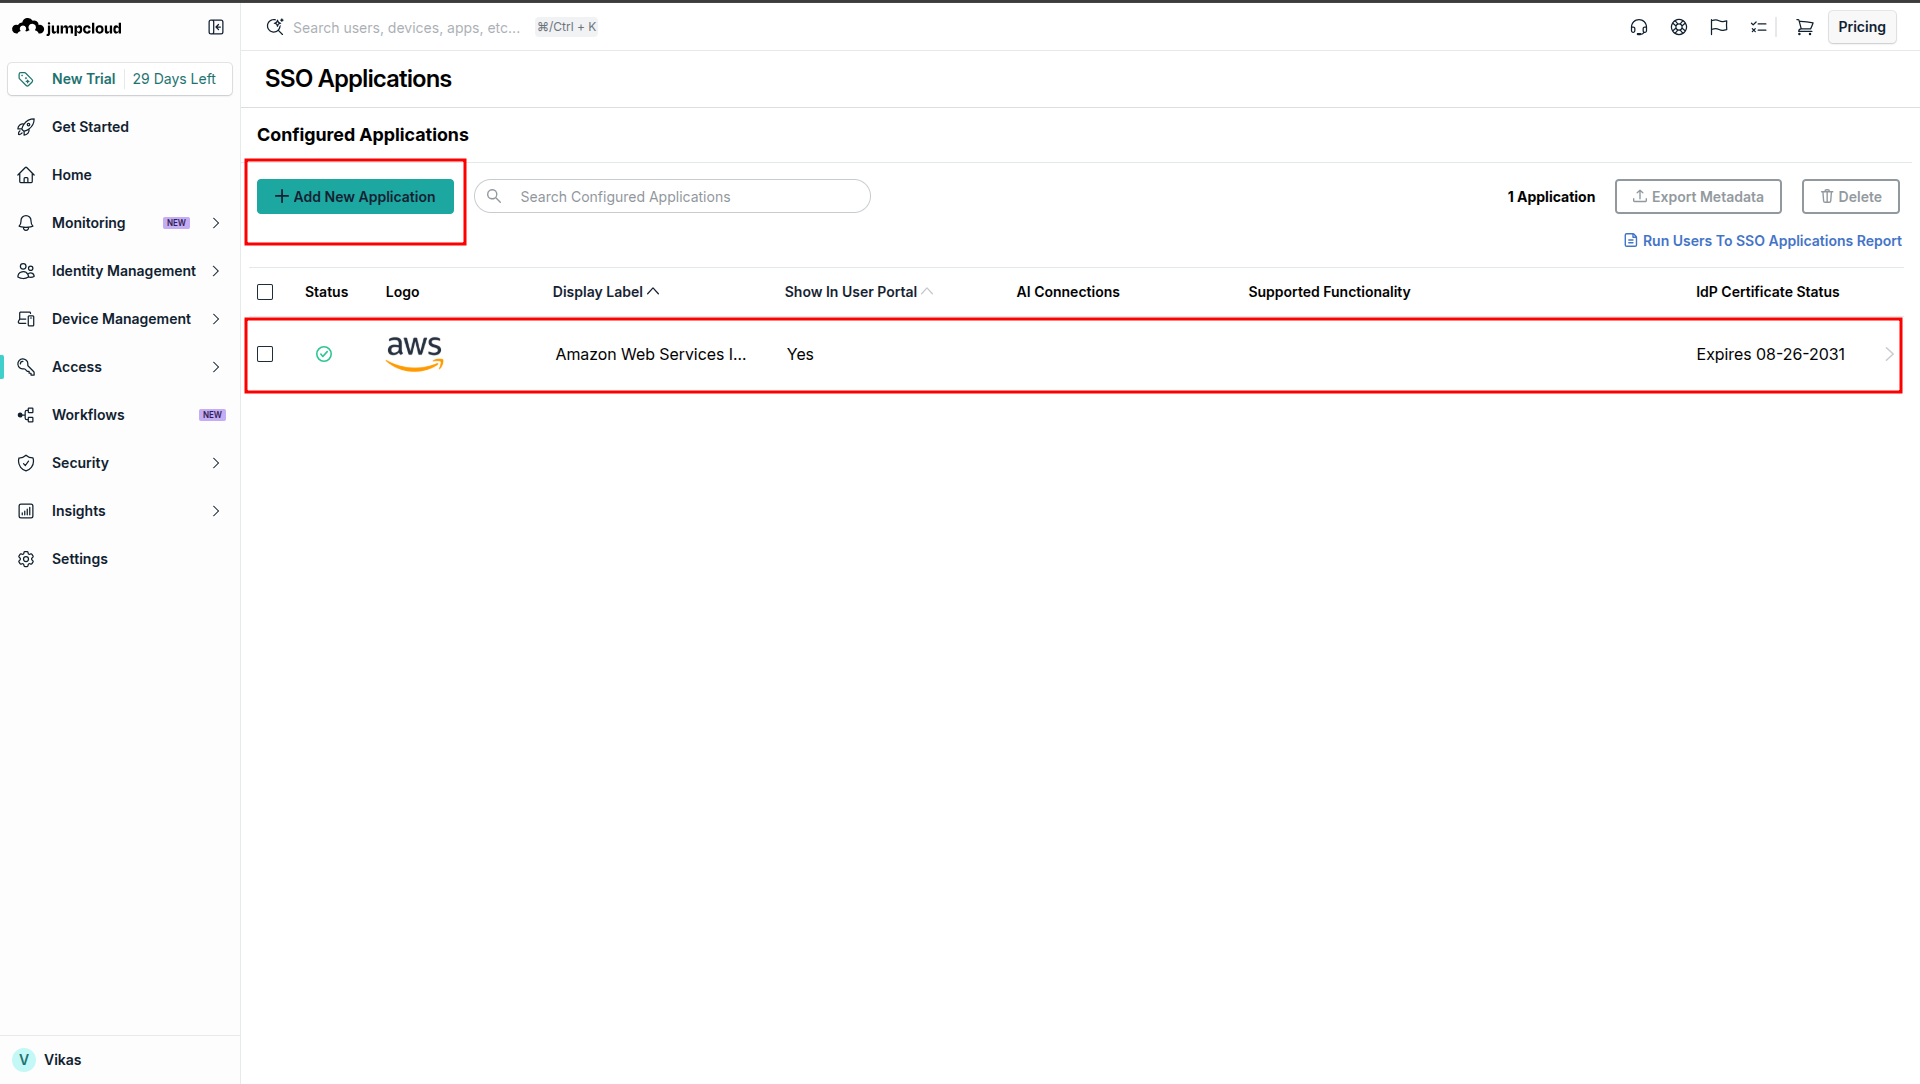
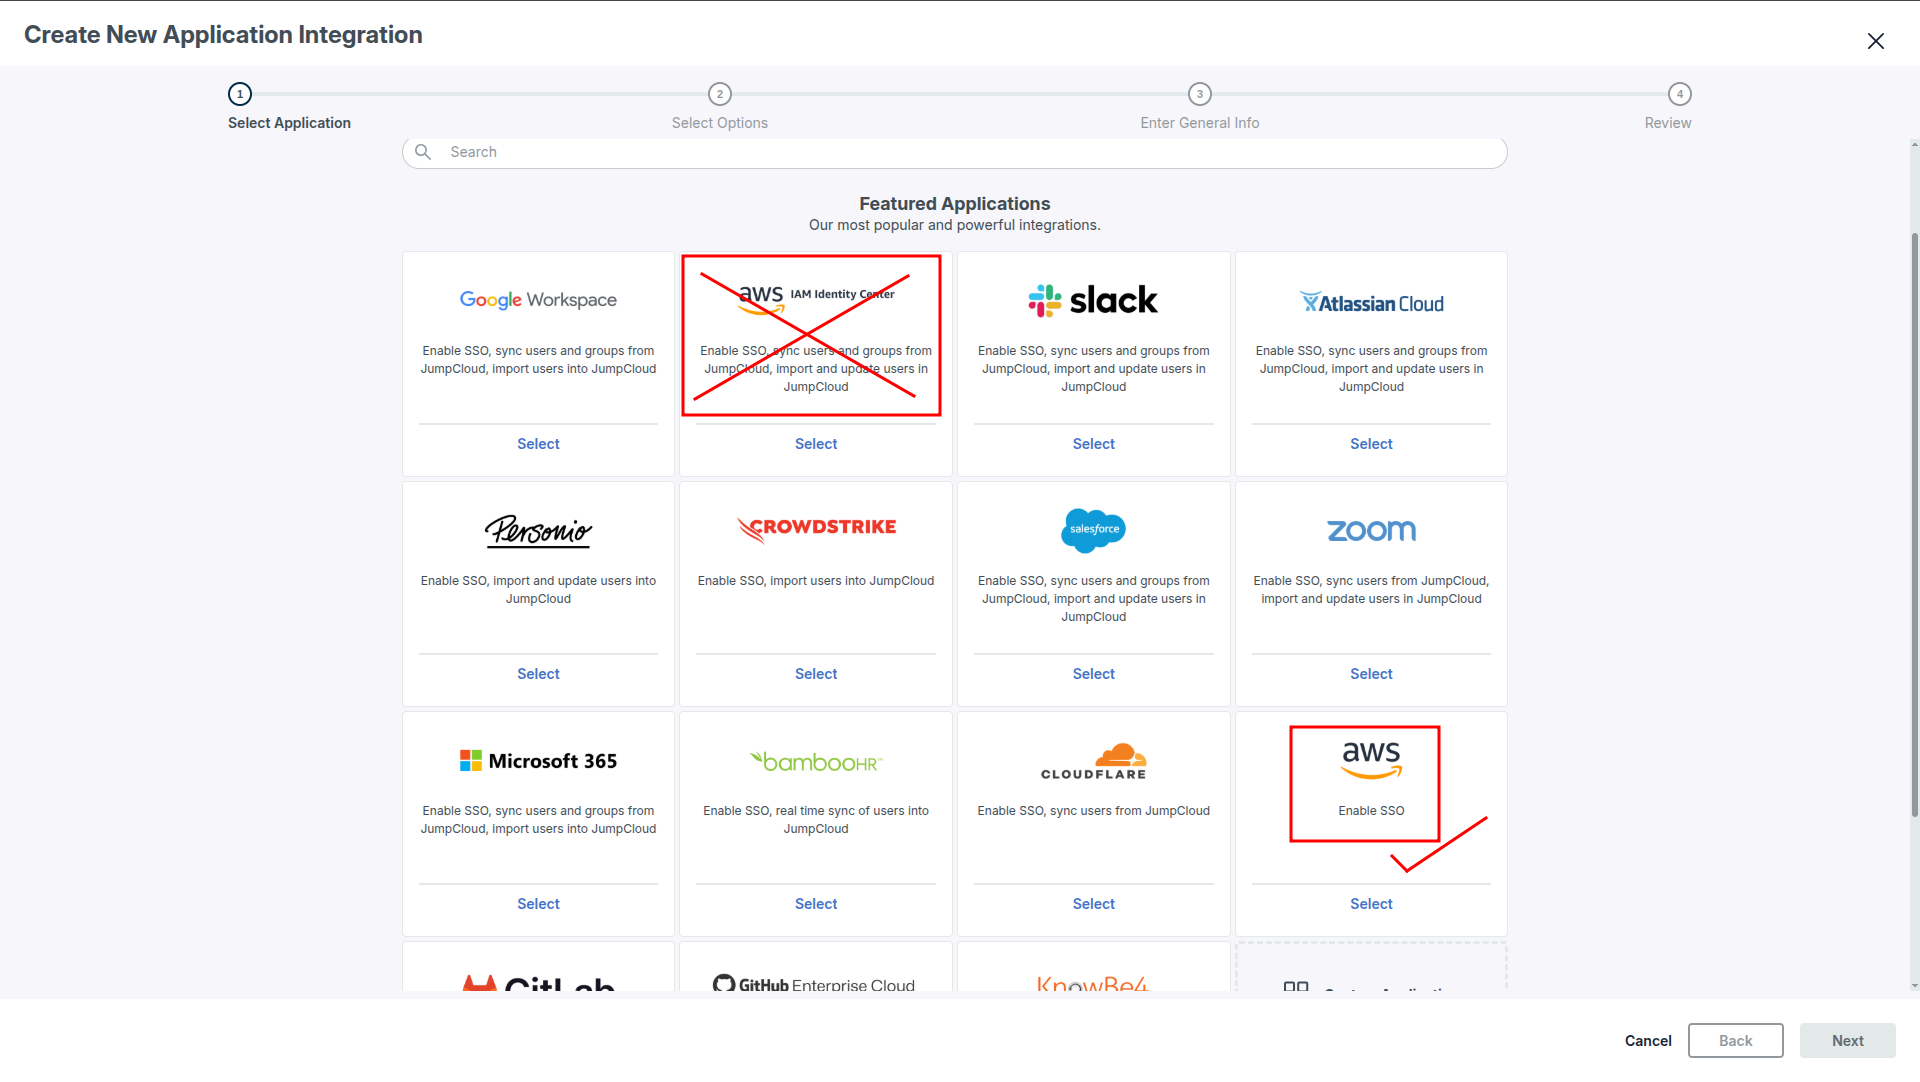
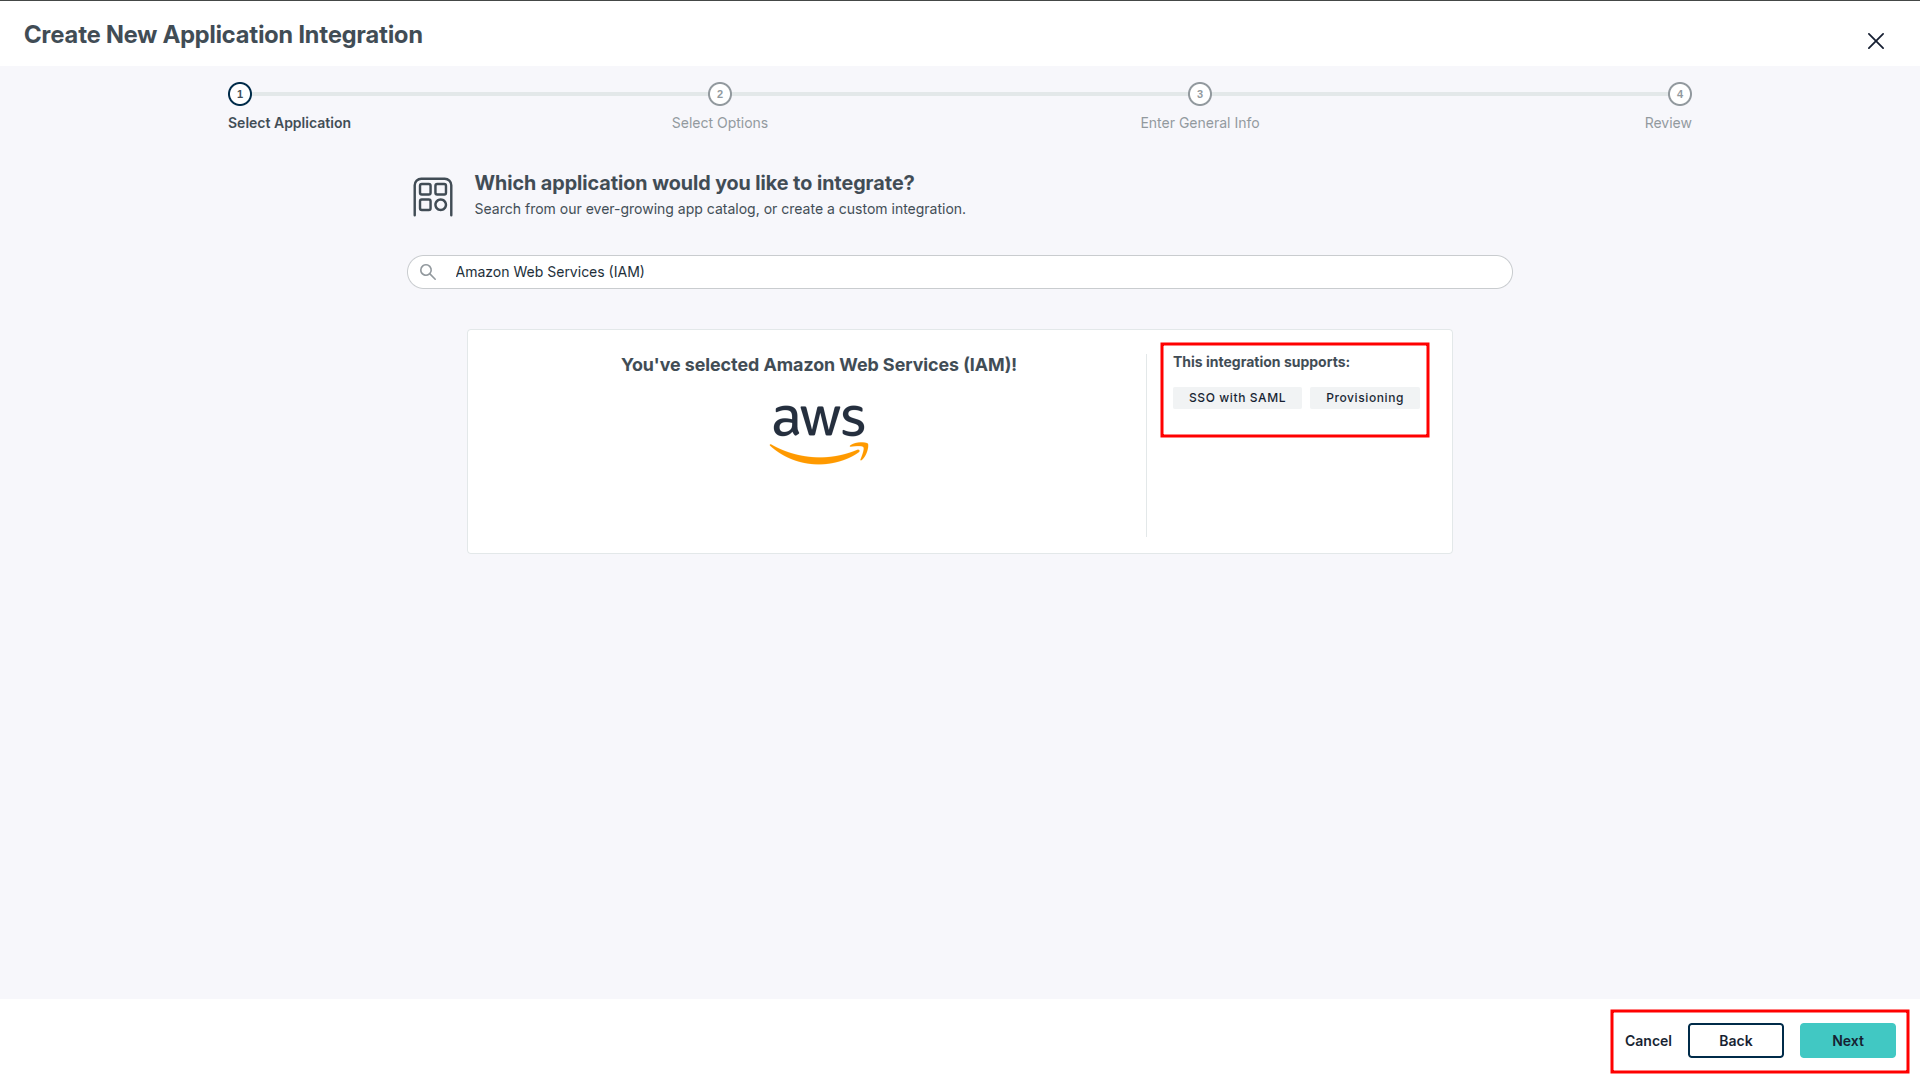
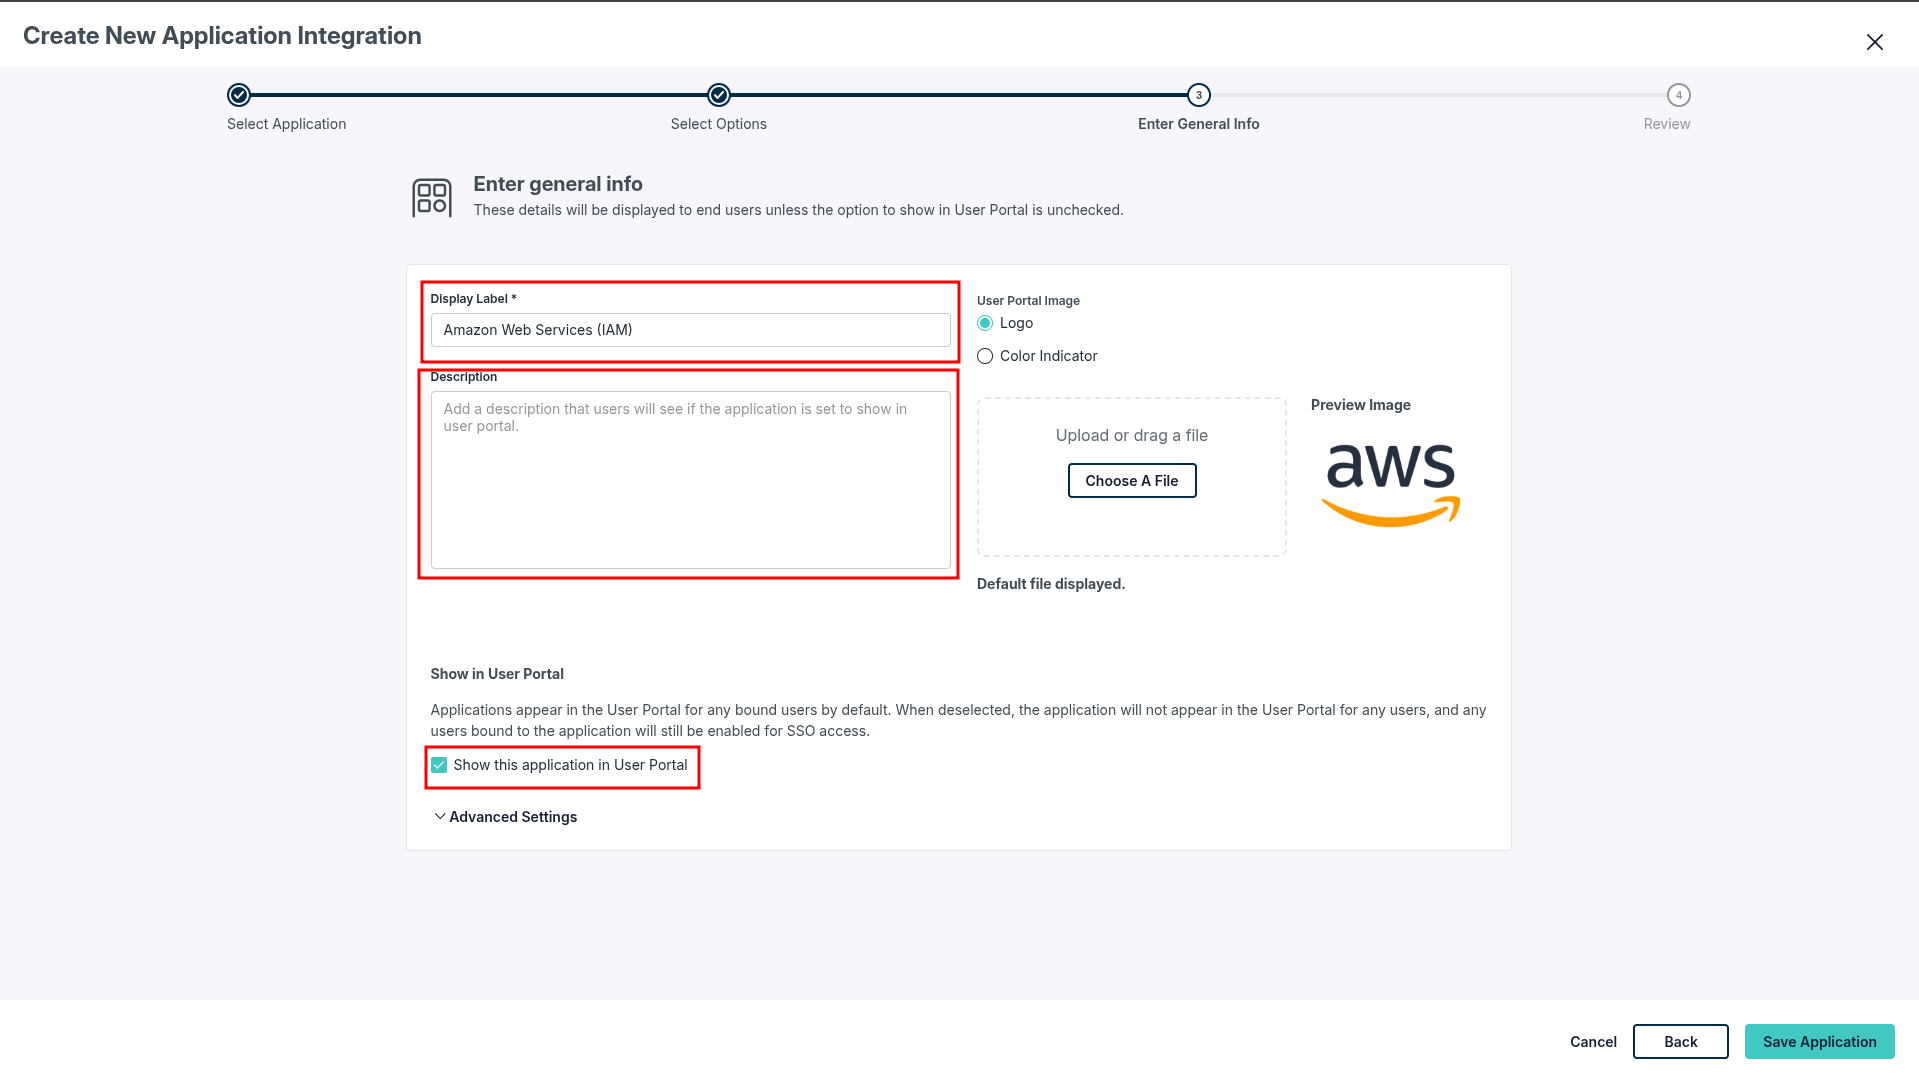
Fill in the general information: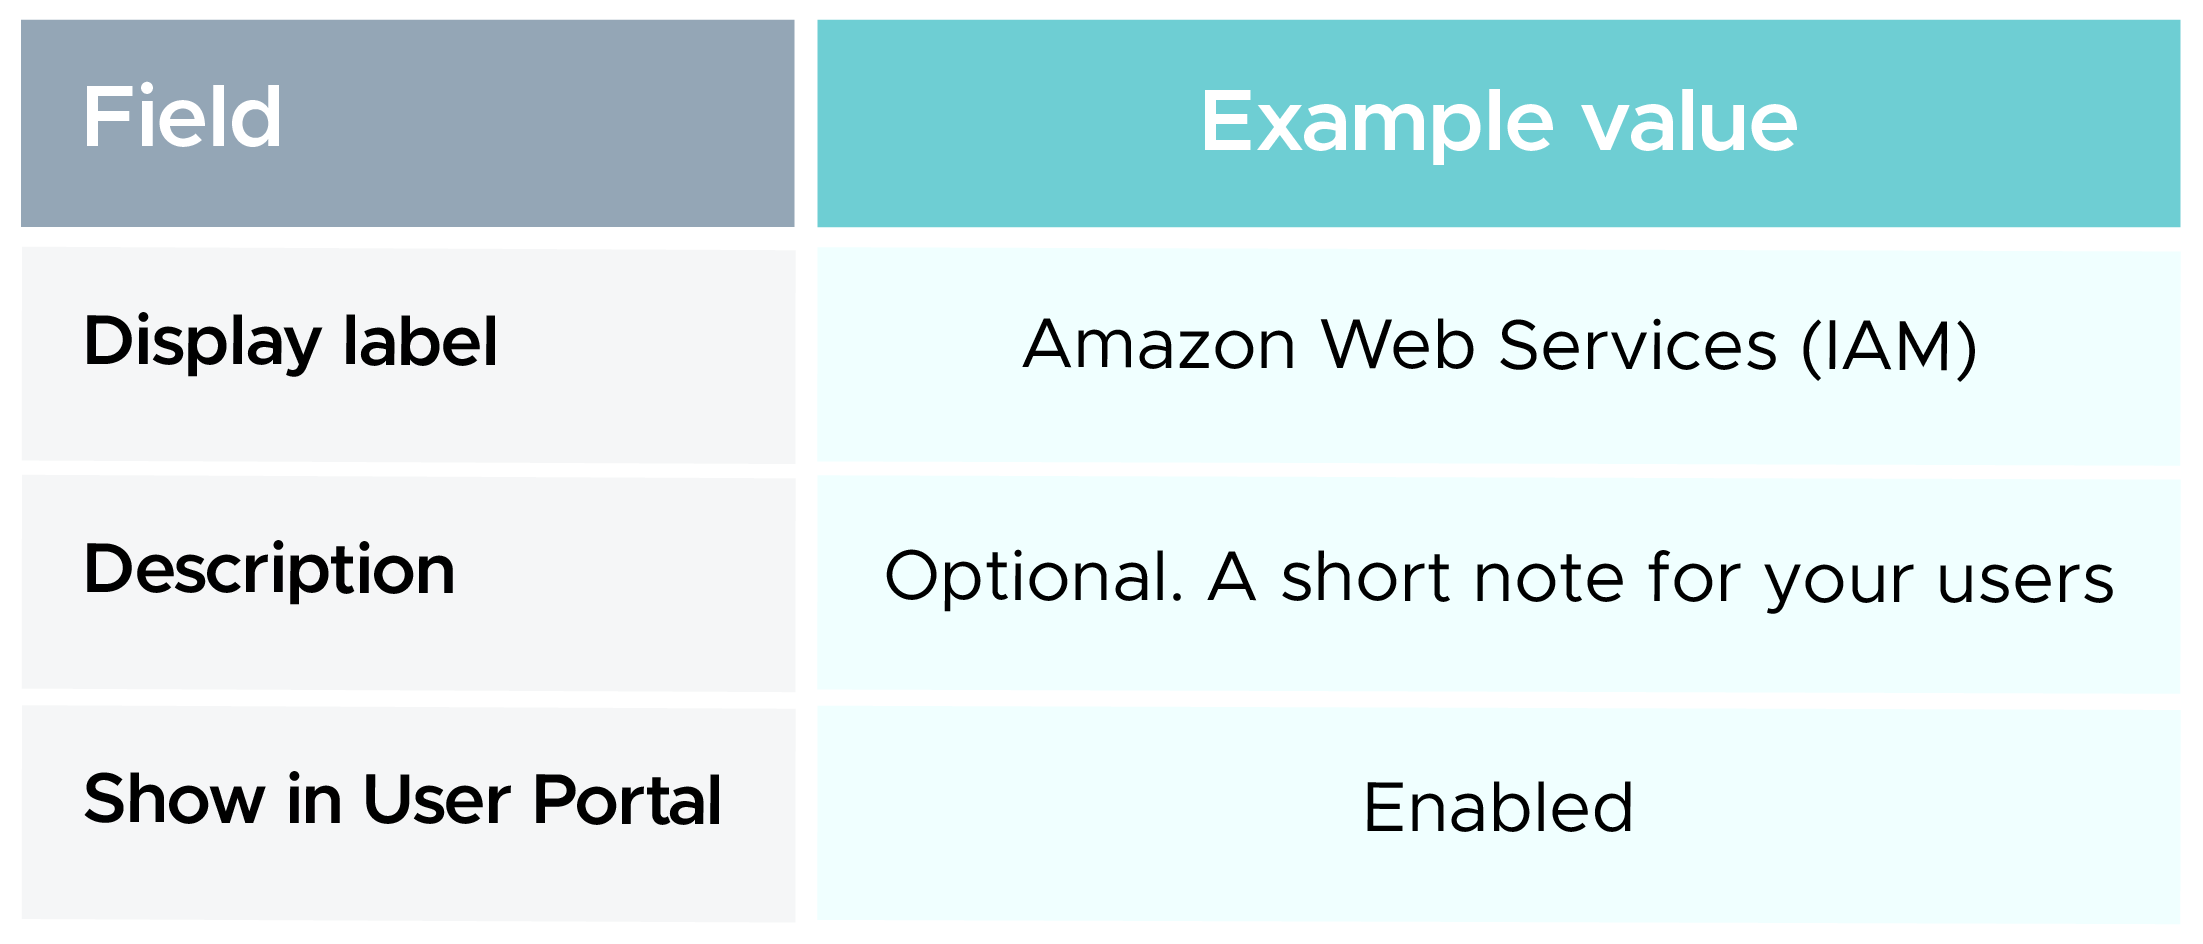
When Show in User Portal is on, authorized users can see the AWS tile in their JumpCloud portal.
Open the application and go to the SSO tab. JumpCloud creates its own SAML details, such as the IdP certificate and the IdP URL. The SSO URL looks like this (your region may be different):
https://sso.jumpcloud.com/saml2/amazonwebservicesiam
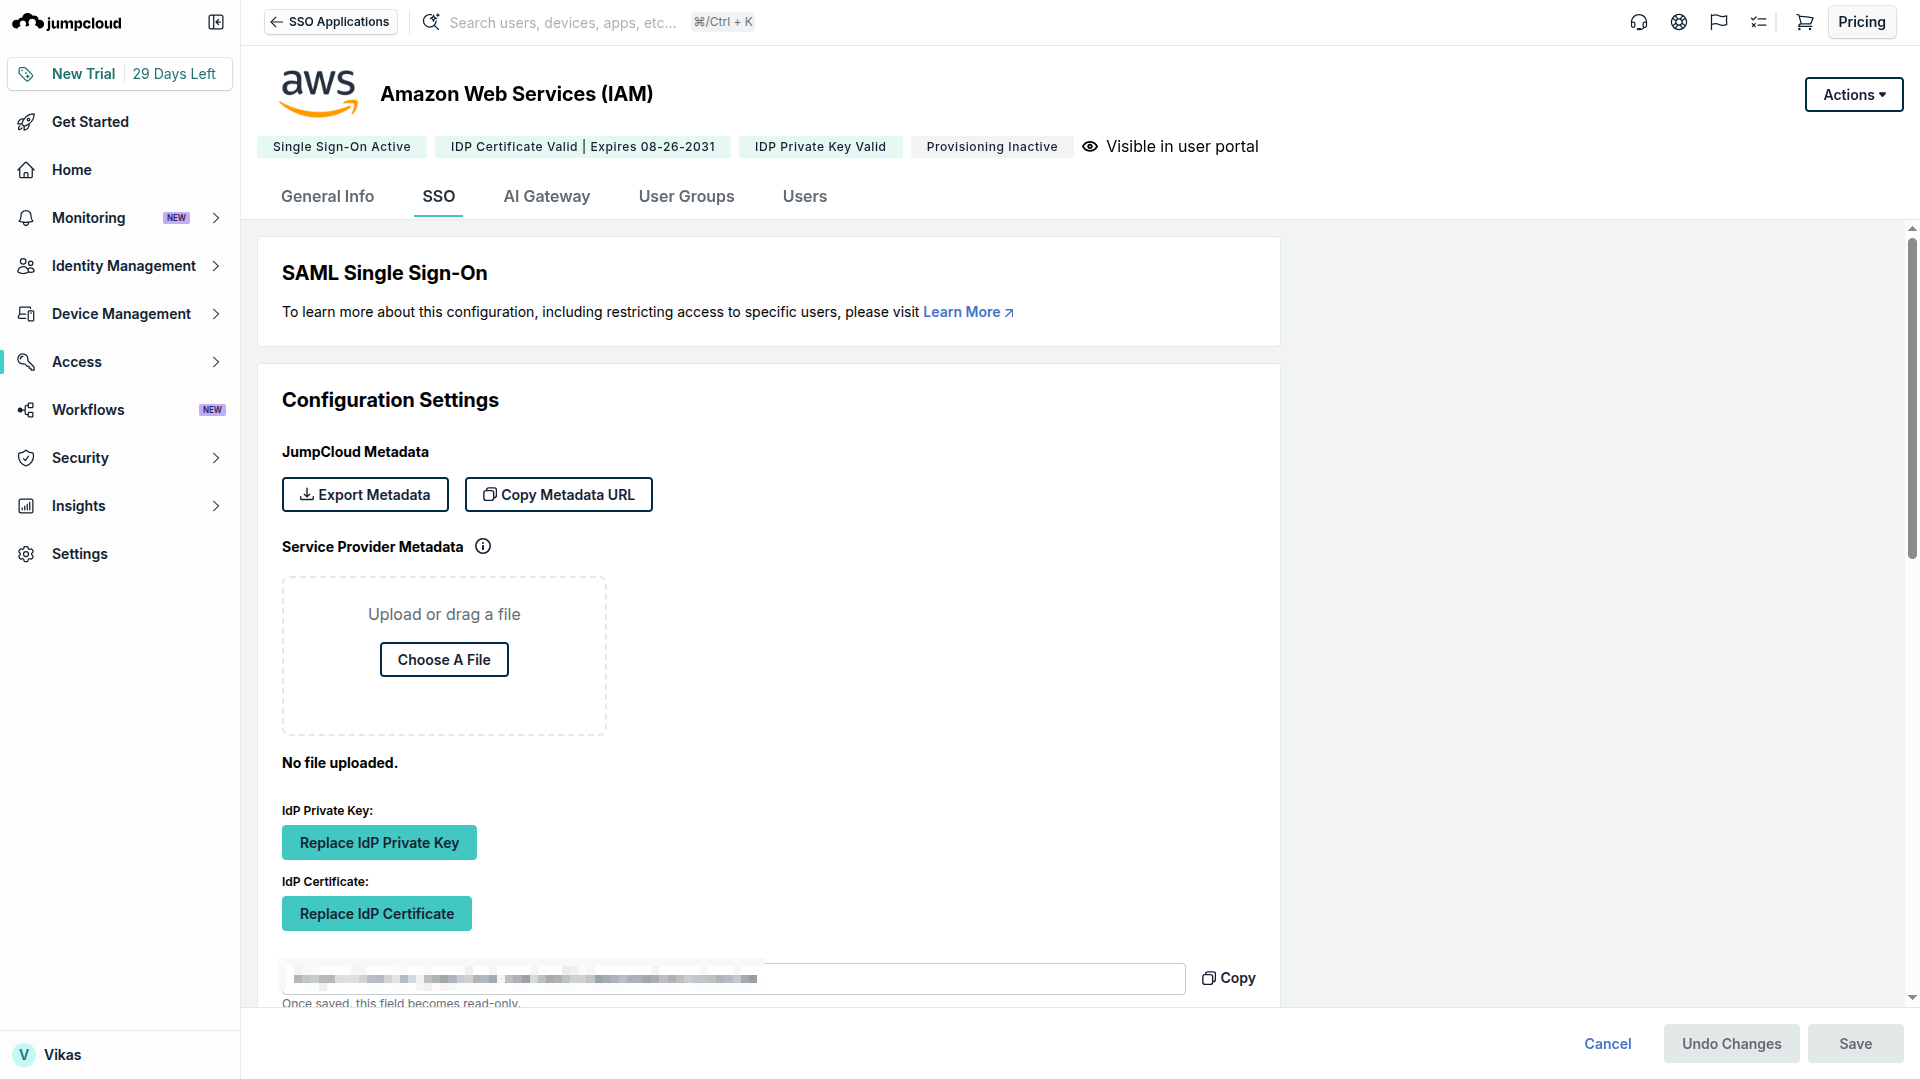
Click Export Metadata and save the XML file, for example JumpCloud-AWS-IAM-metadata.xml. AWS uses this file to trust JumpCloud as the SAML identity provider.
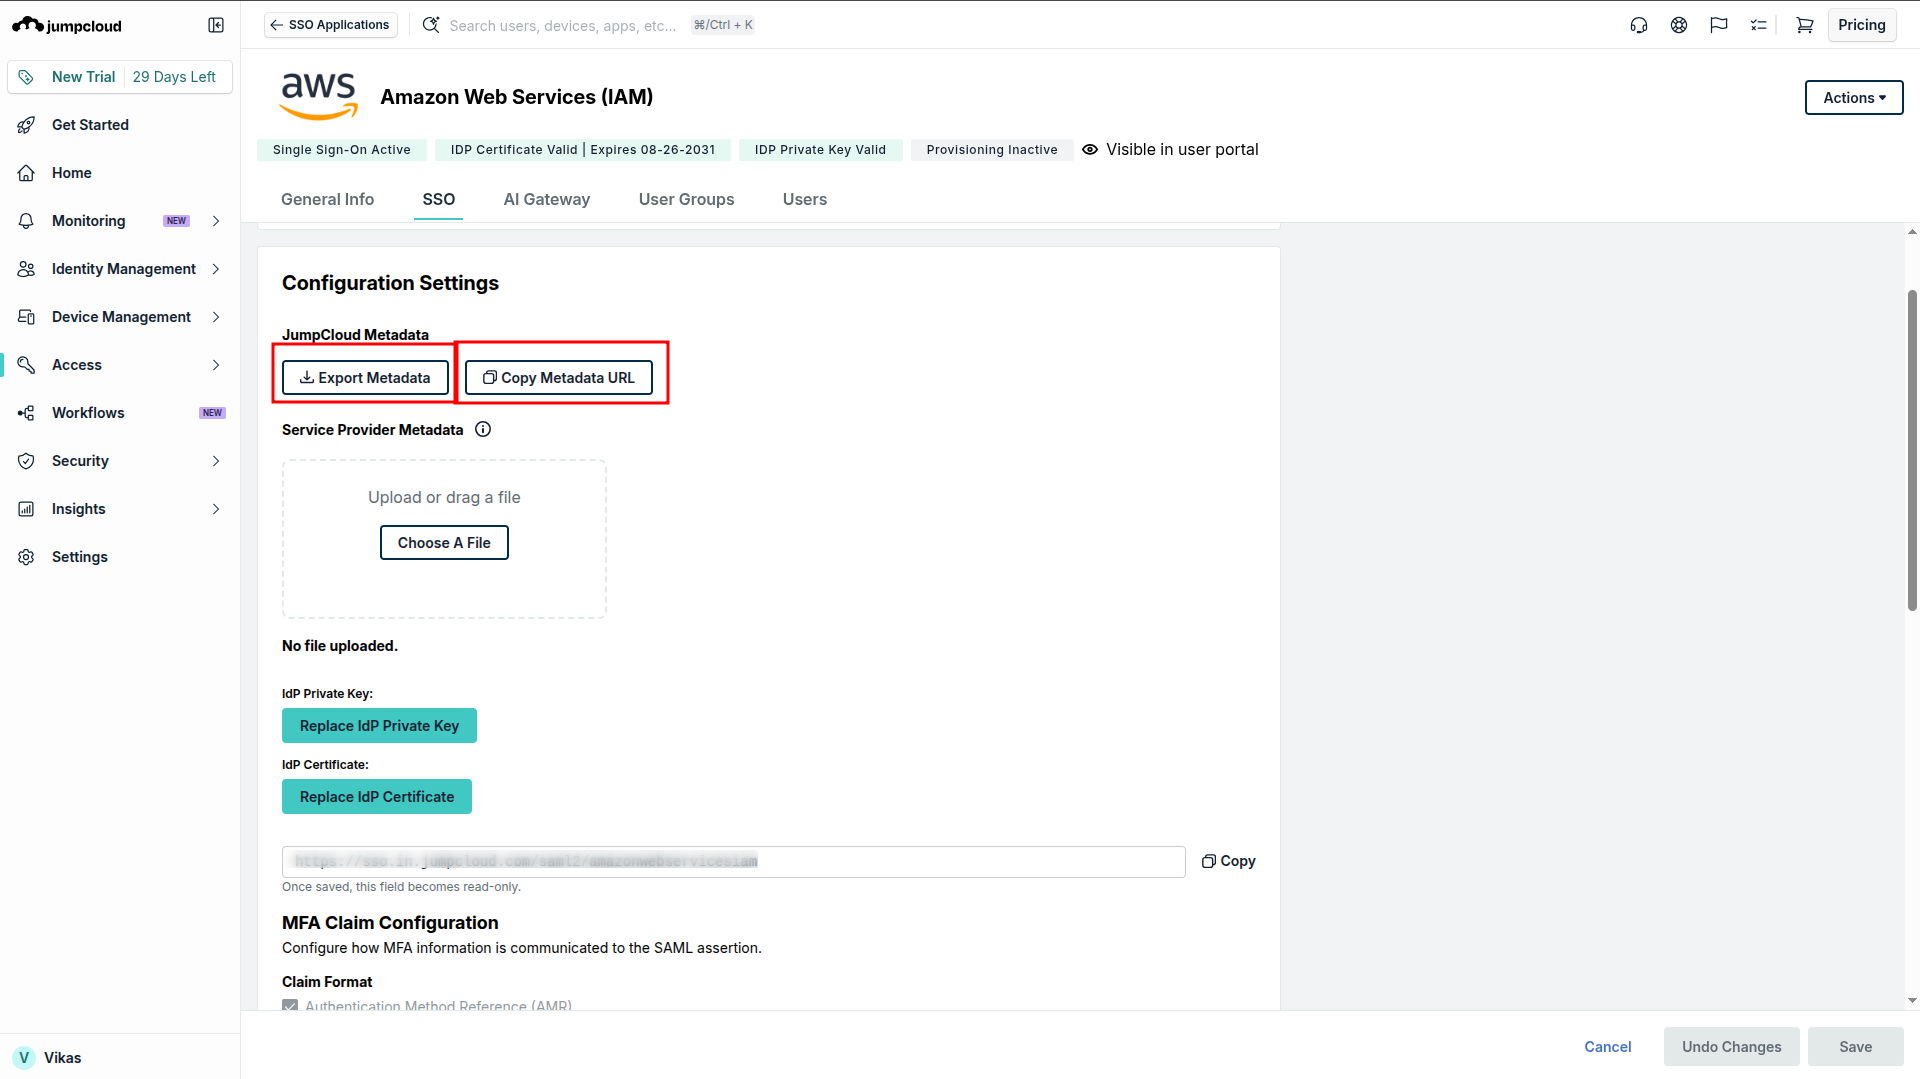
Important: The SSO tab may show an IdP private key. Never copy, share, or publish it. AWS does not need it. AWS only needs the metadata file, which contains the public certificate.
Now open the AWS console and go to IAM:
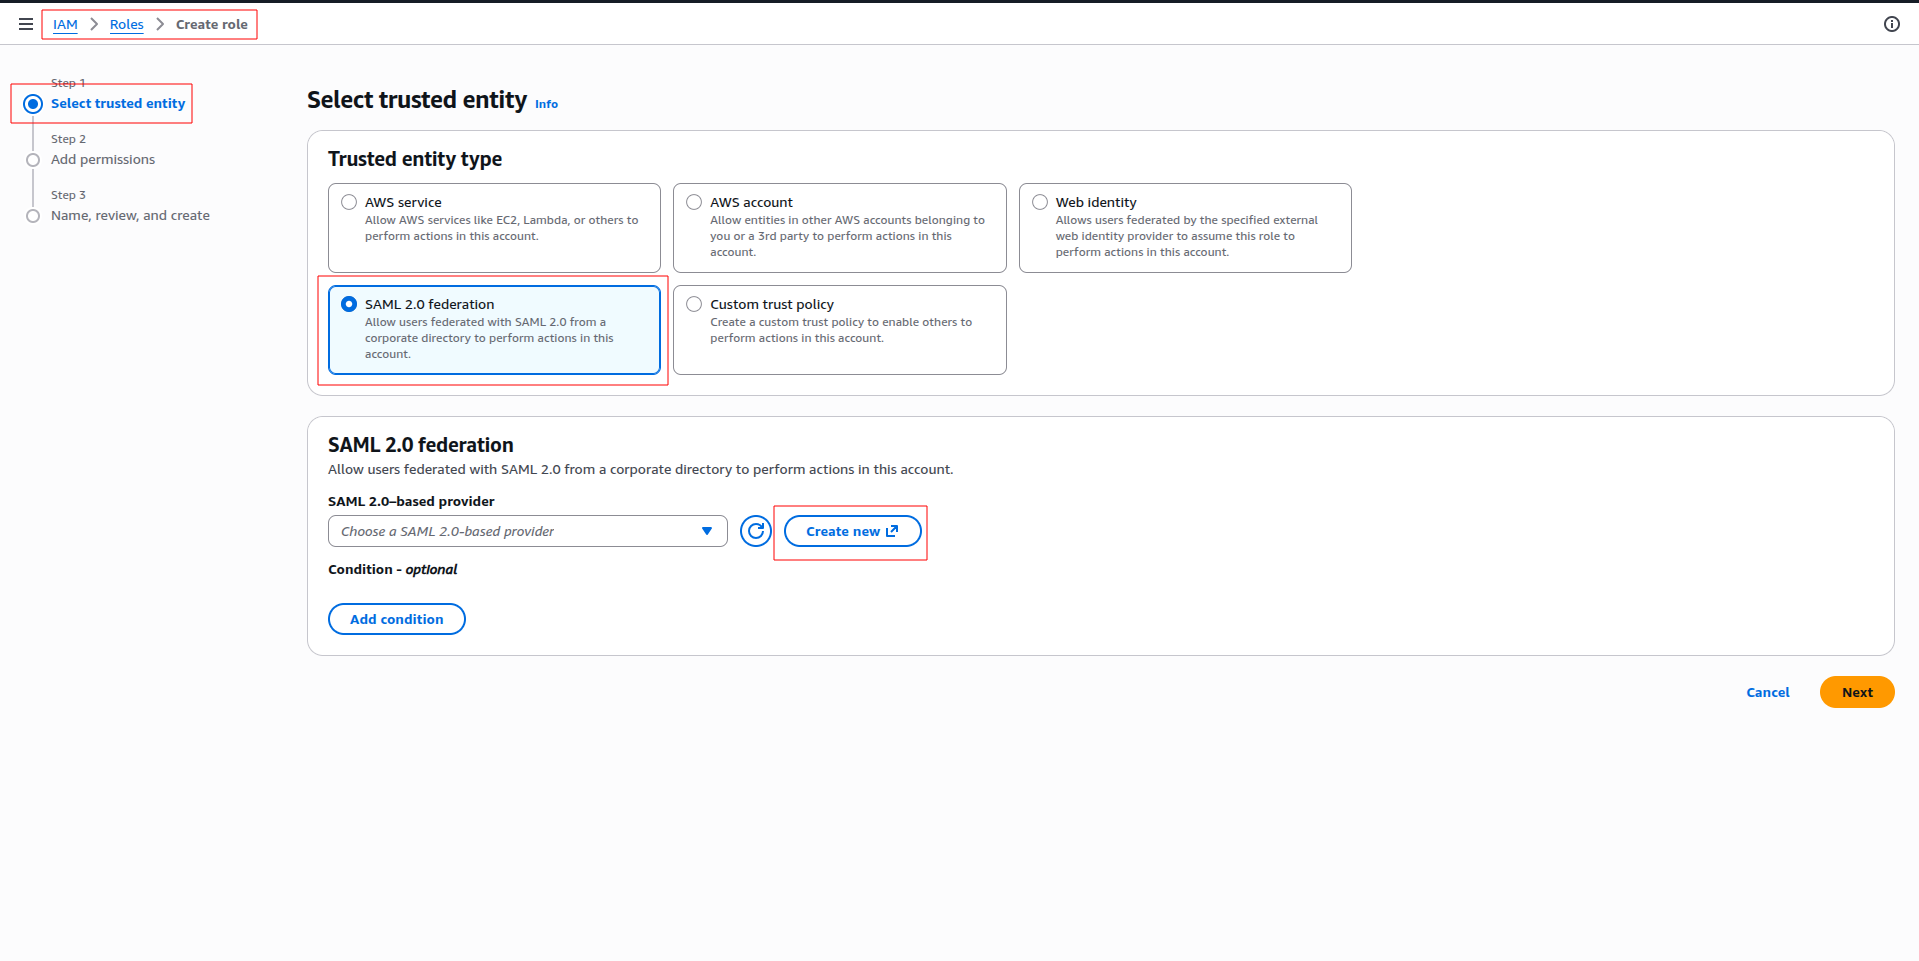
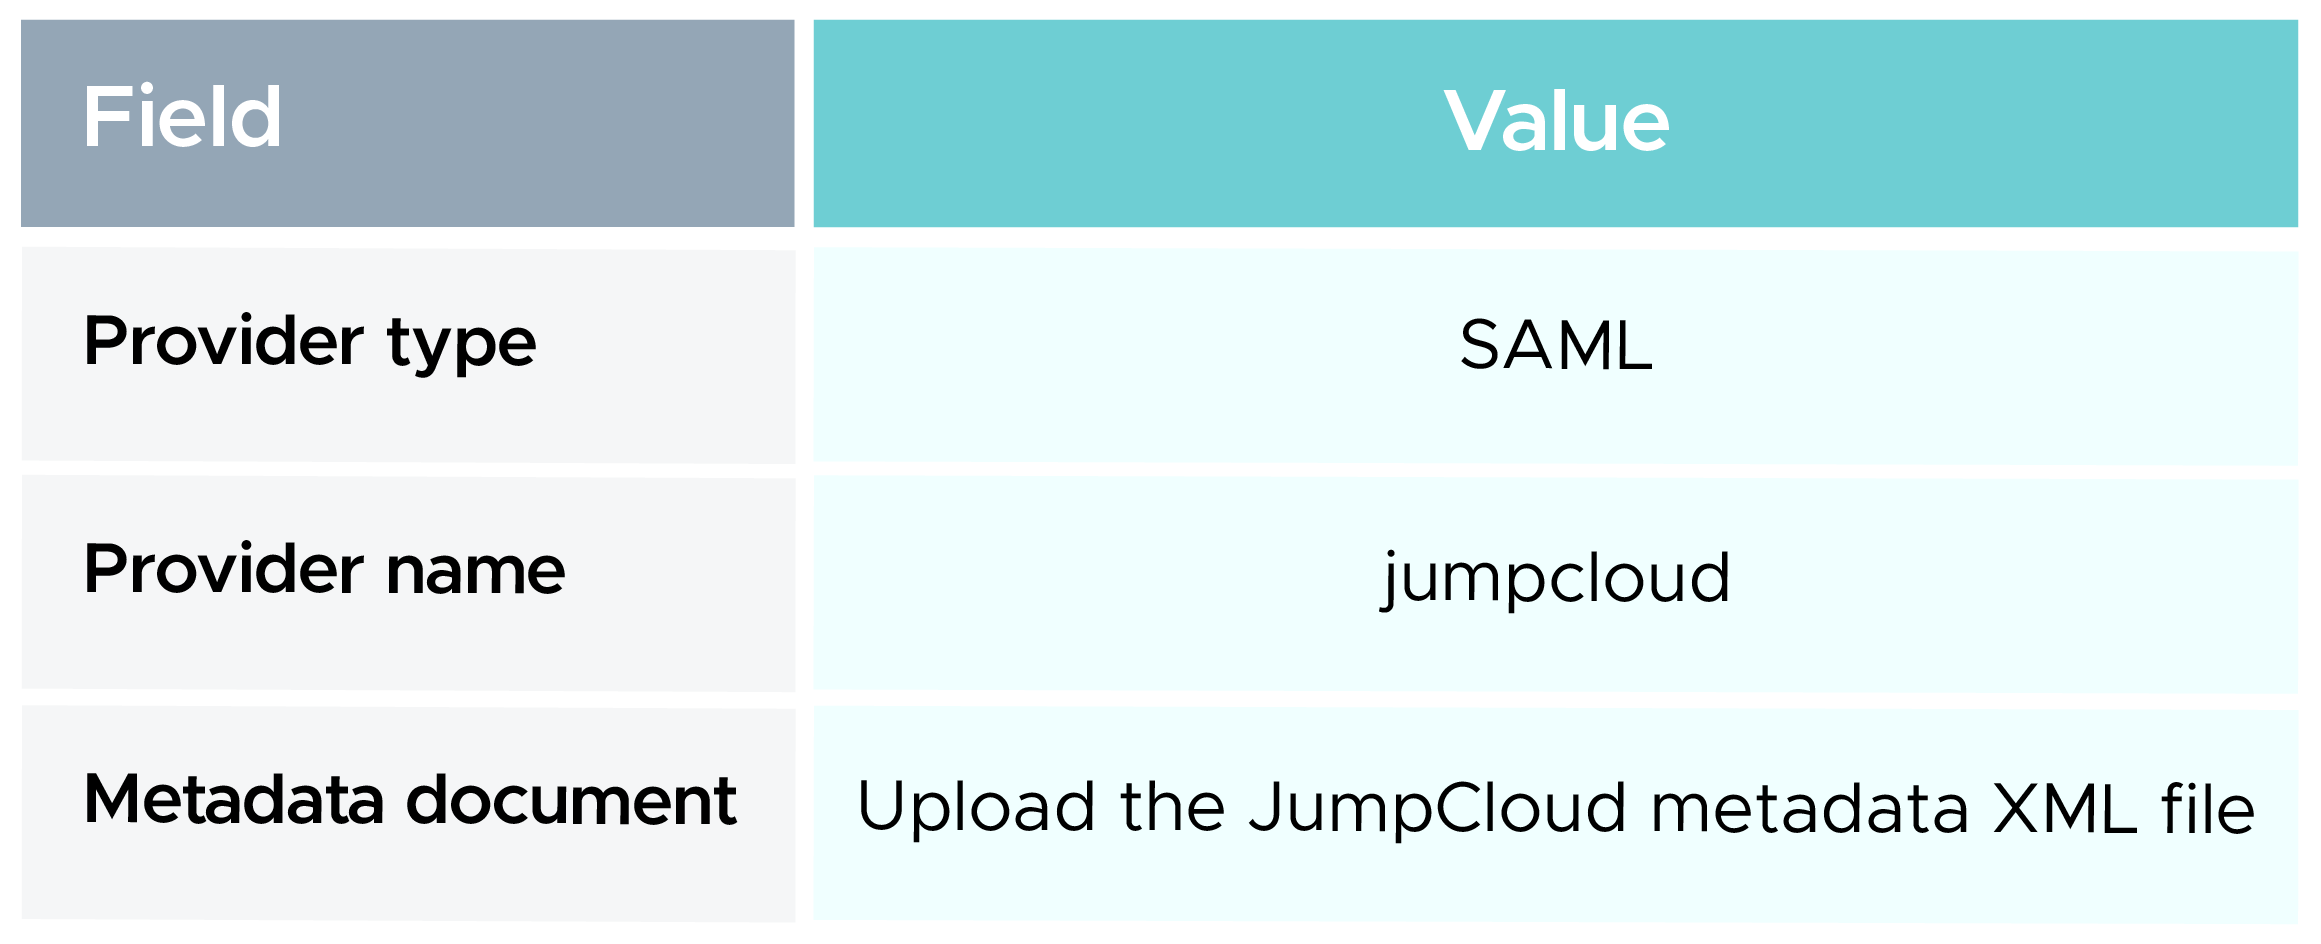
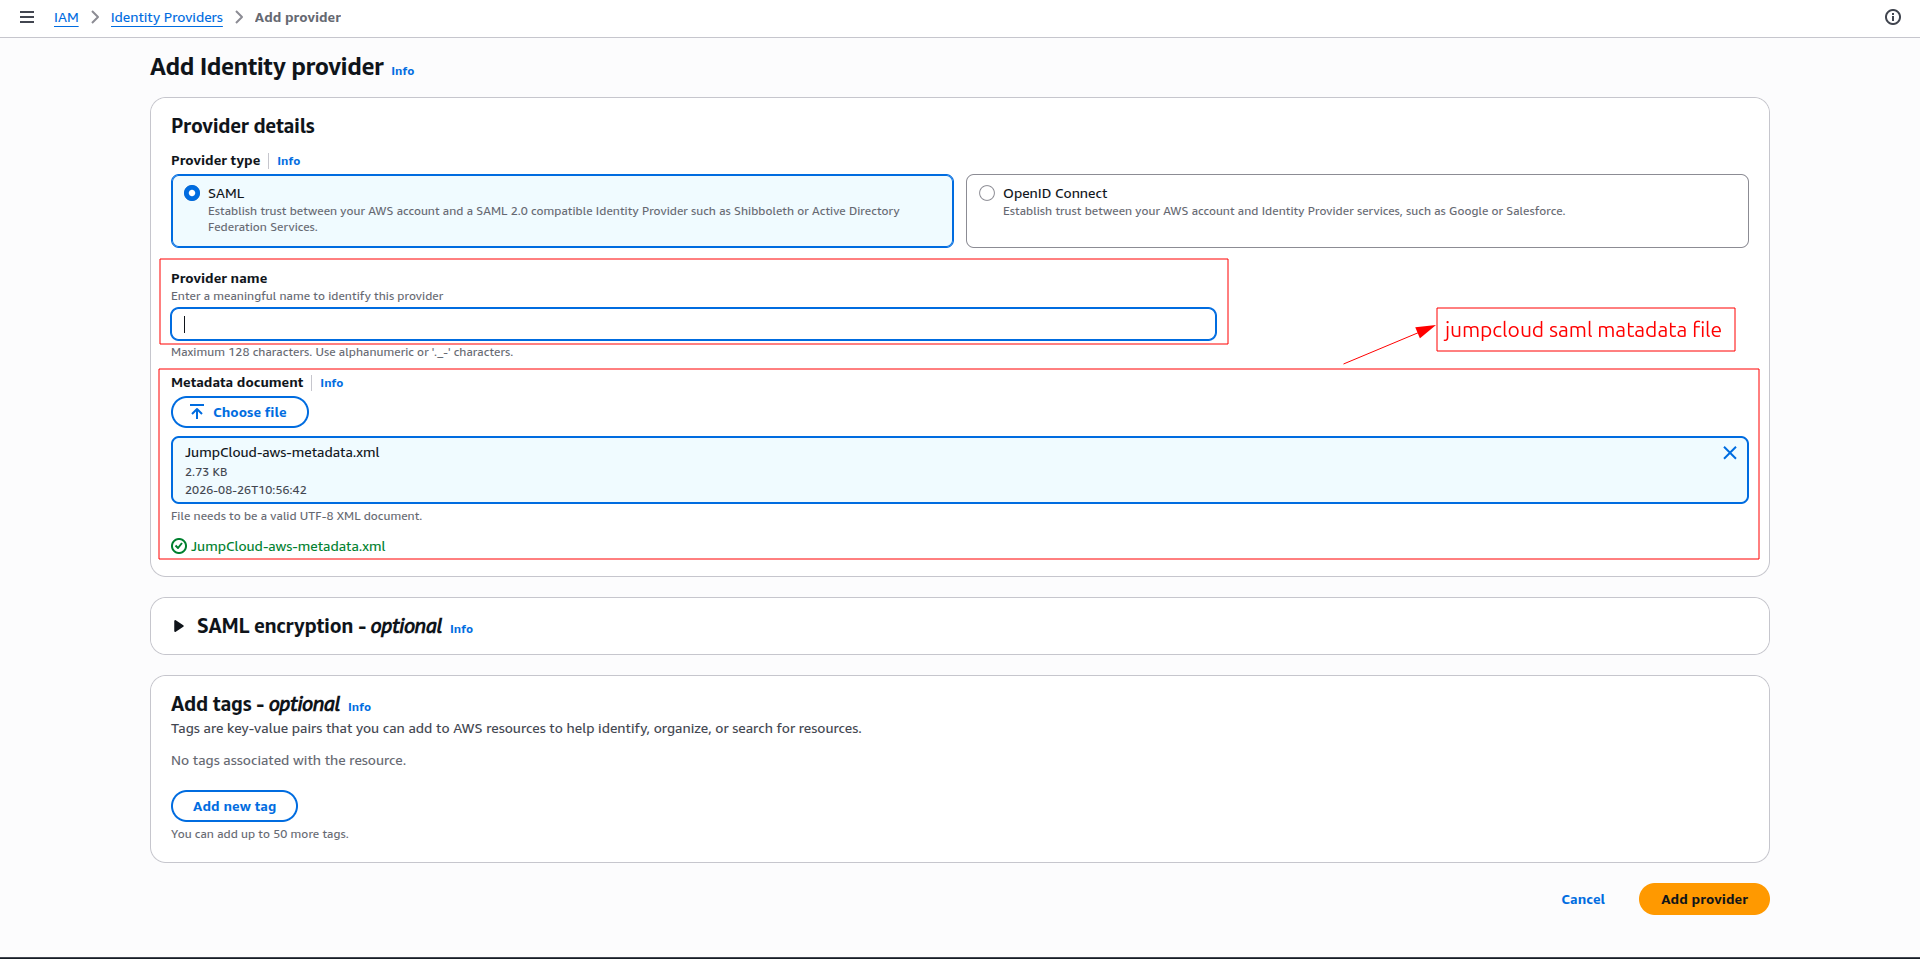
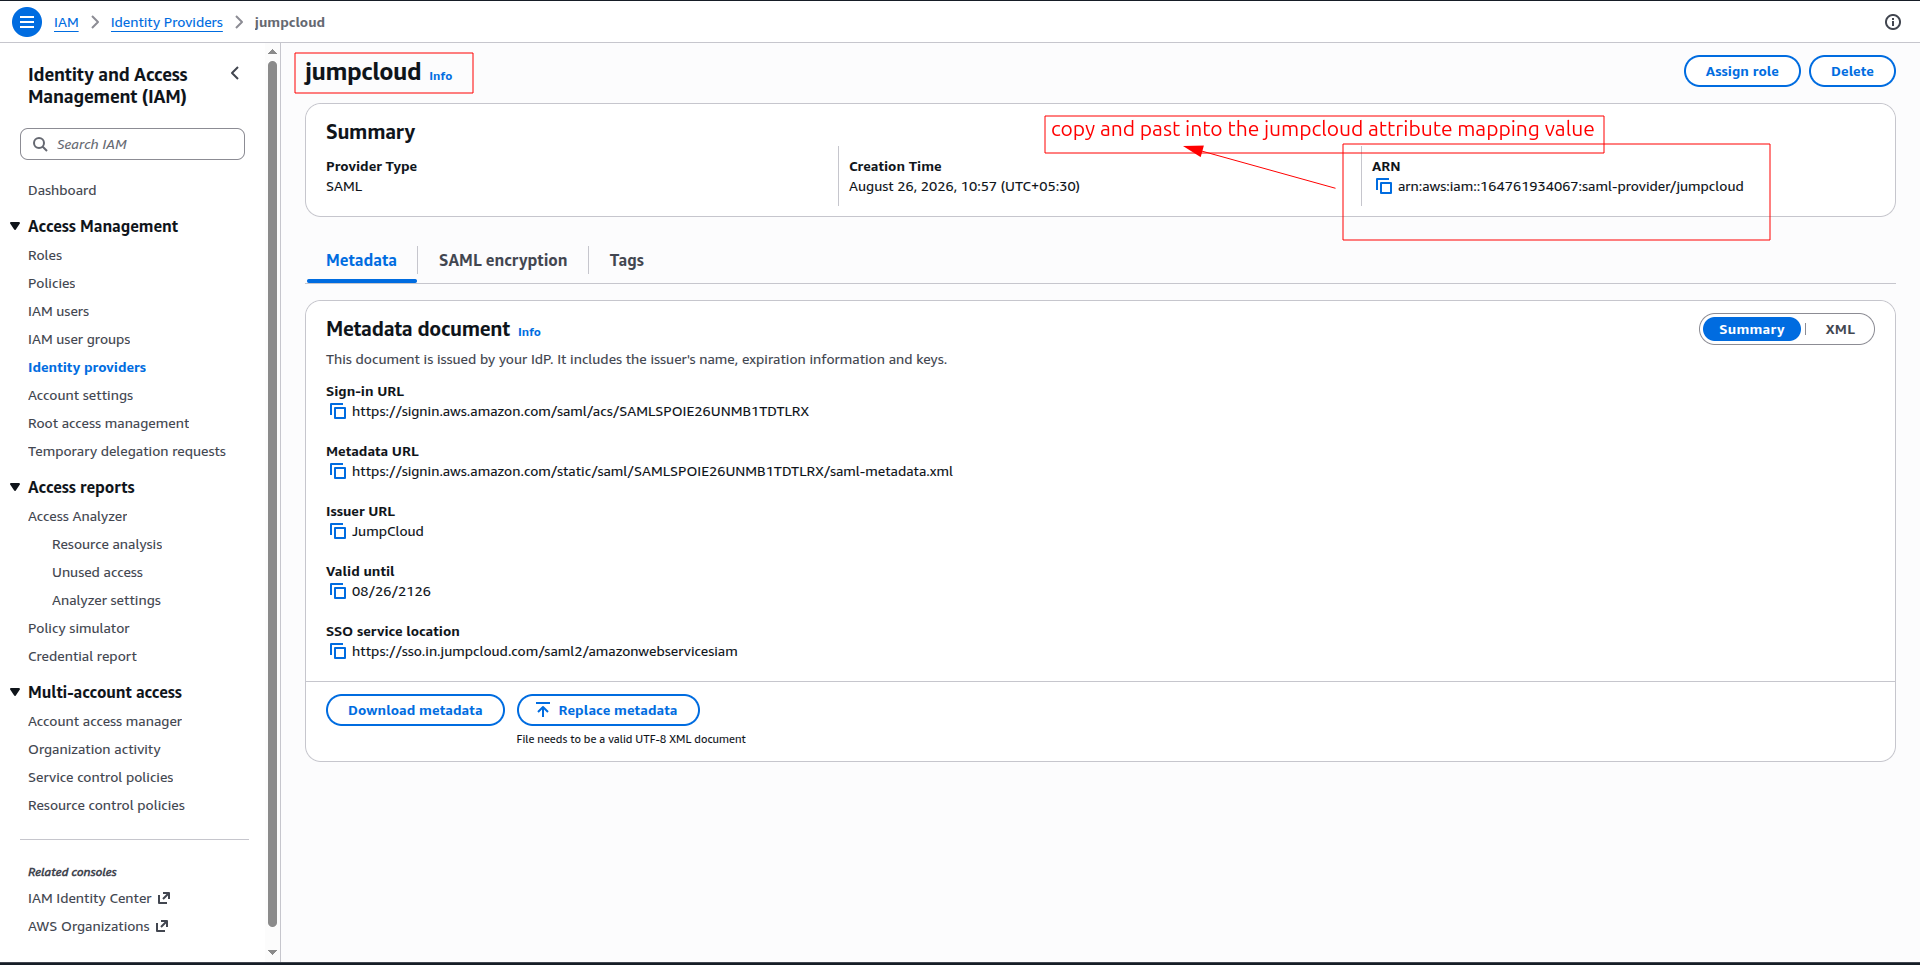
After you save, the provider ARN looks like this:
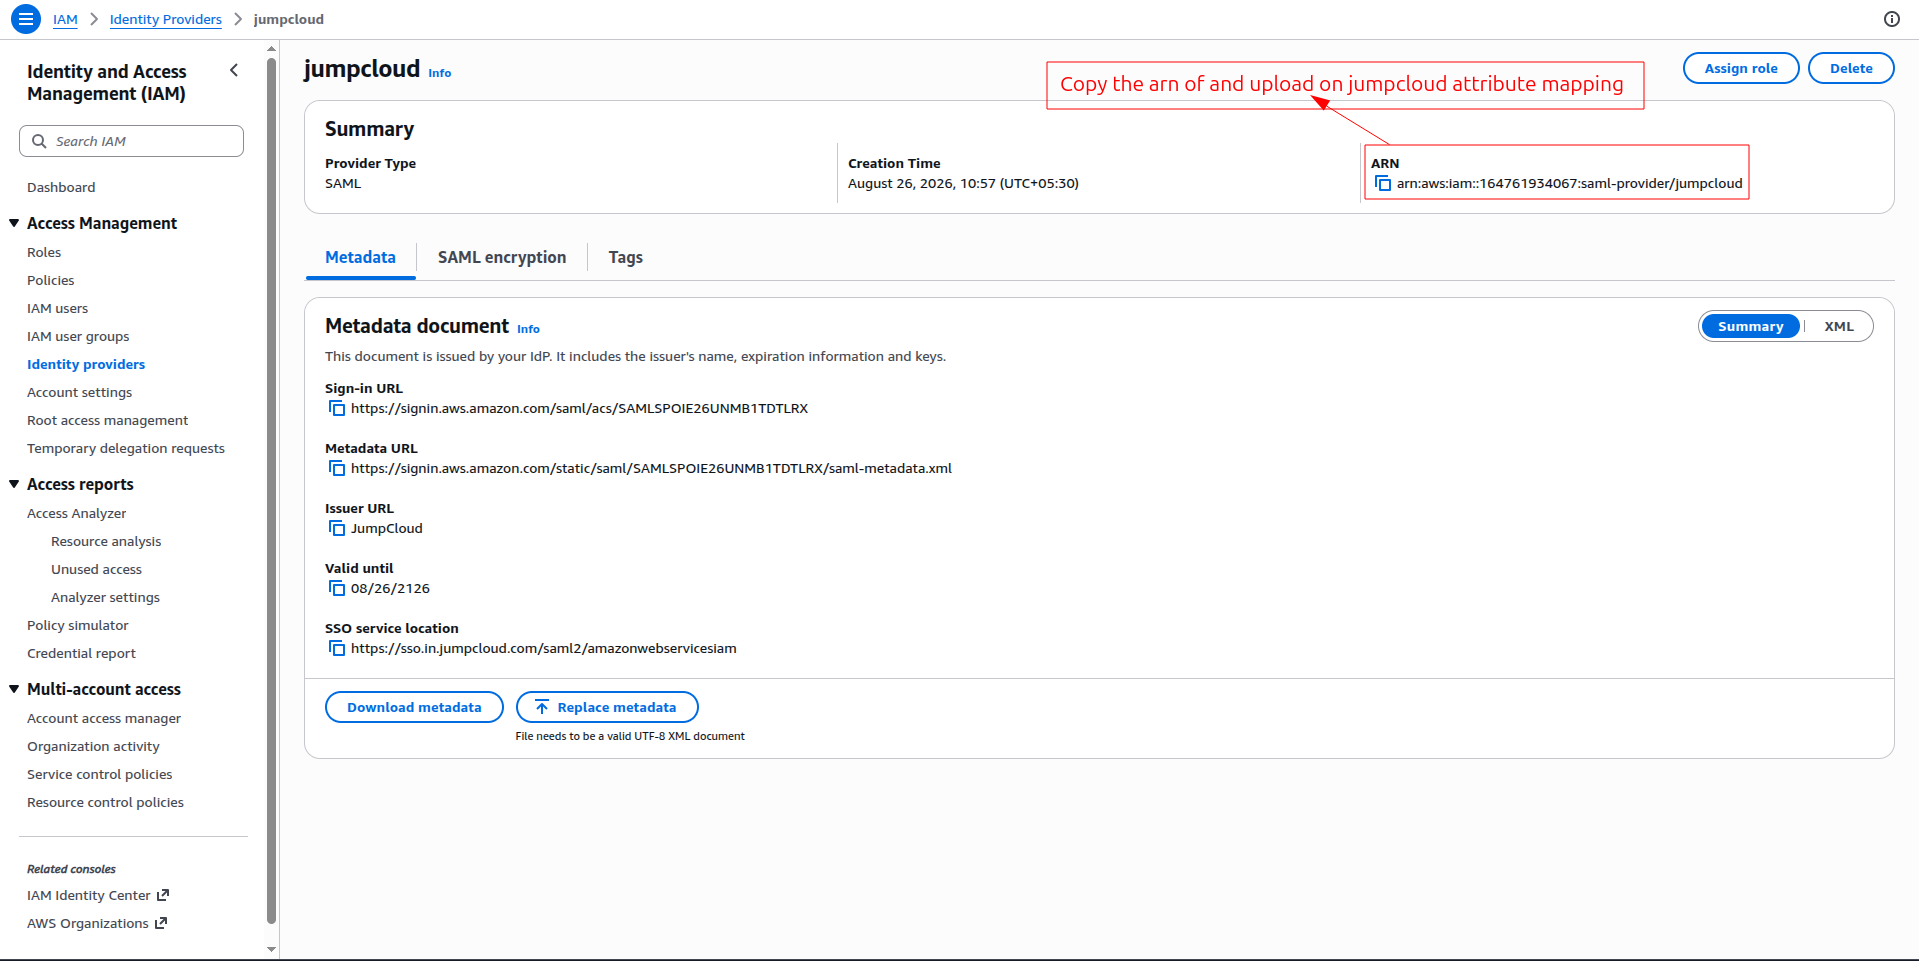
The SAML provider only sets up trust with JumpCloud. Users still need IAM roles to get any permissions.
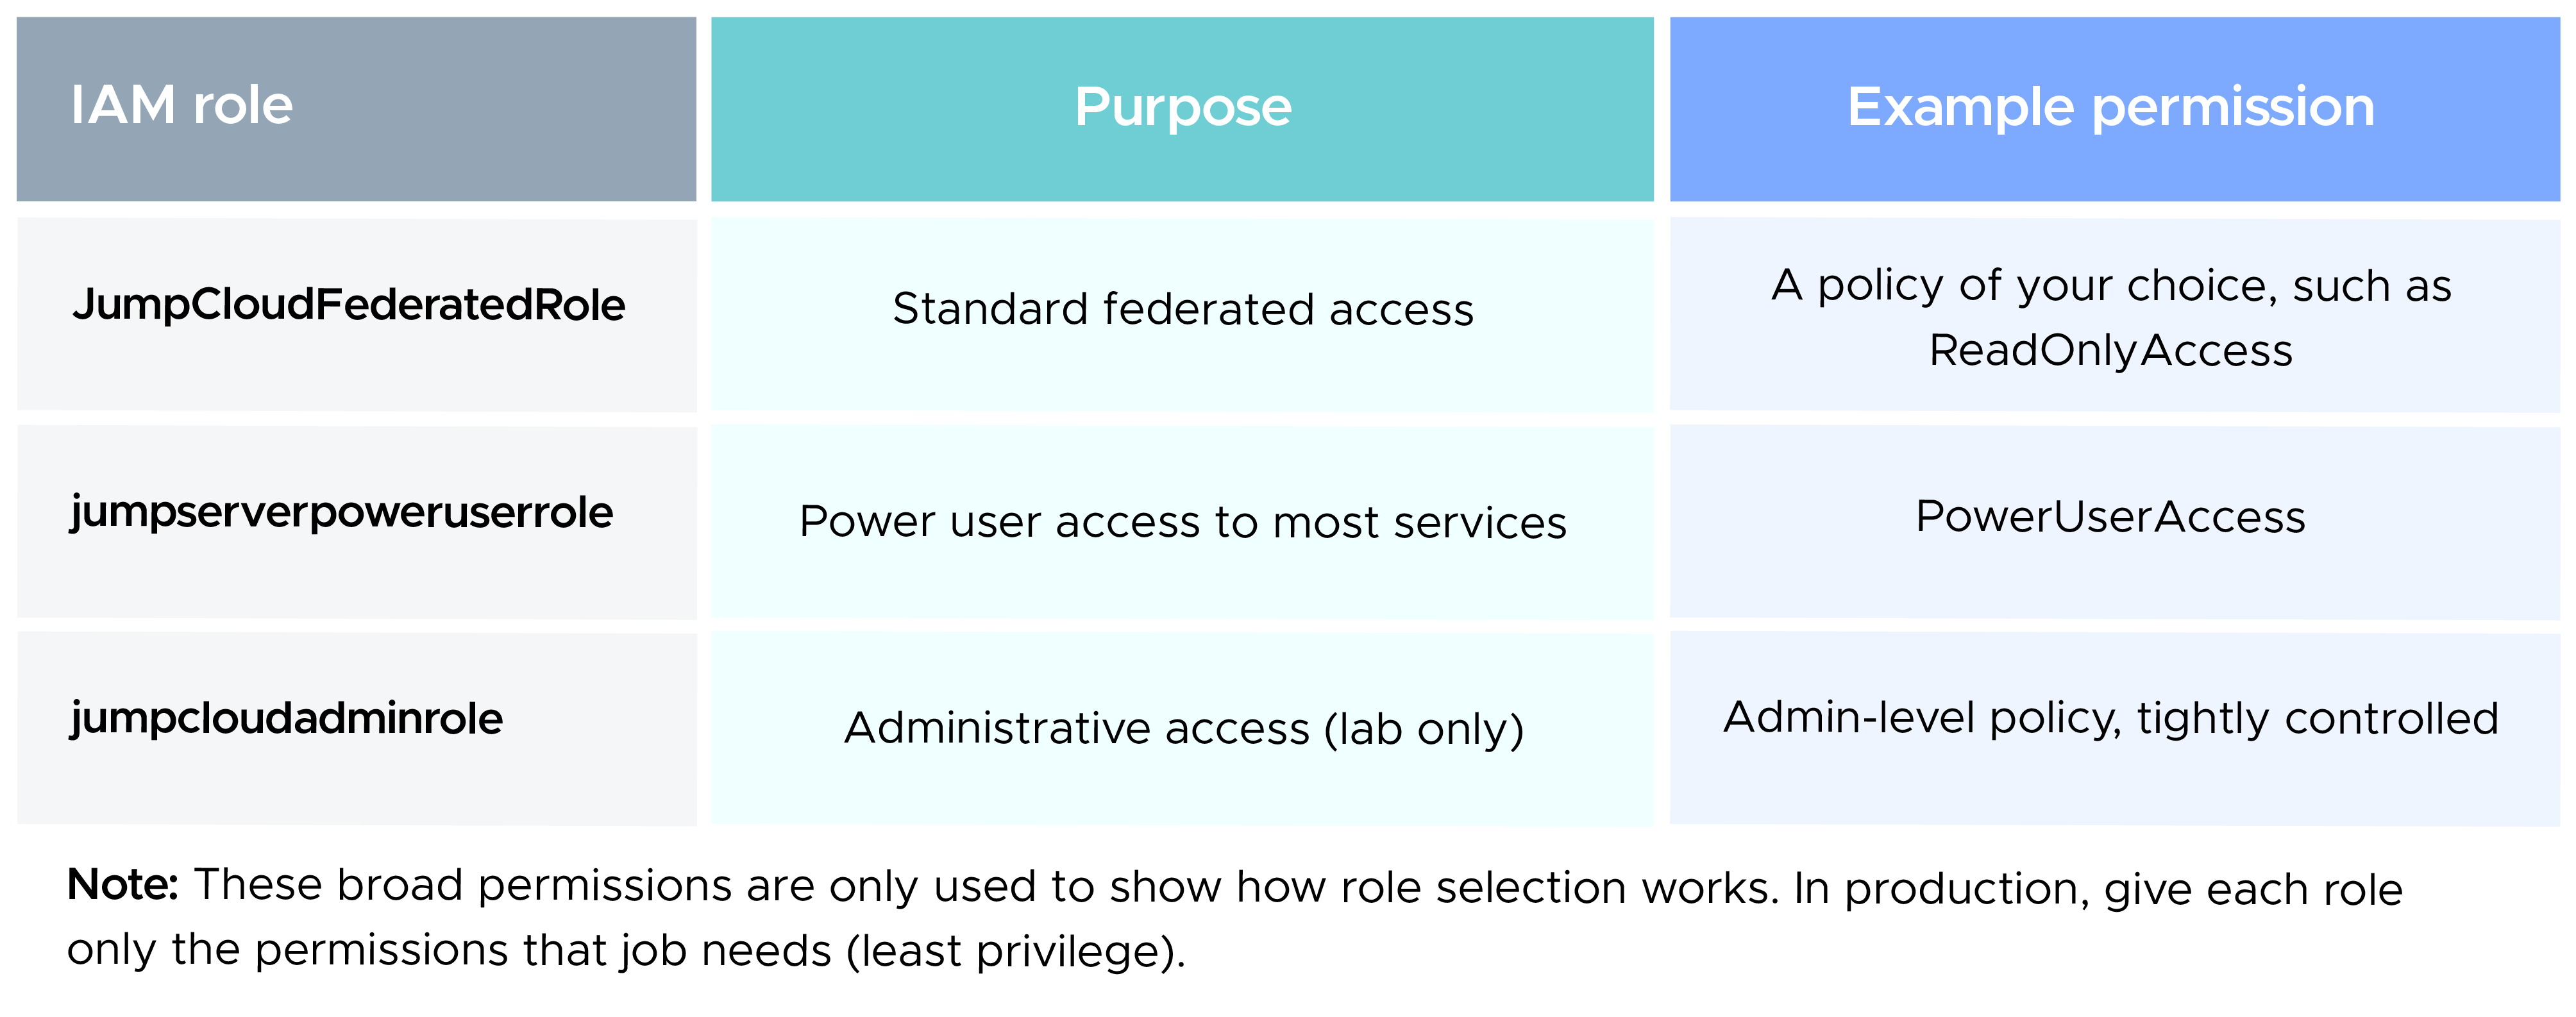
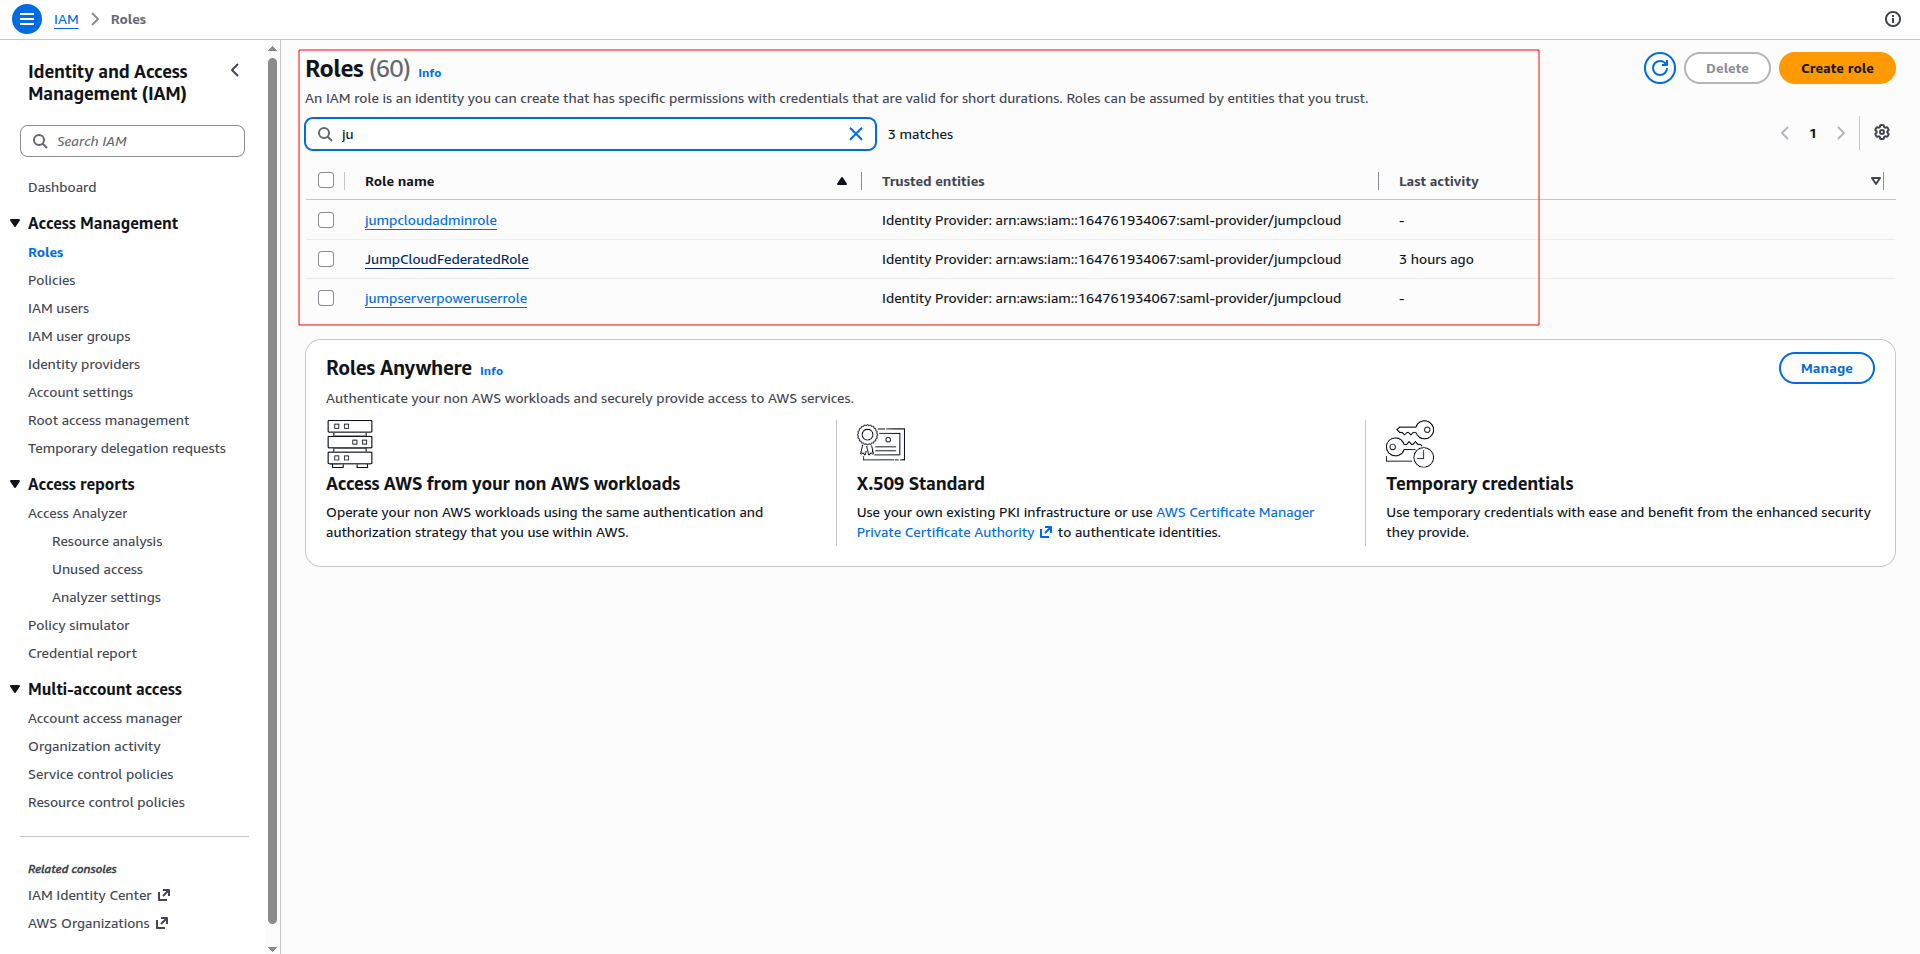
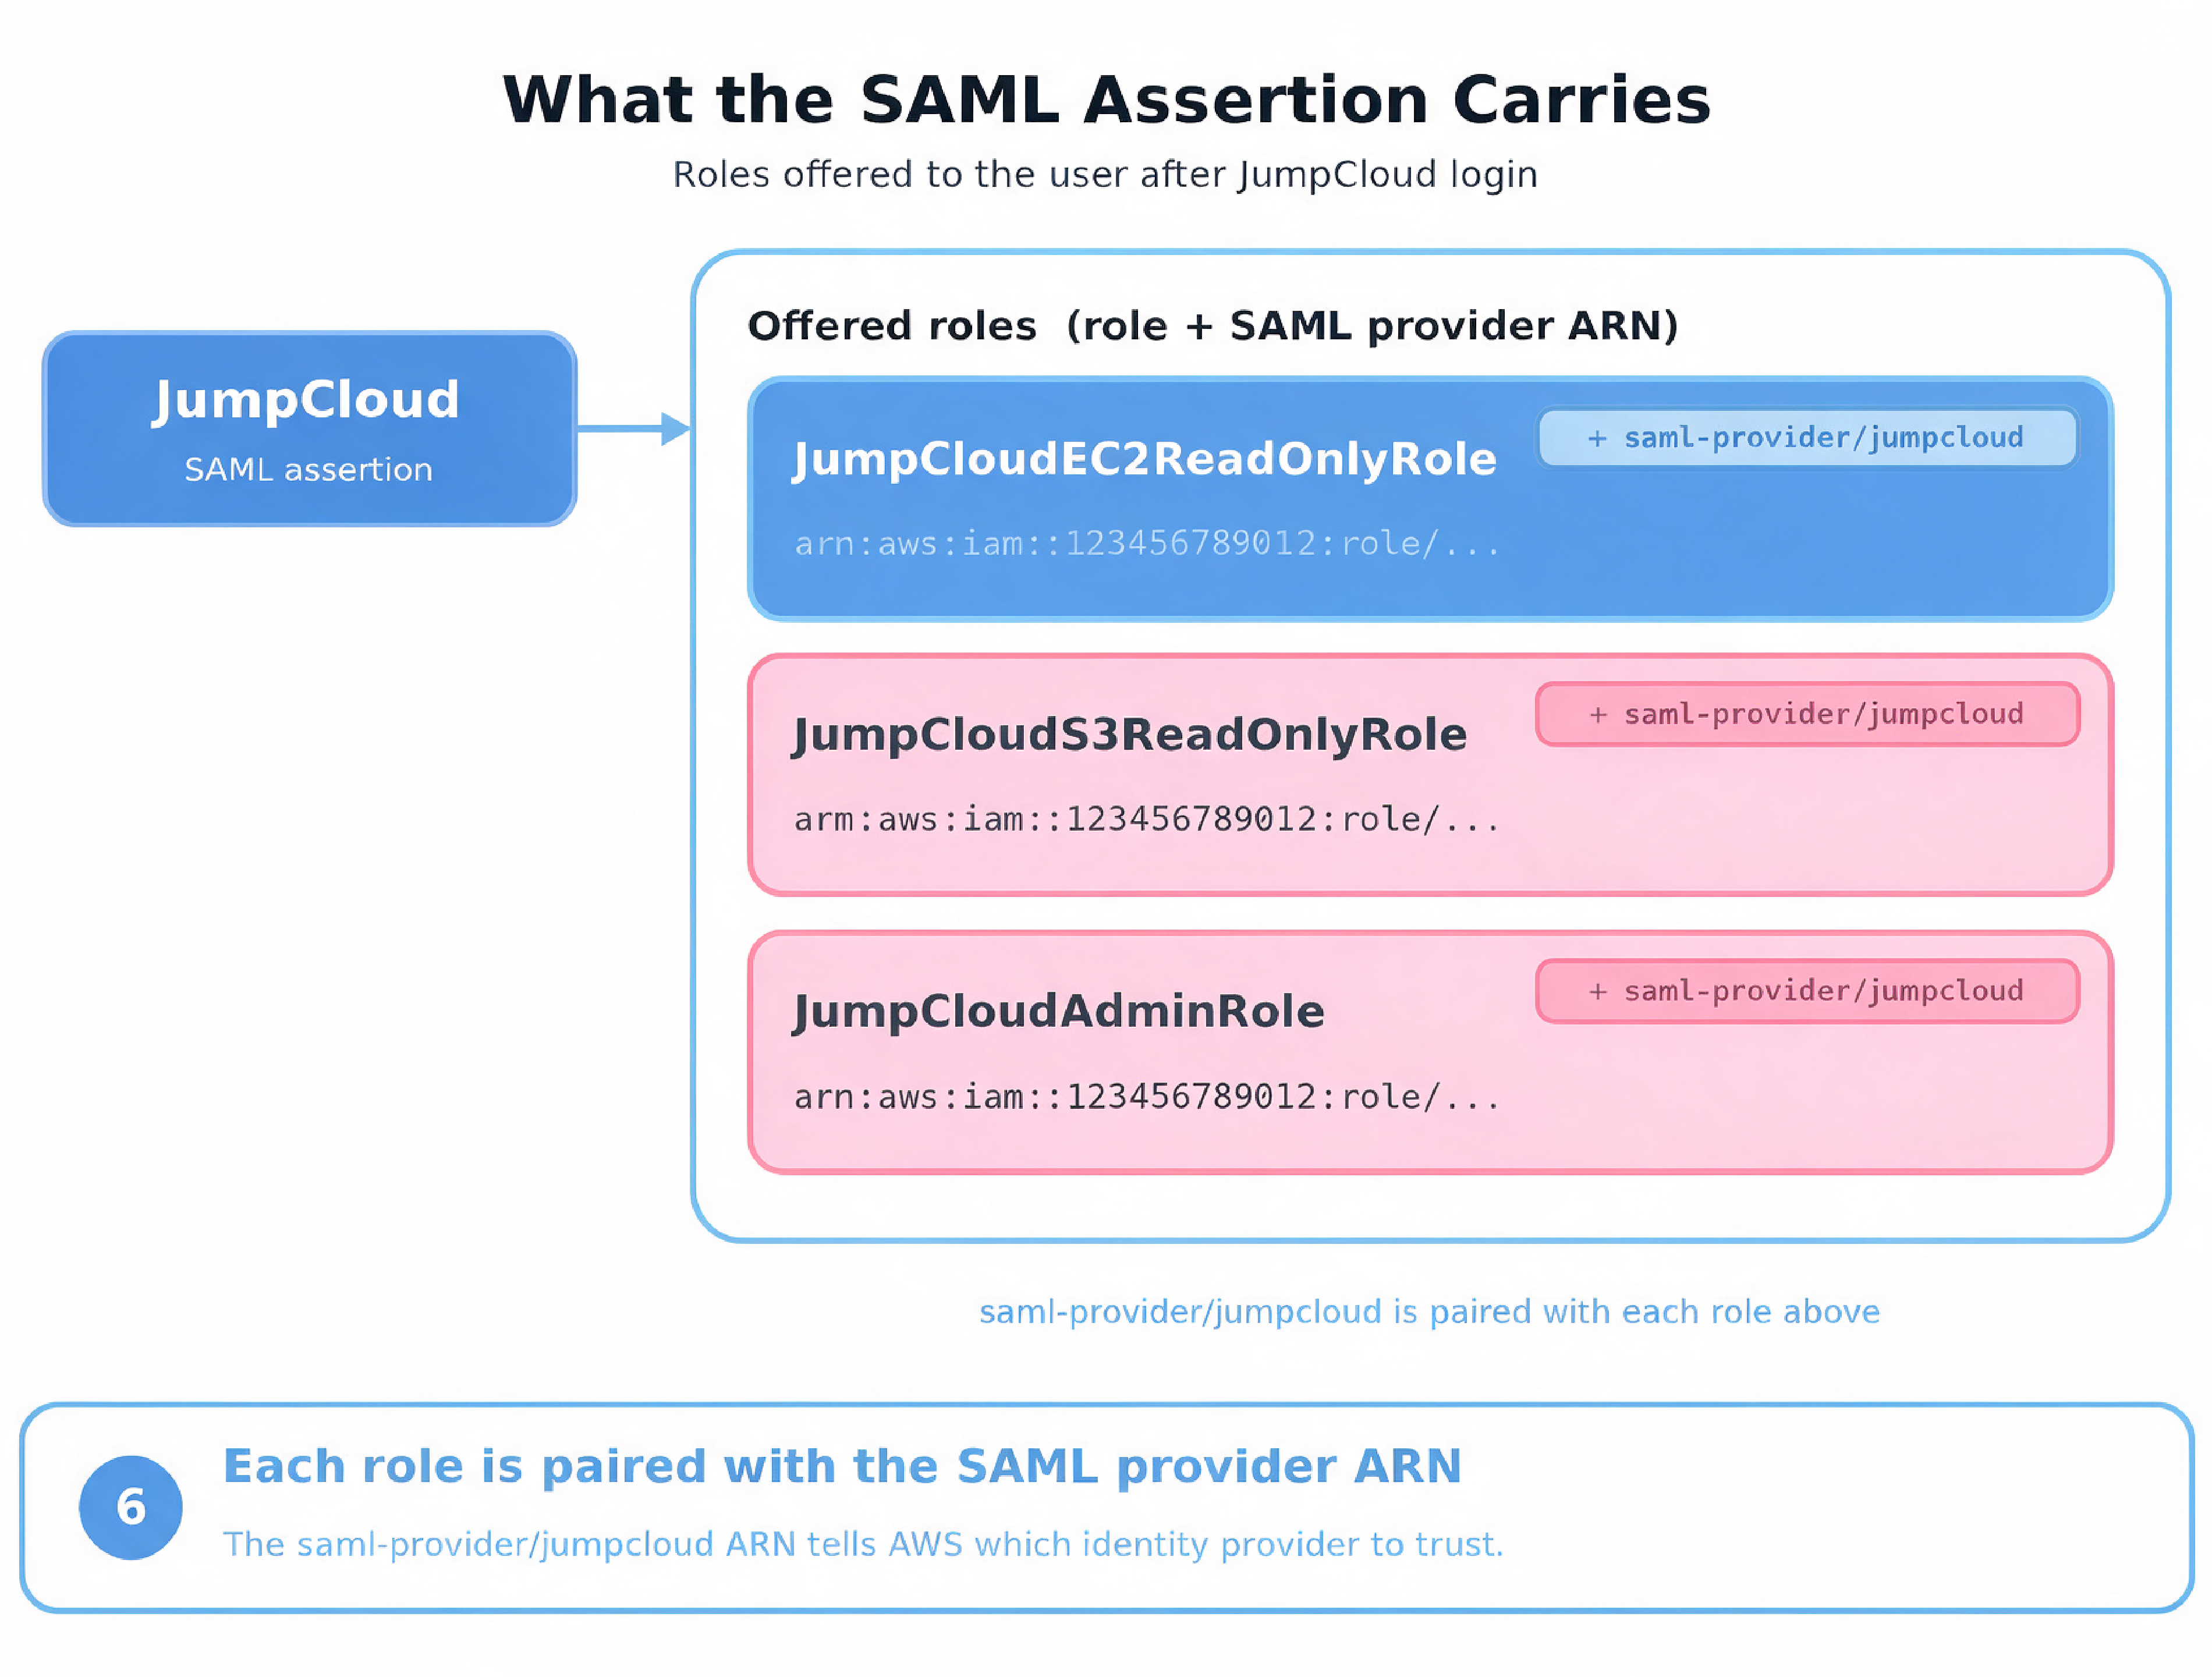
This is where one JumpCloud app becomes powerful. Create three roles, each with a different job. The role names below are the ones used in the screenshots.

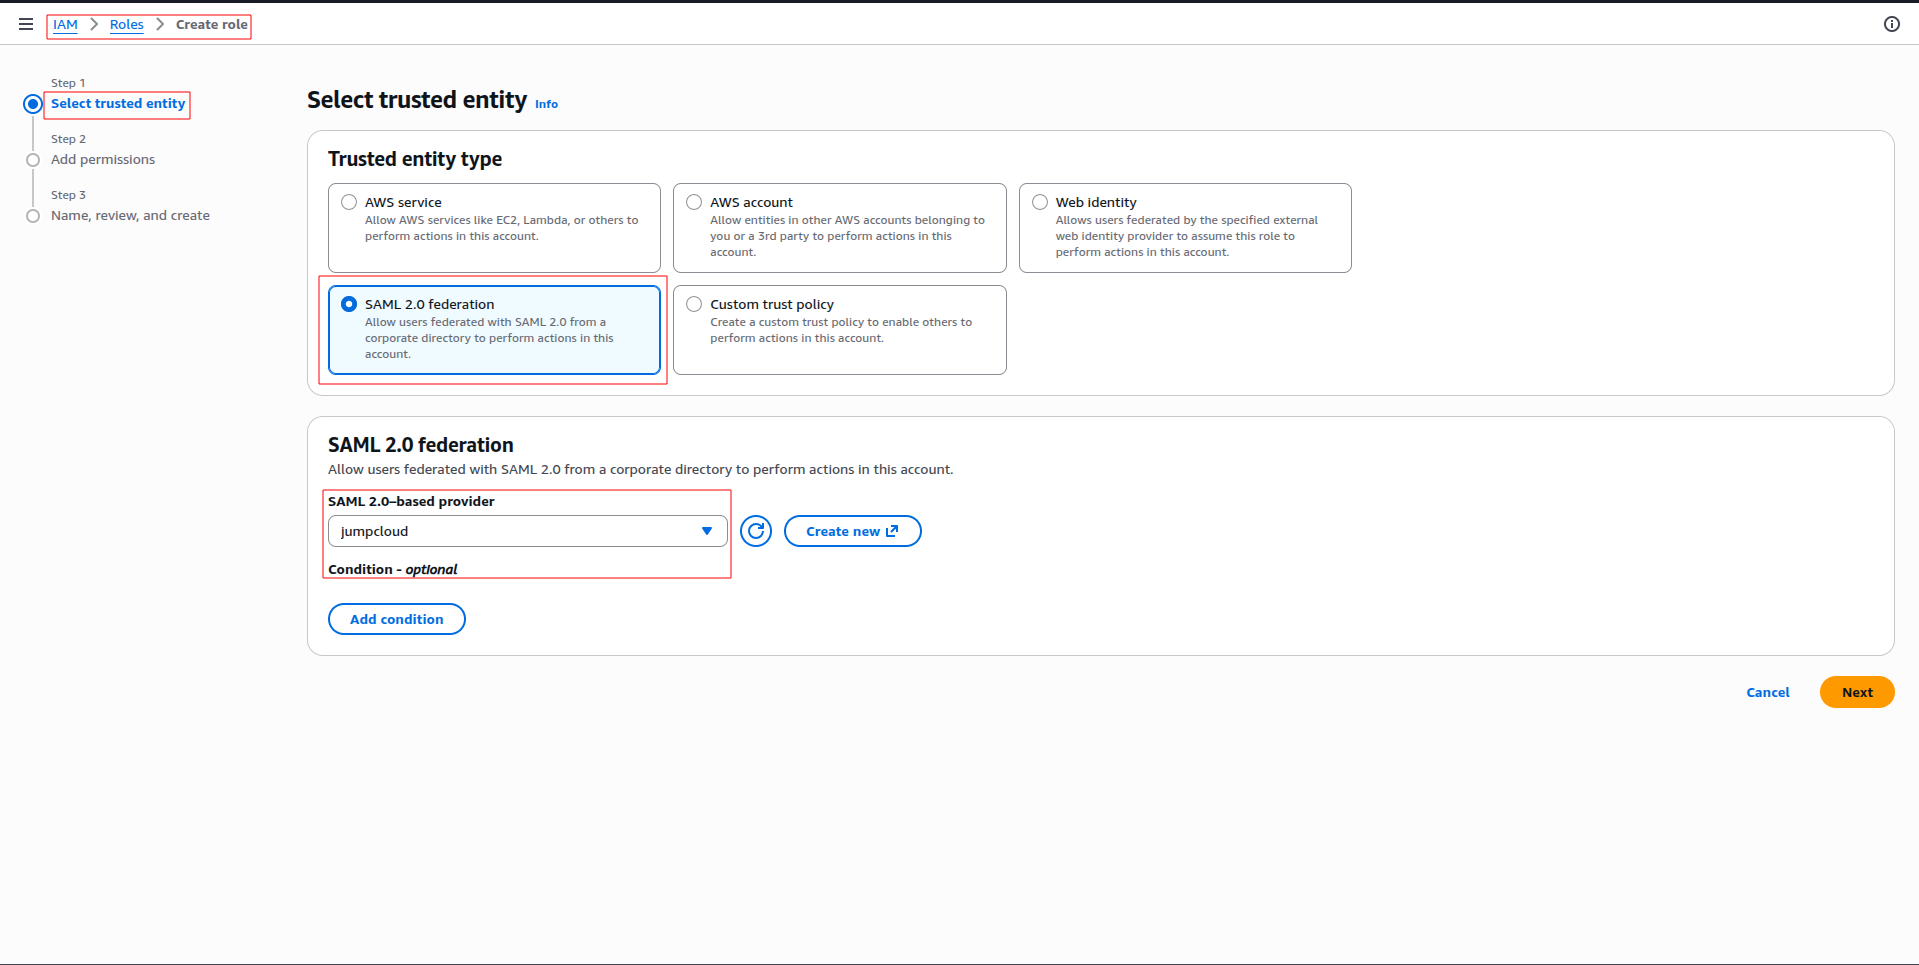
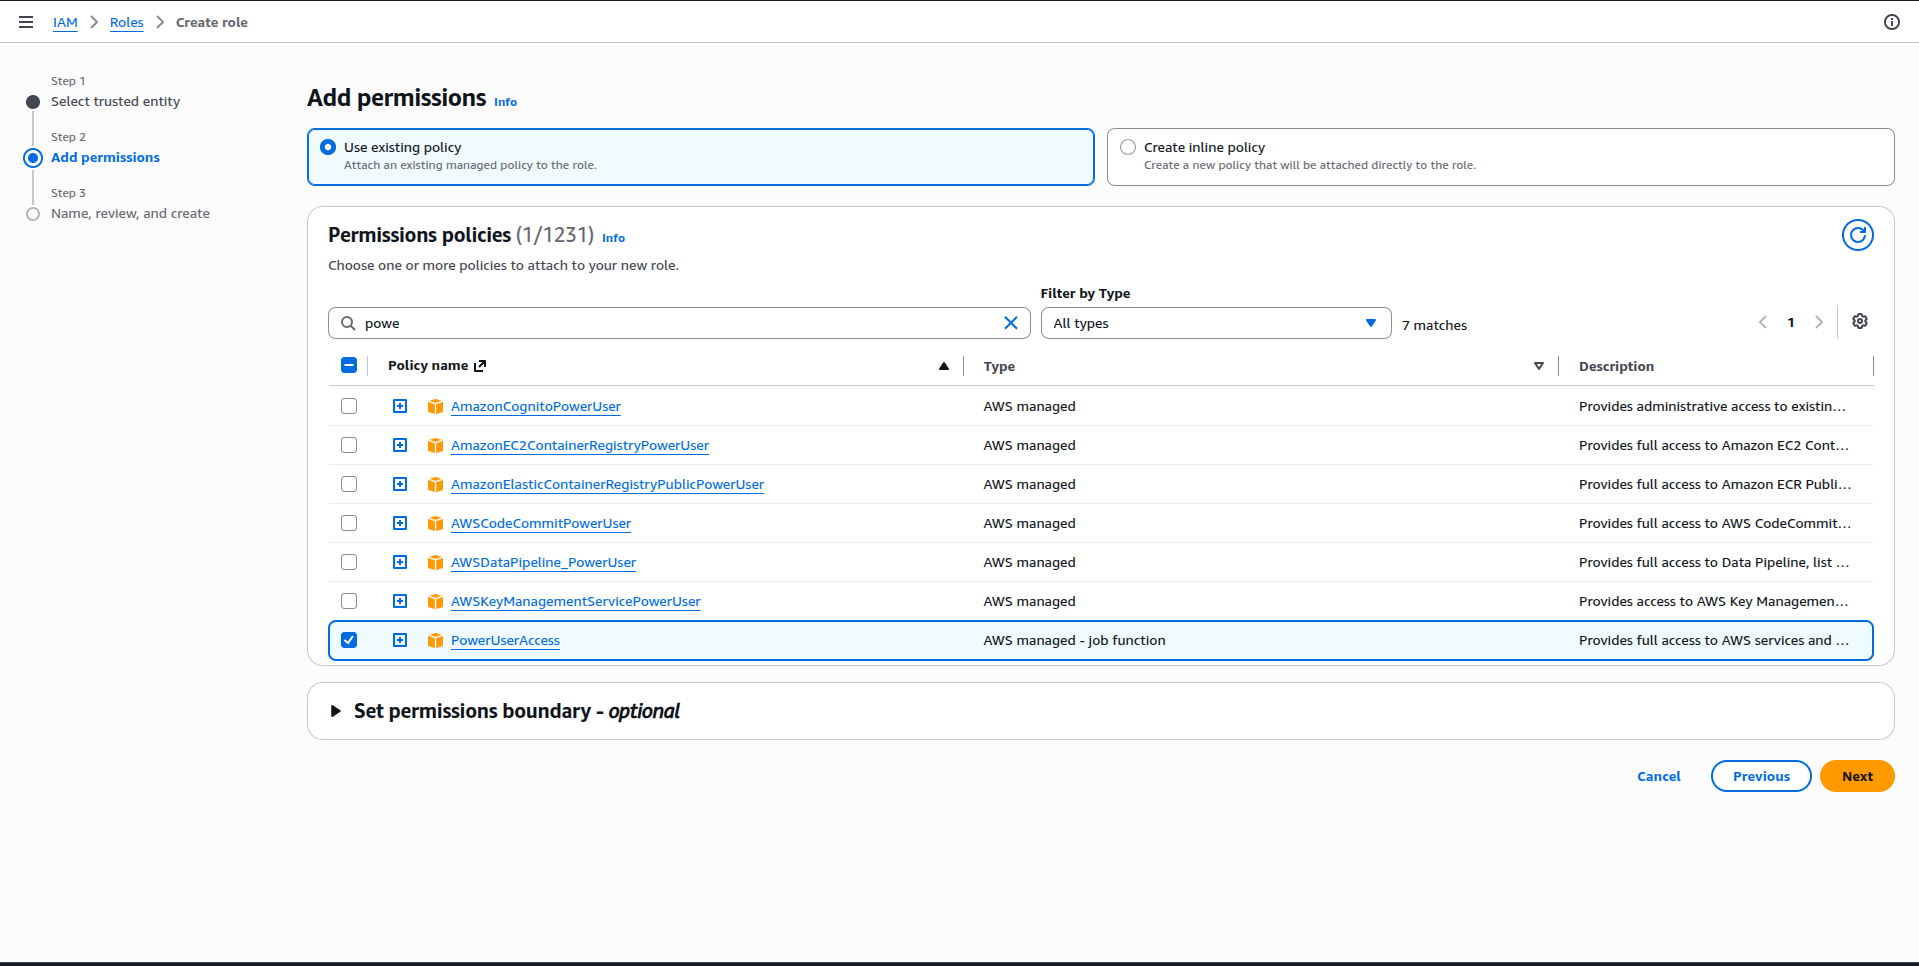
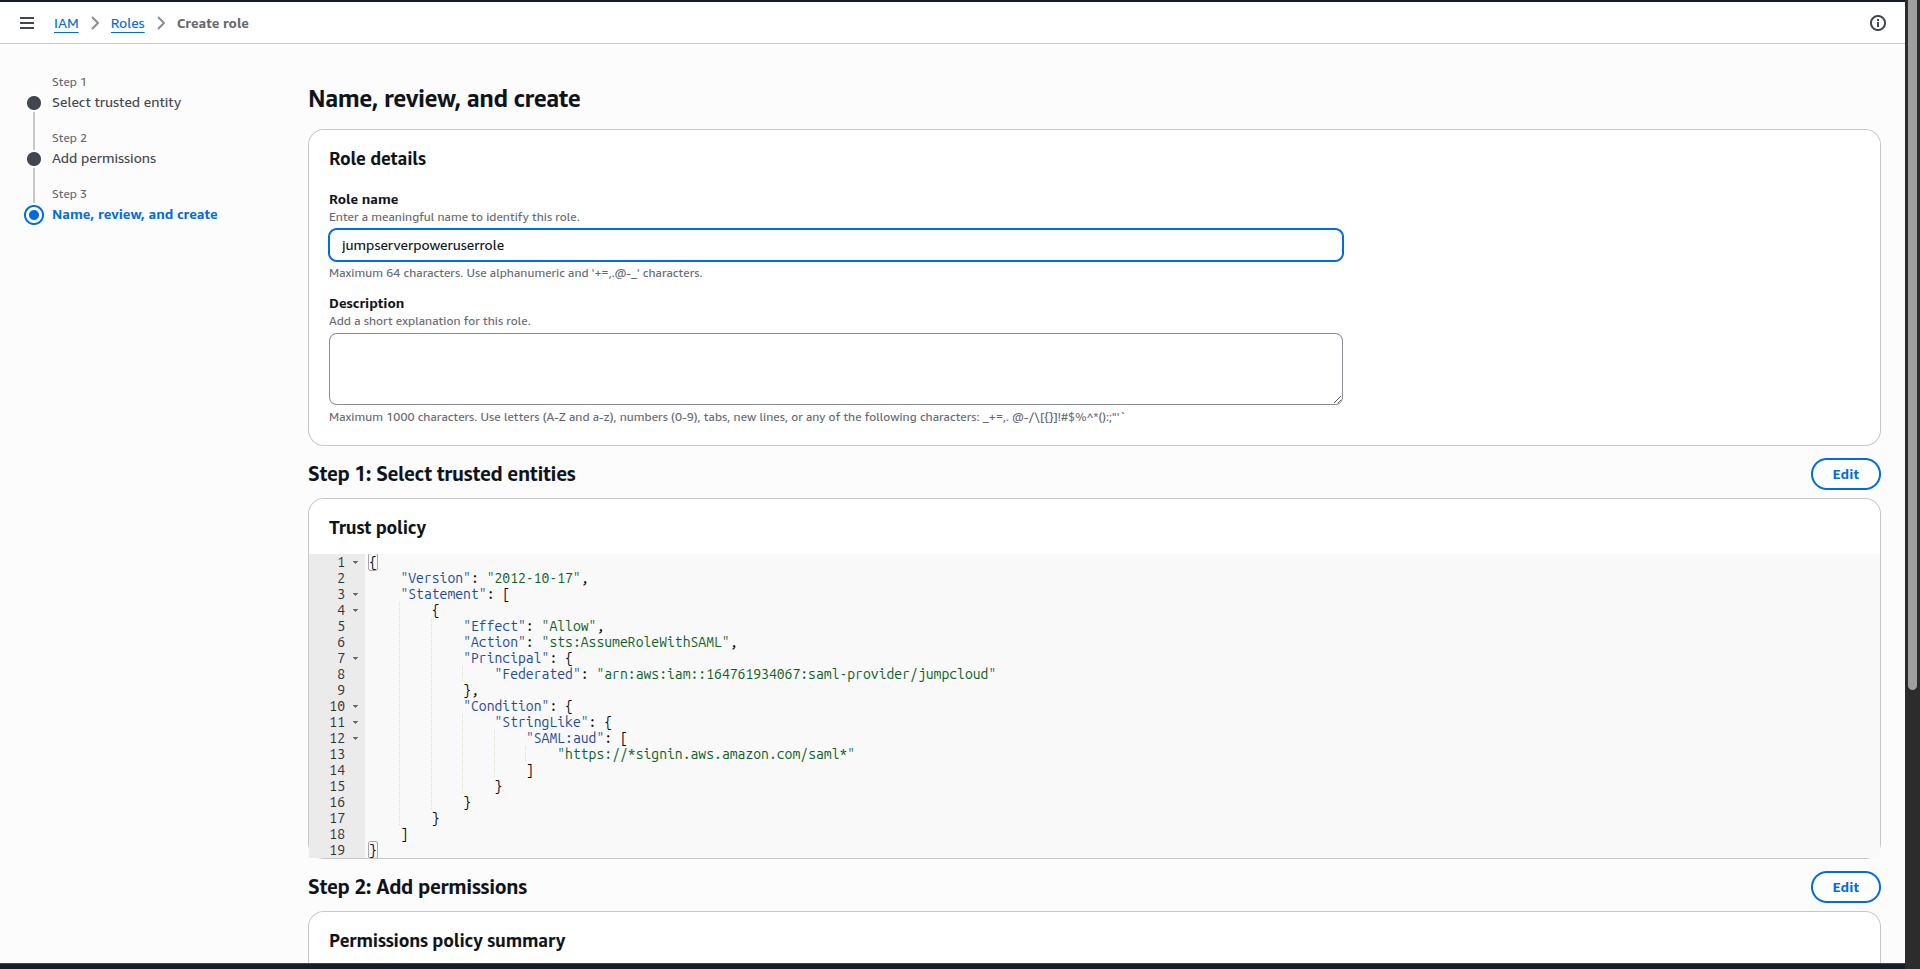
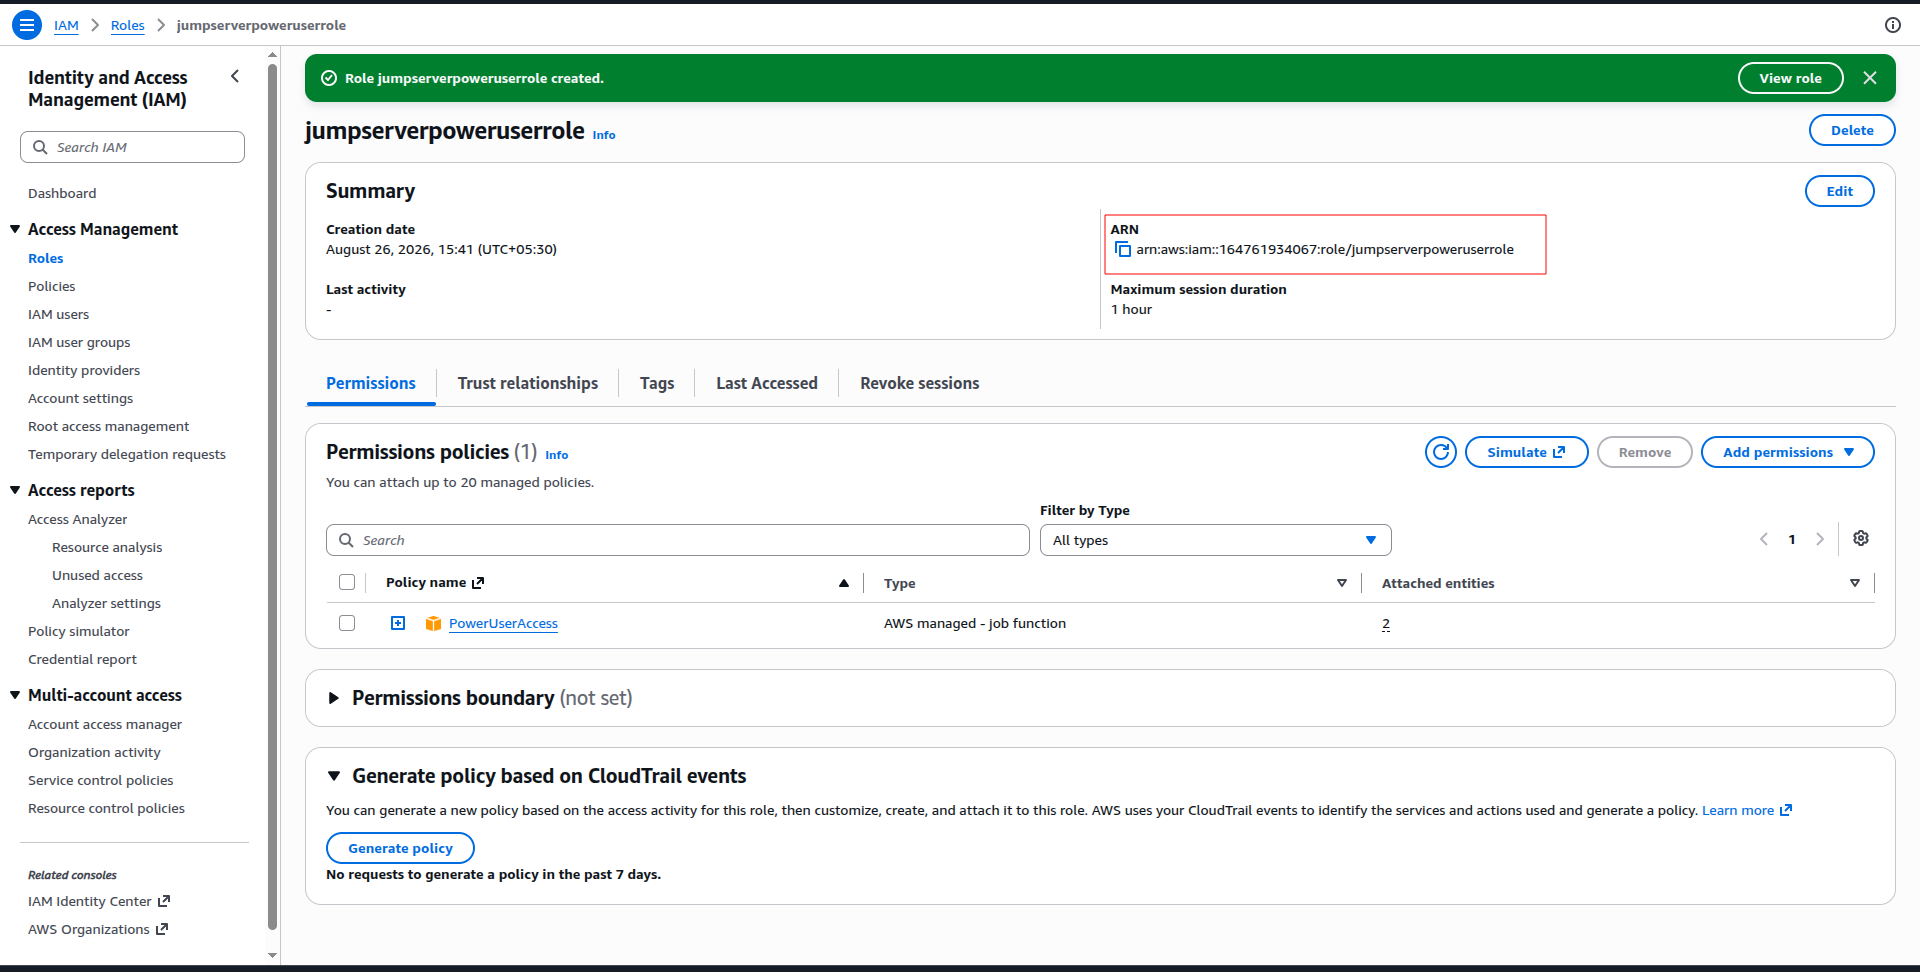
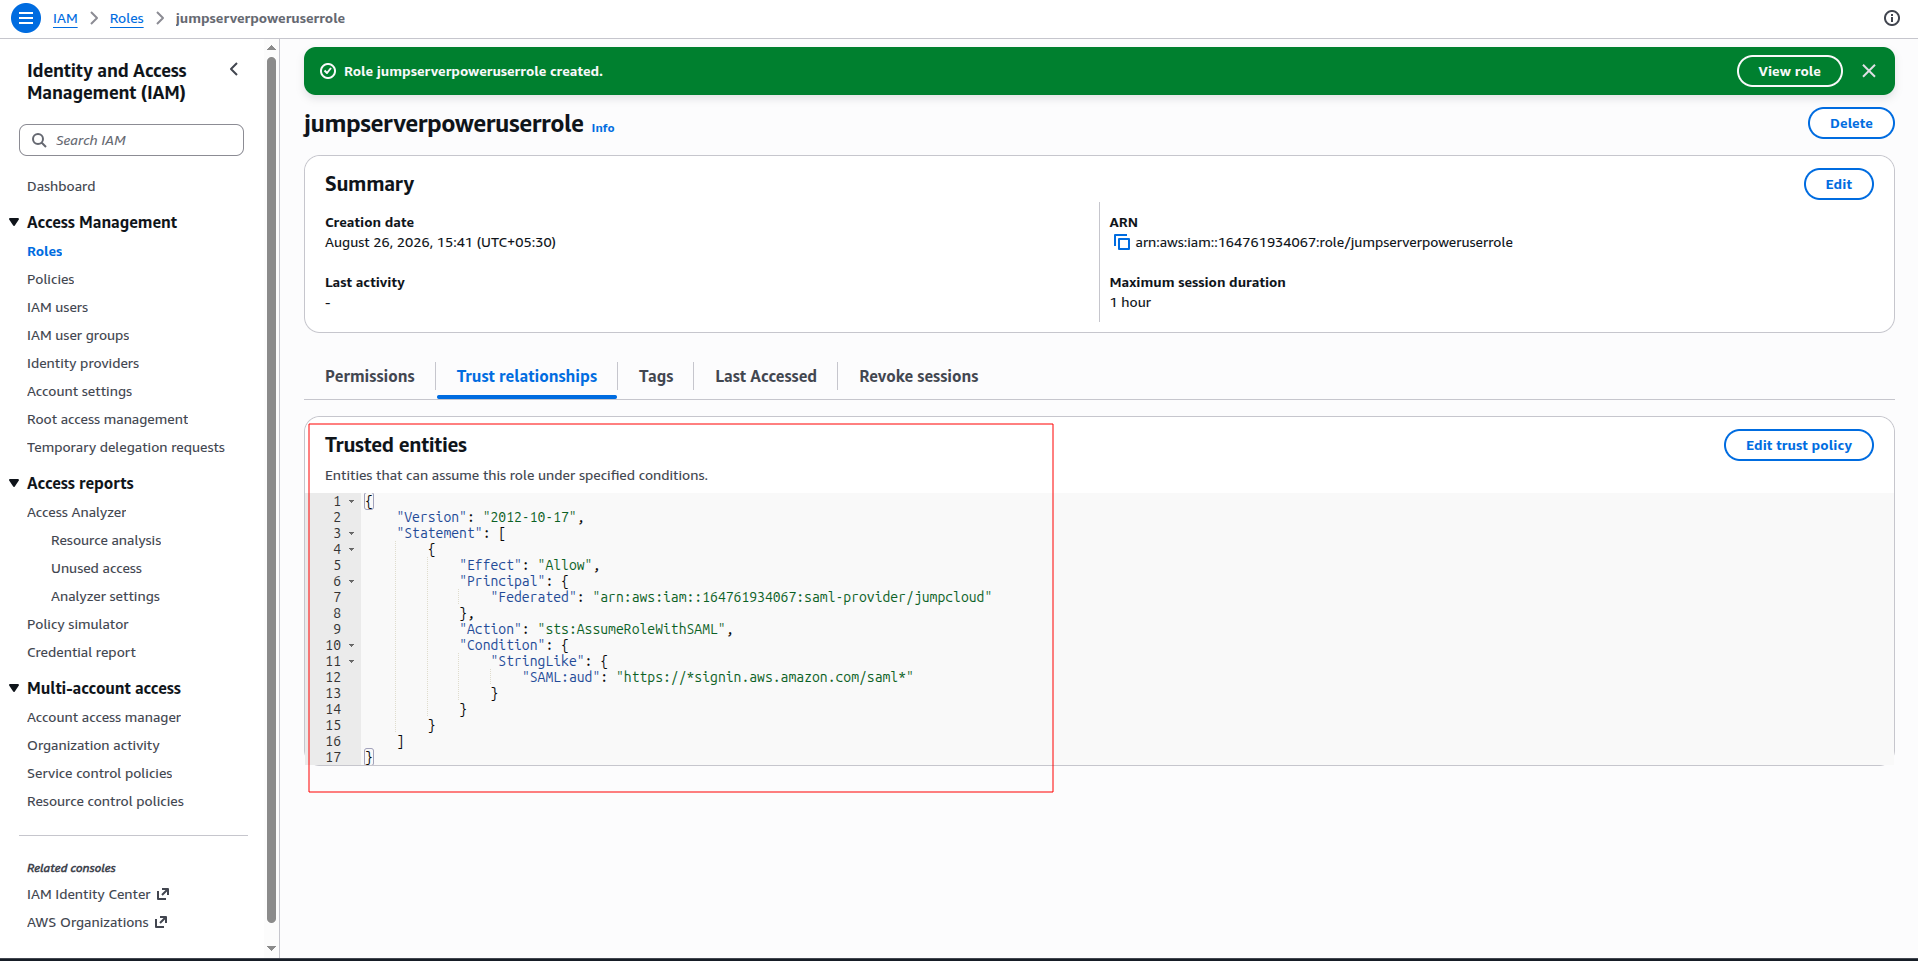
Trust policy
The console builds the trust policy for you. The important part looks like this:
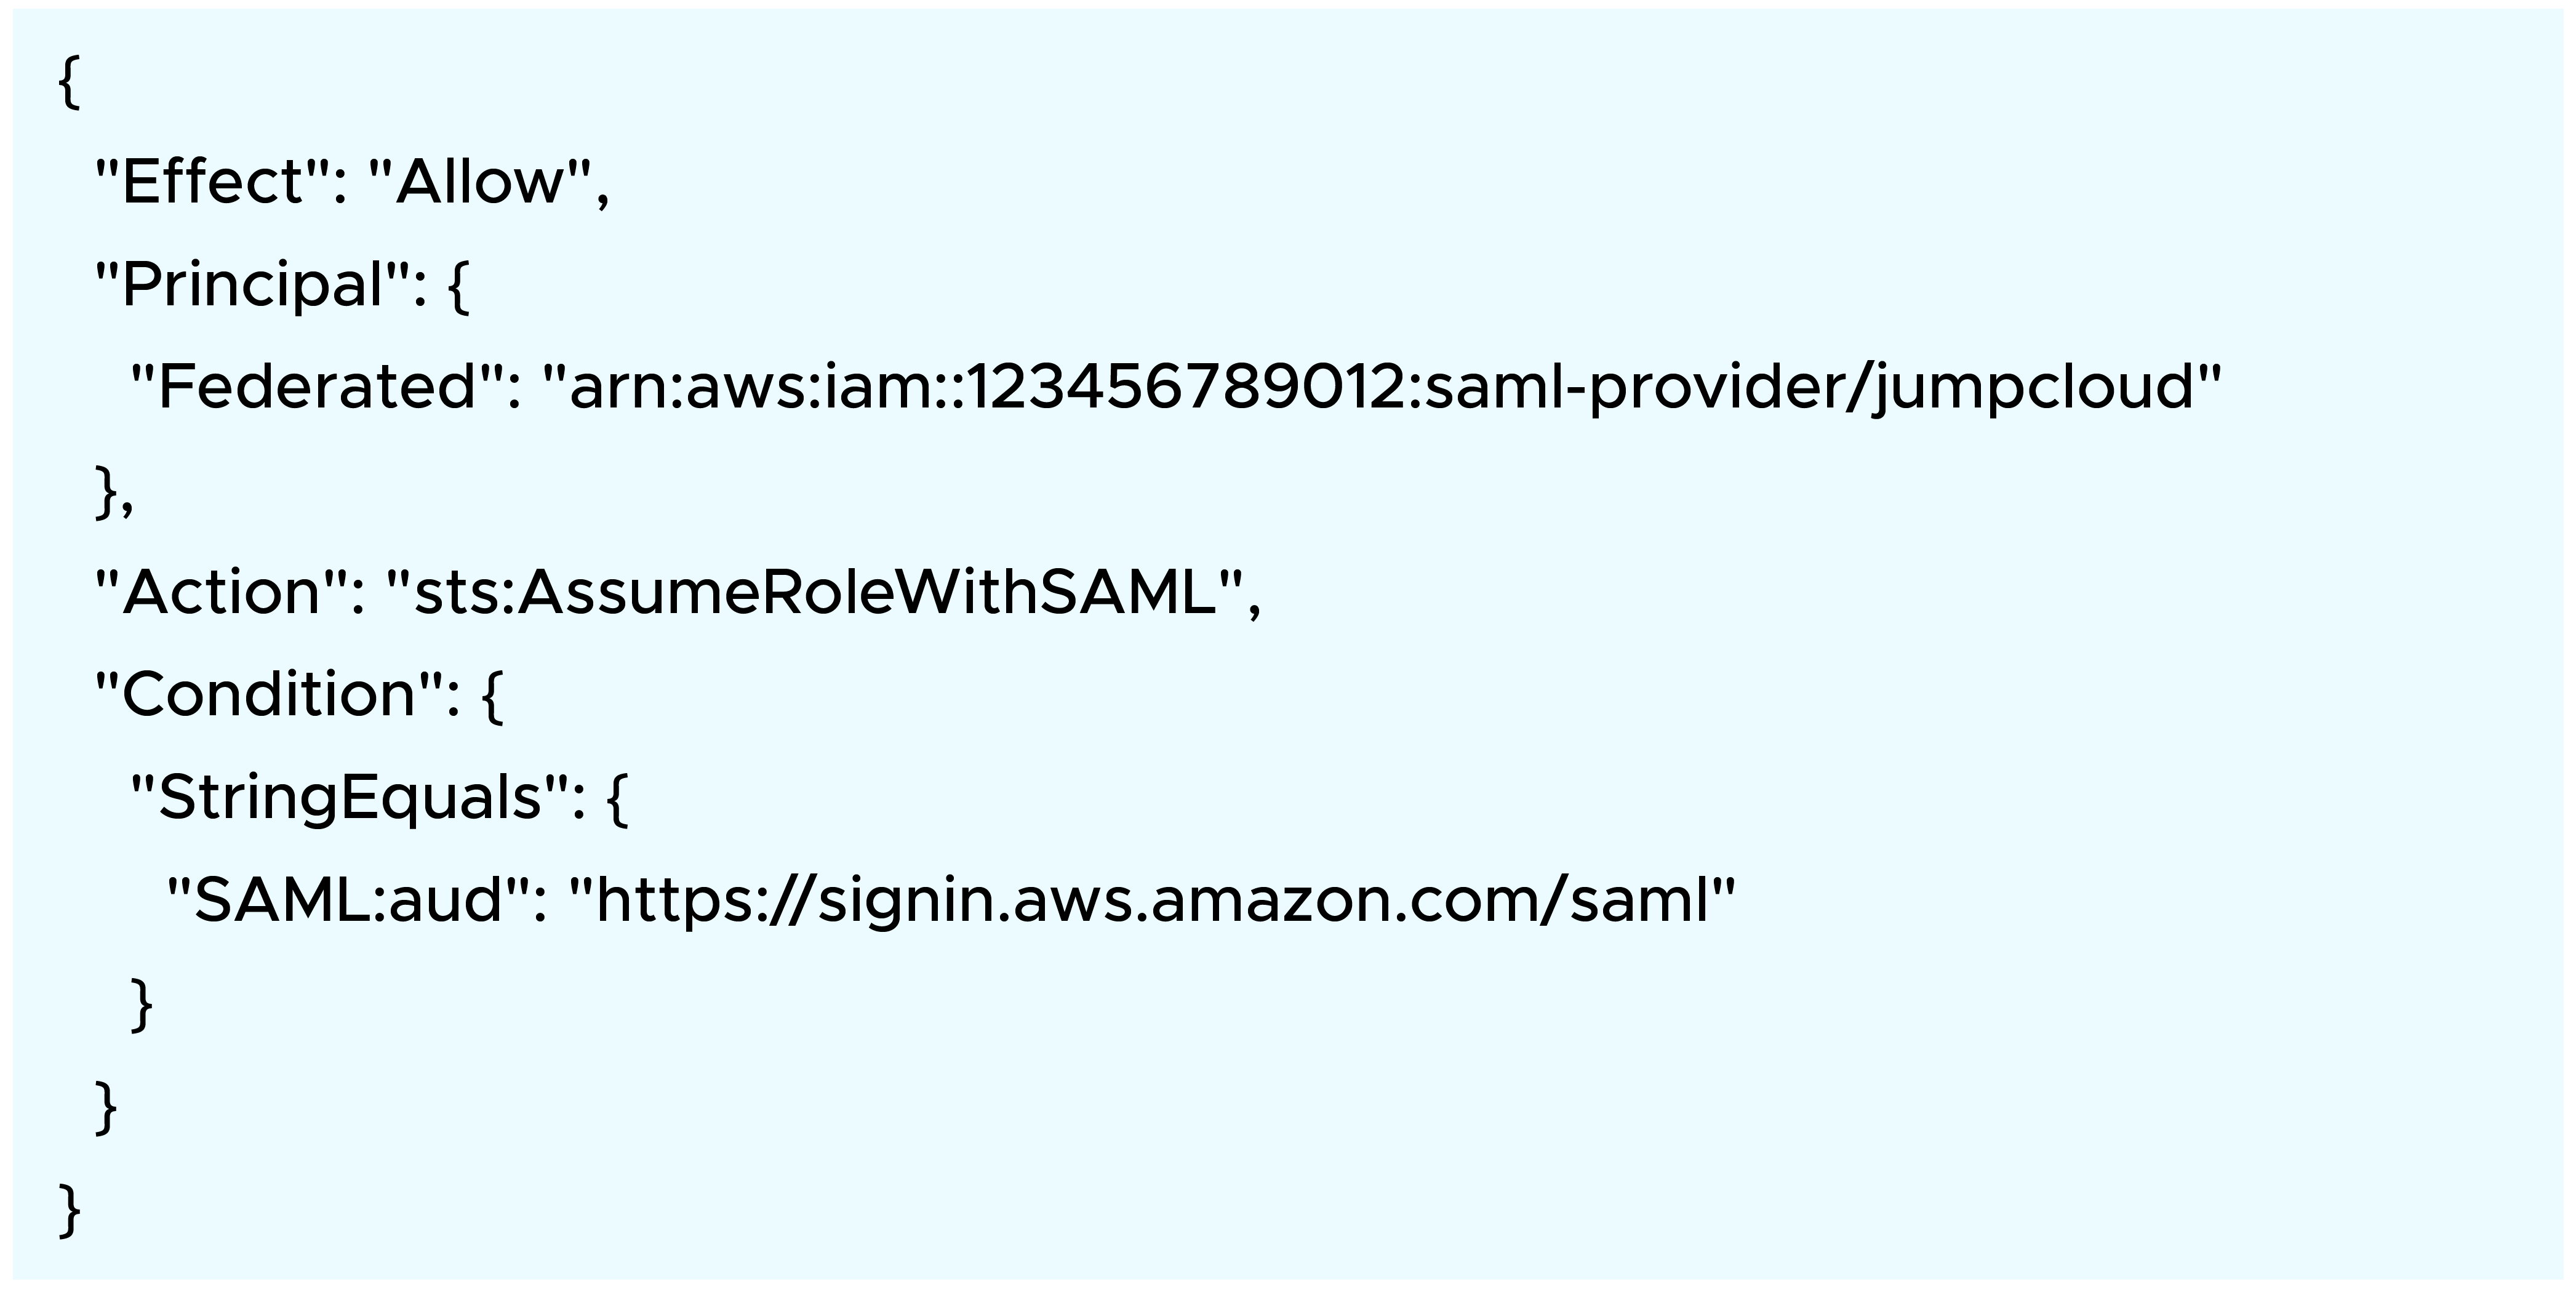
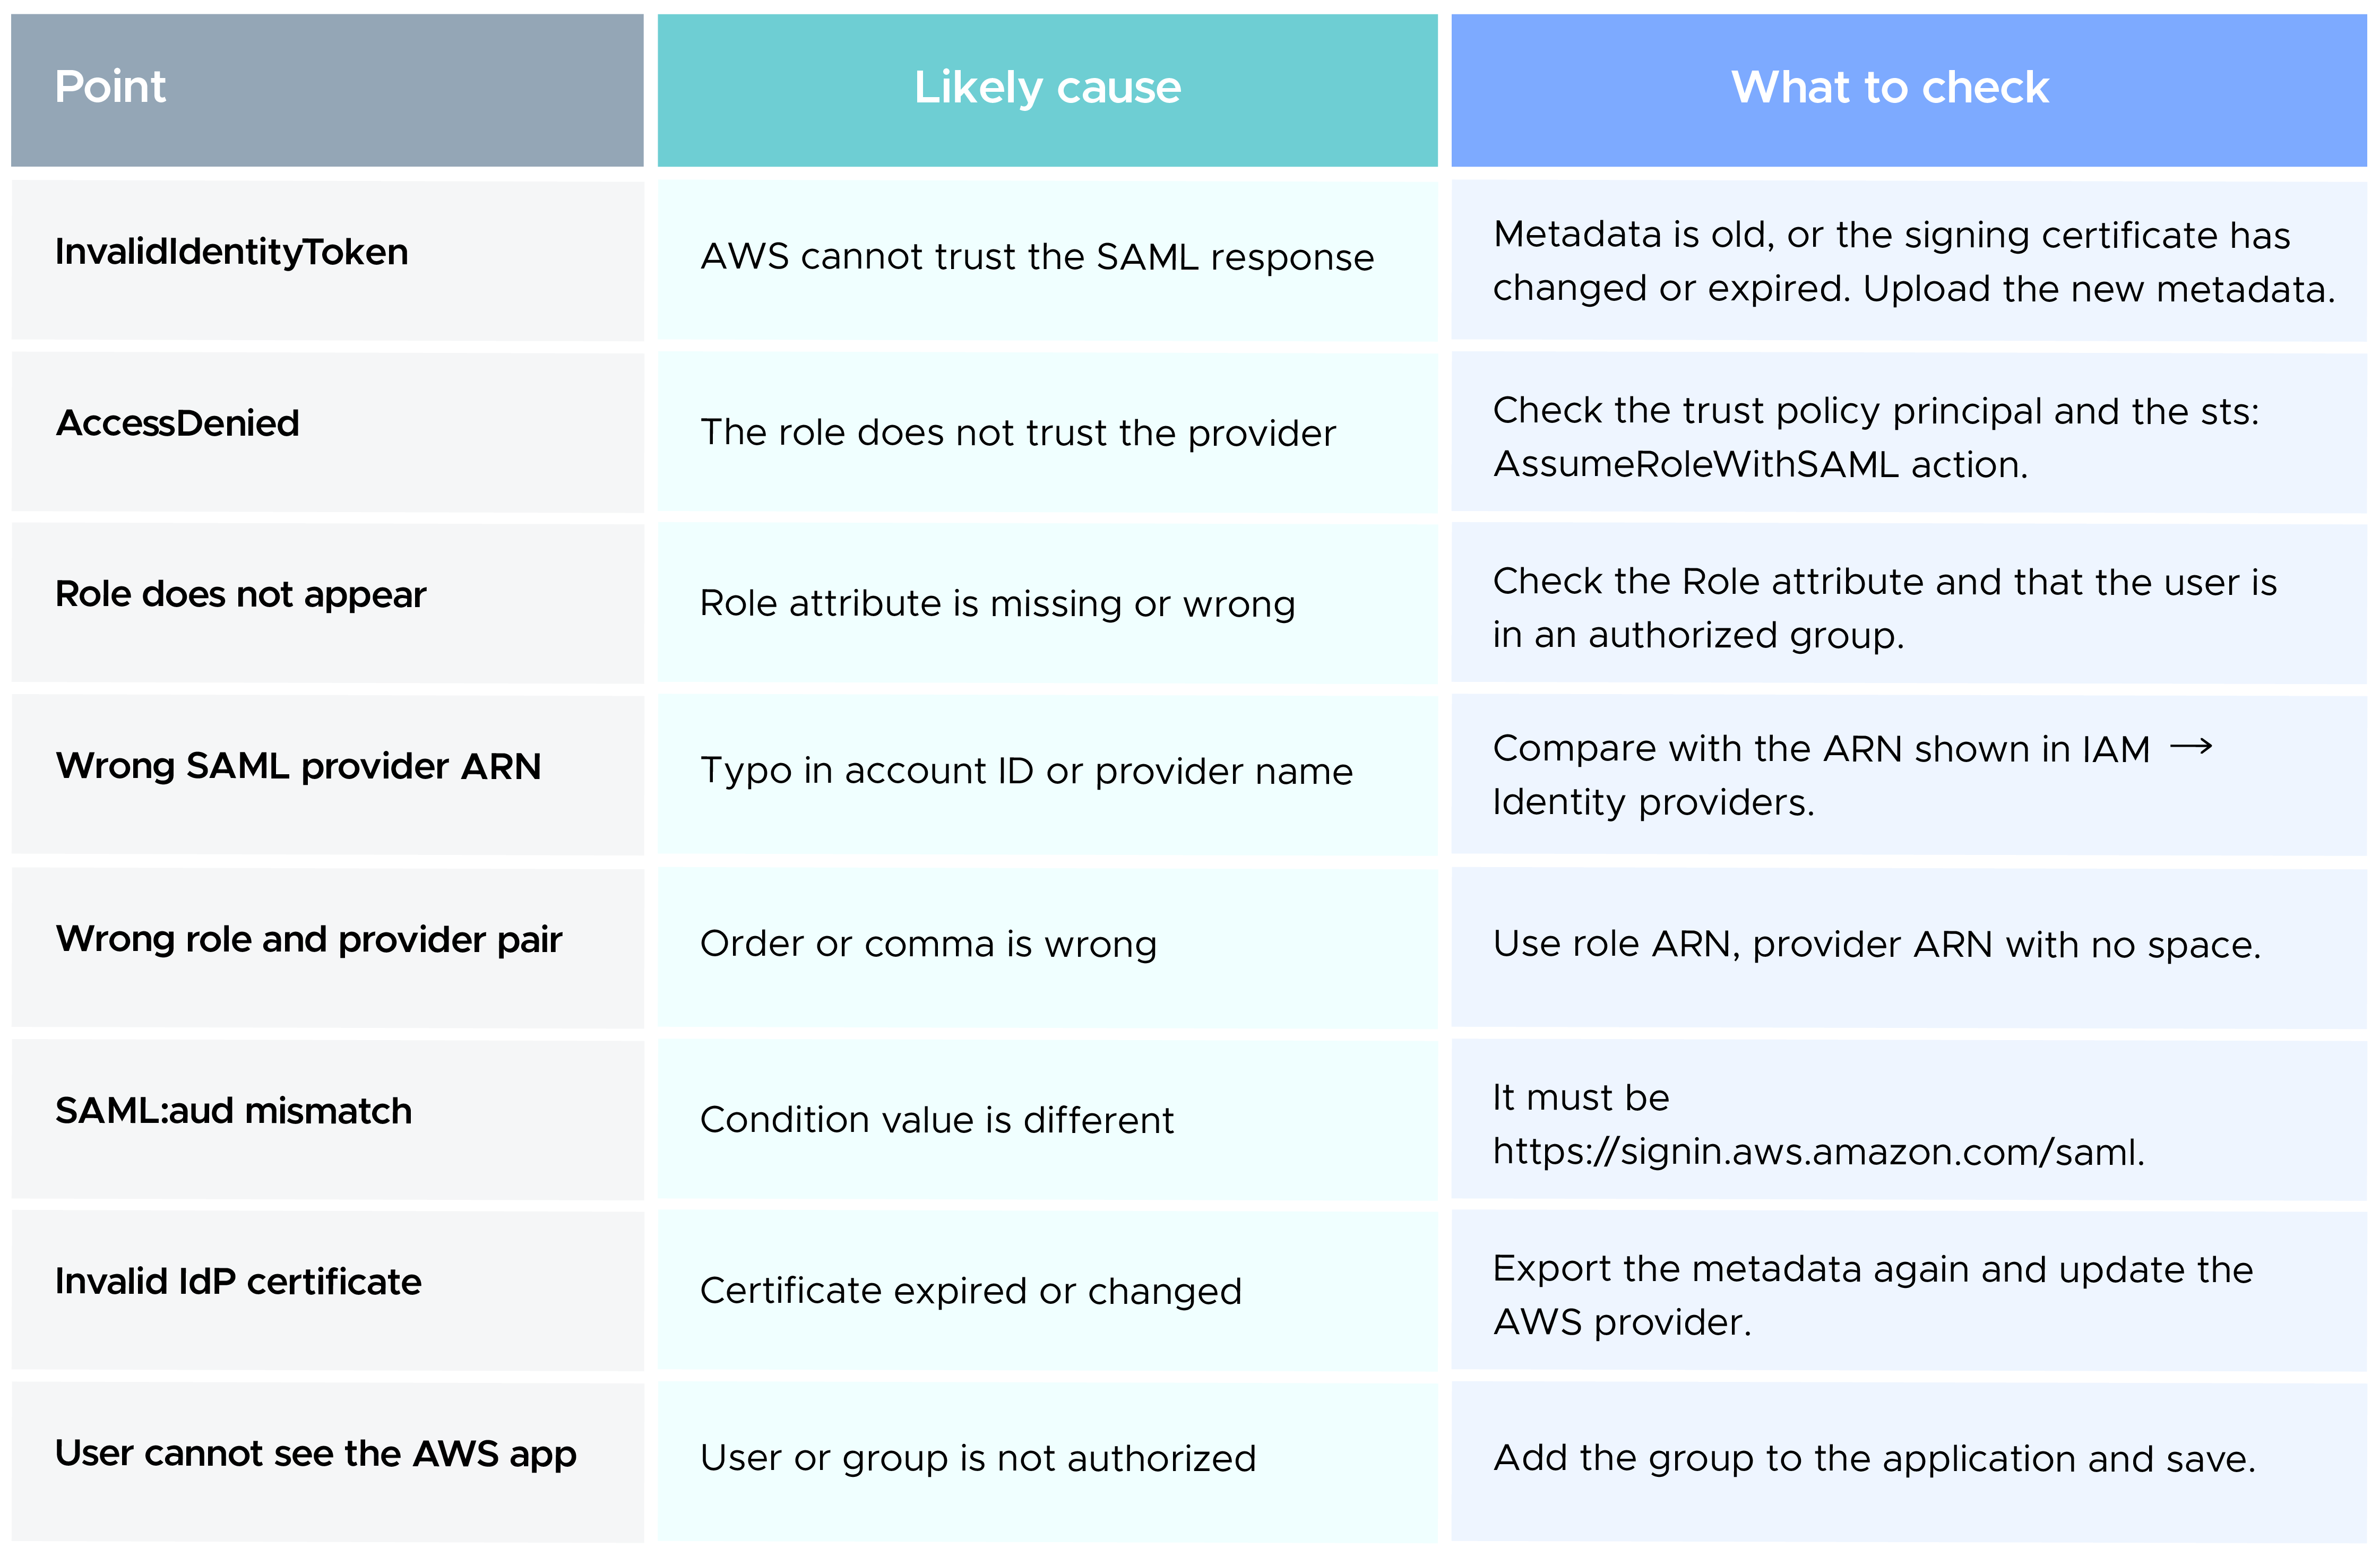
In simple words: this policy lets users who signed in through the JumpCloud SAML provider assume this role using sts:AssumeRoleWithSAML. The SAML:aud condition makes sure the assertion is meant for the AWS sign-in page.
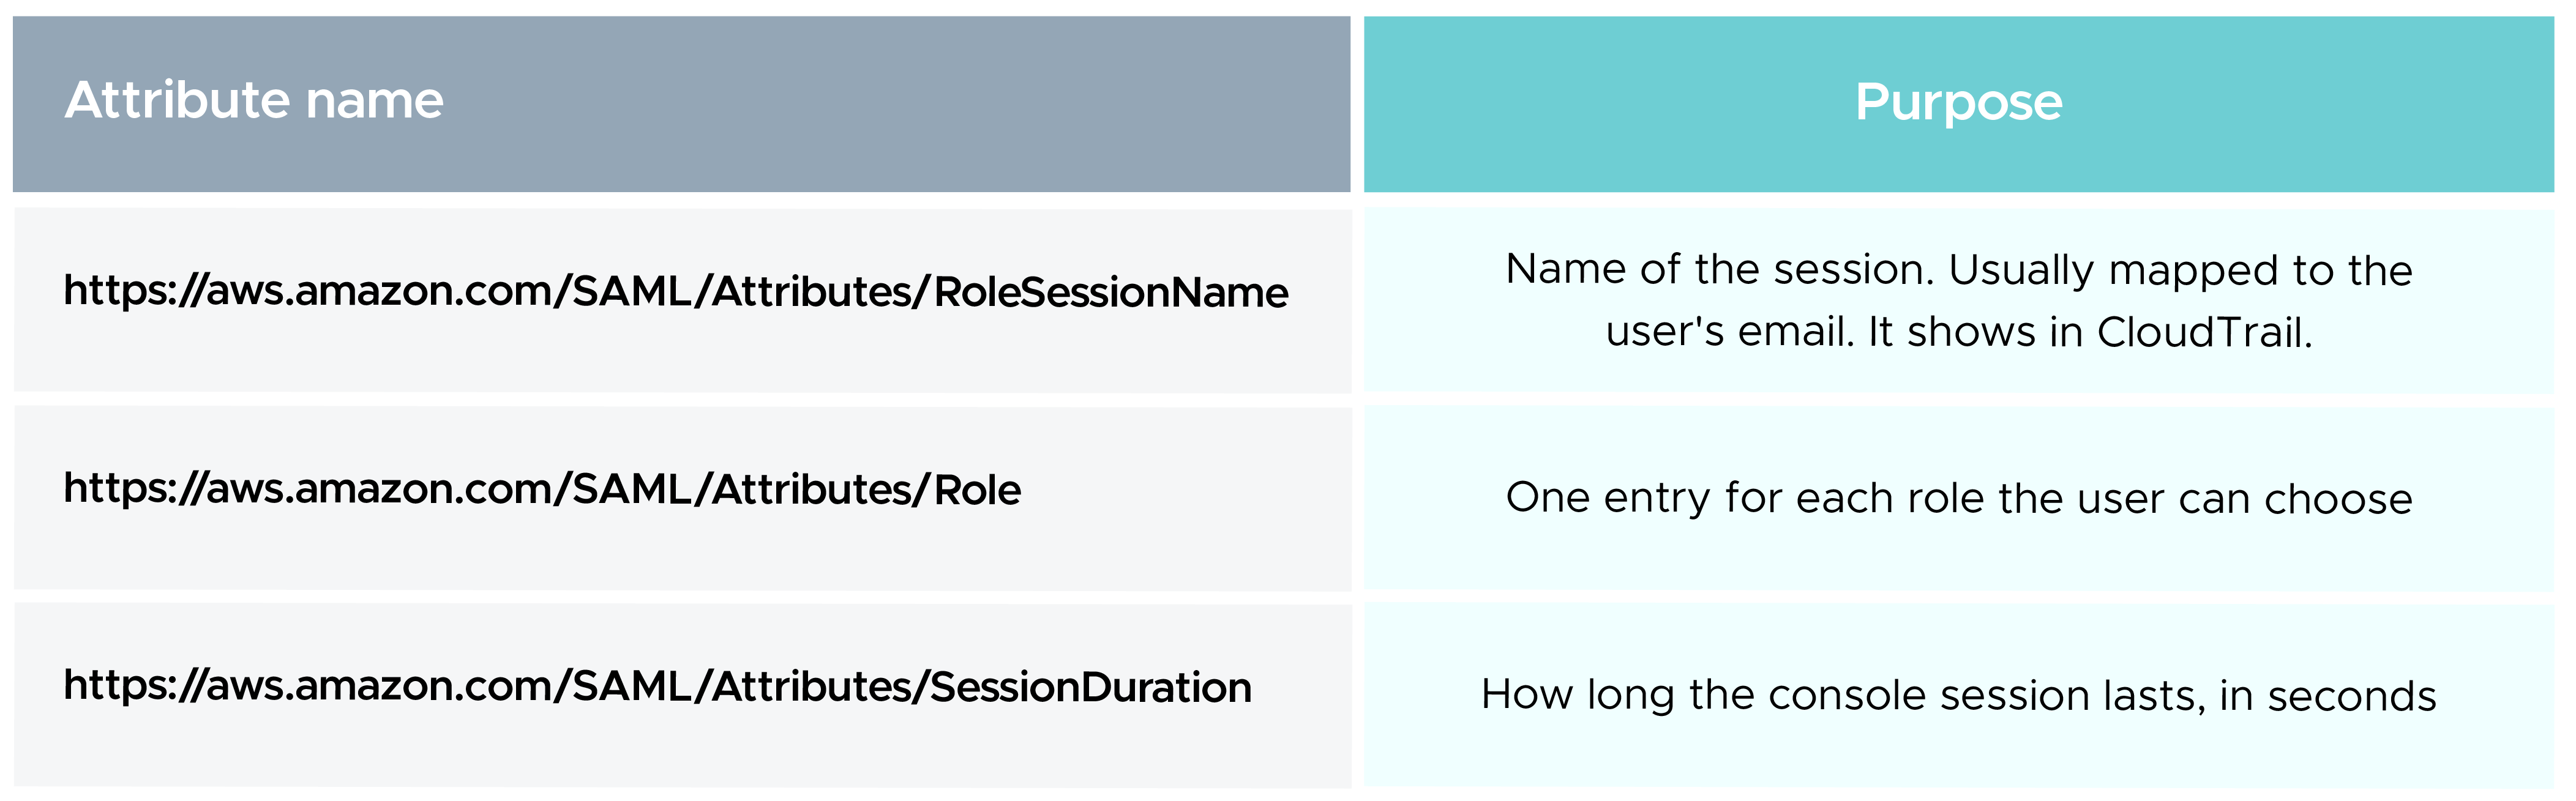
Go back to JumpCloud and open the AWS application. On the SSO tab, find the attribute settings. JumpCloud must send the role details inside the SAML assertion. These are the attributes we use:
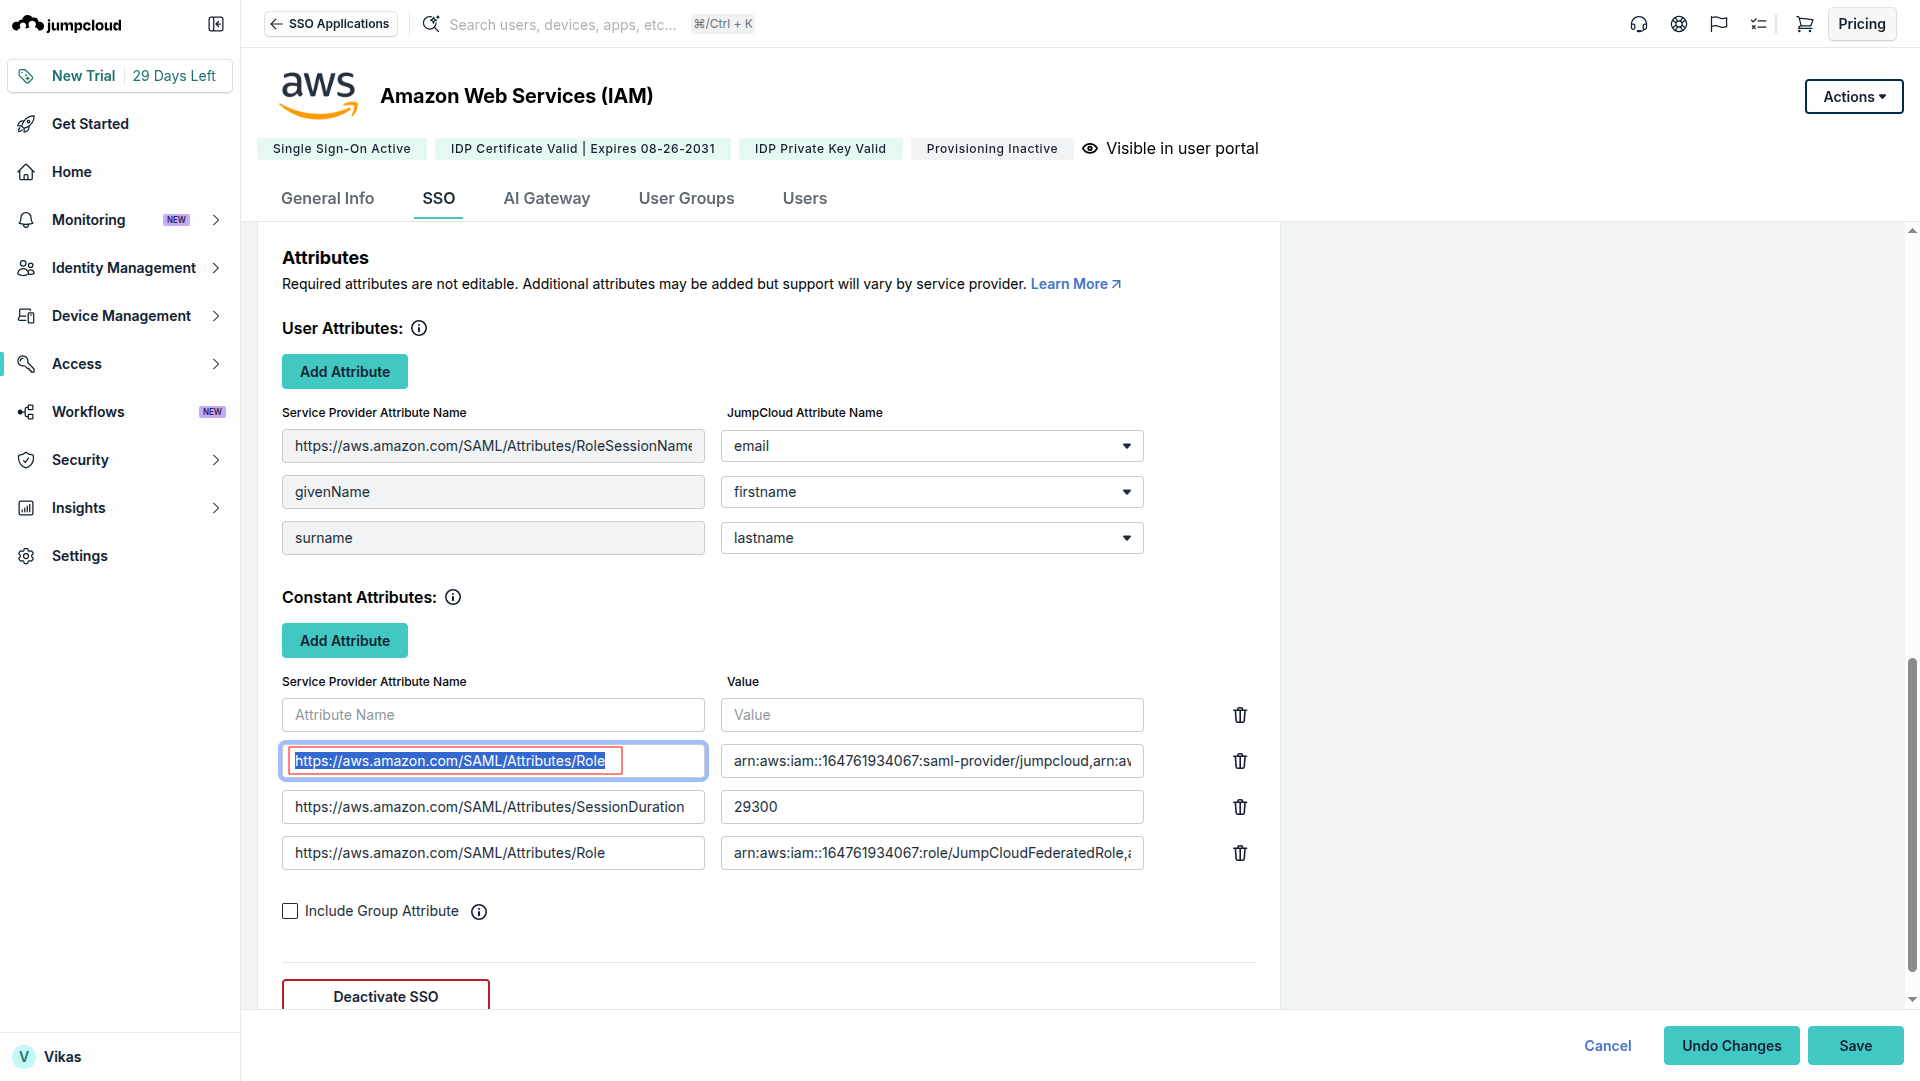
Role attribute format
Add one Role attribute for each role. Each value has two ARNs, separated by a comma and no space: first the role ARN, then the SAML provider ARN.
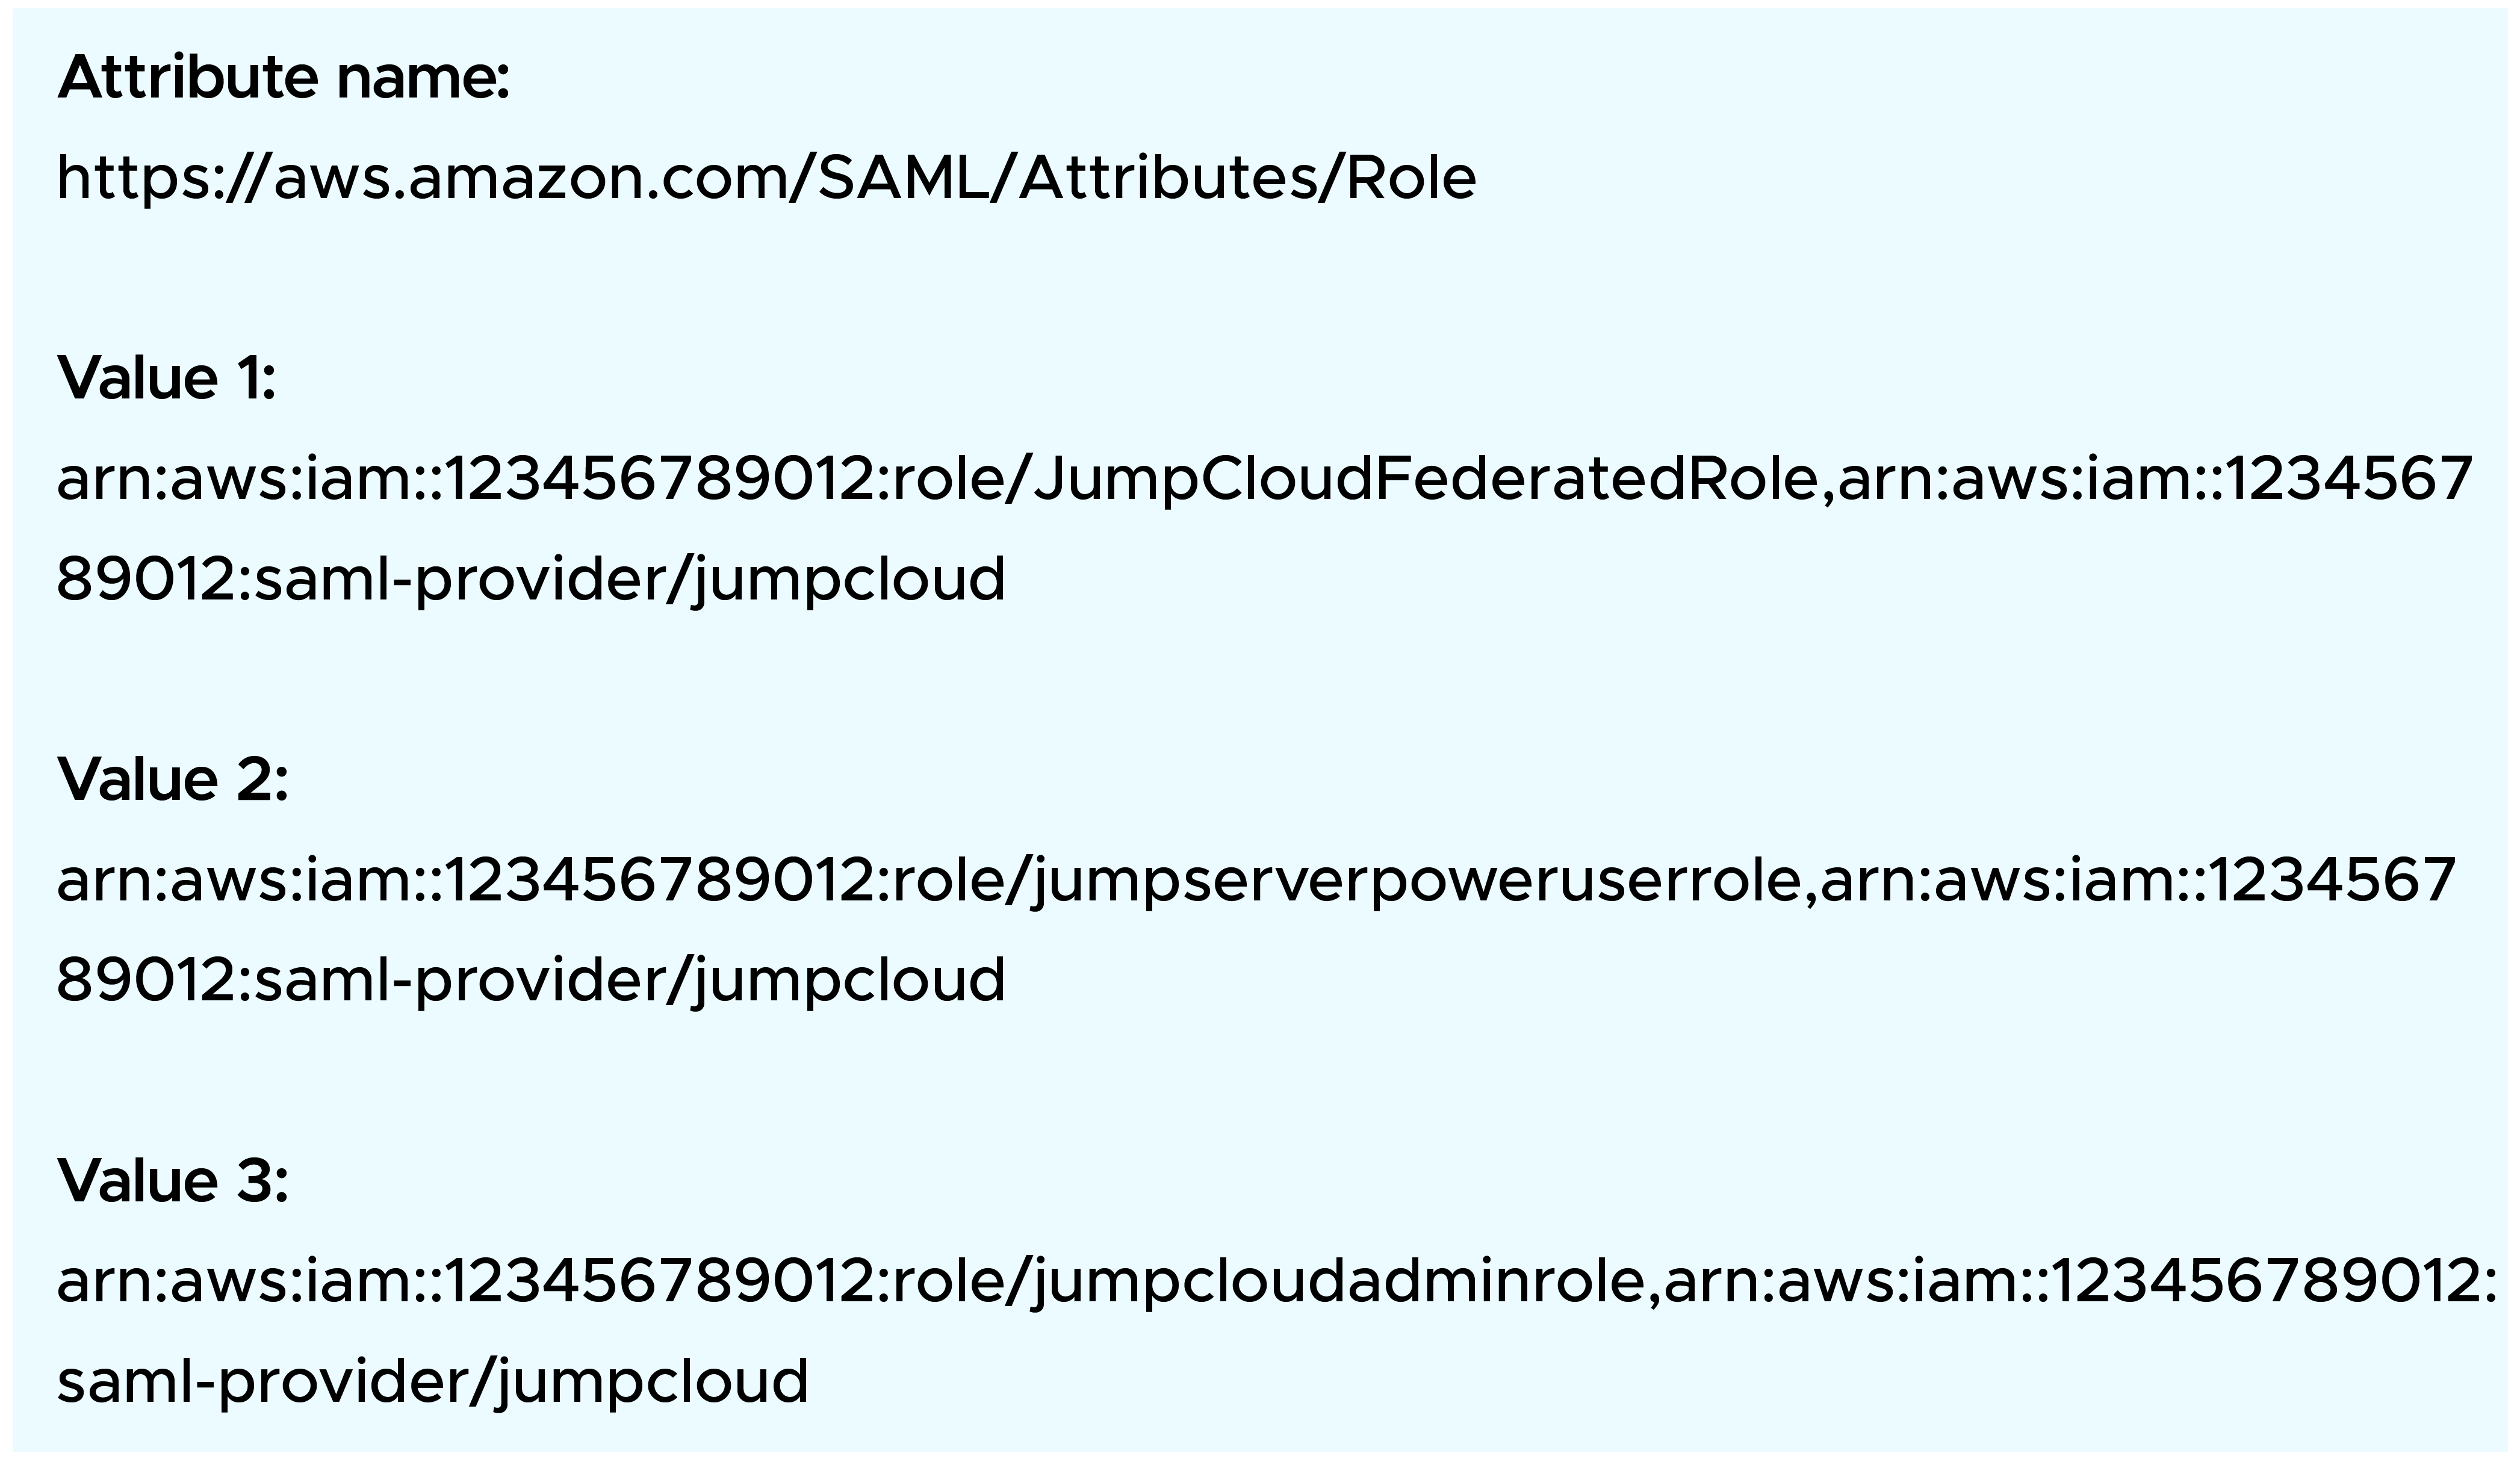
Check each ARN carefully. A small typo in a role name, account ID, or provider name will stop the role from working.
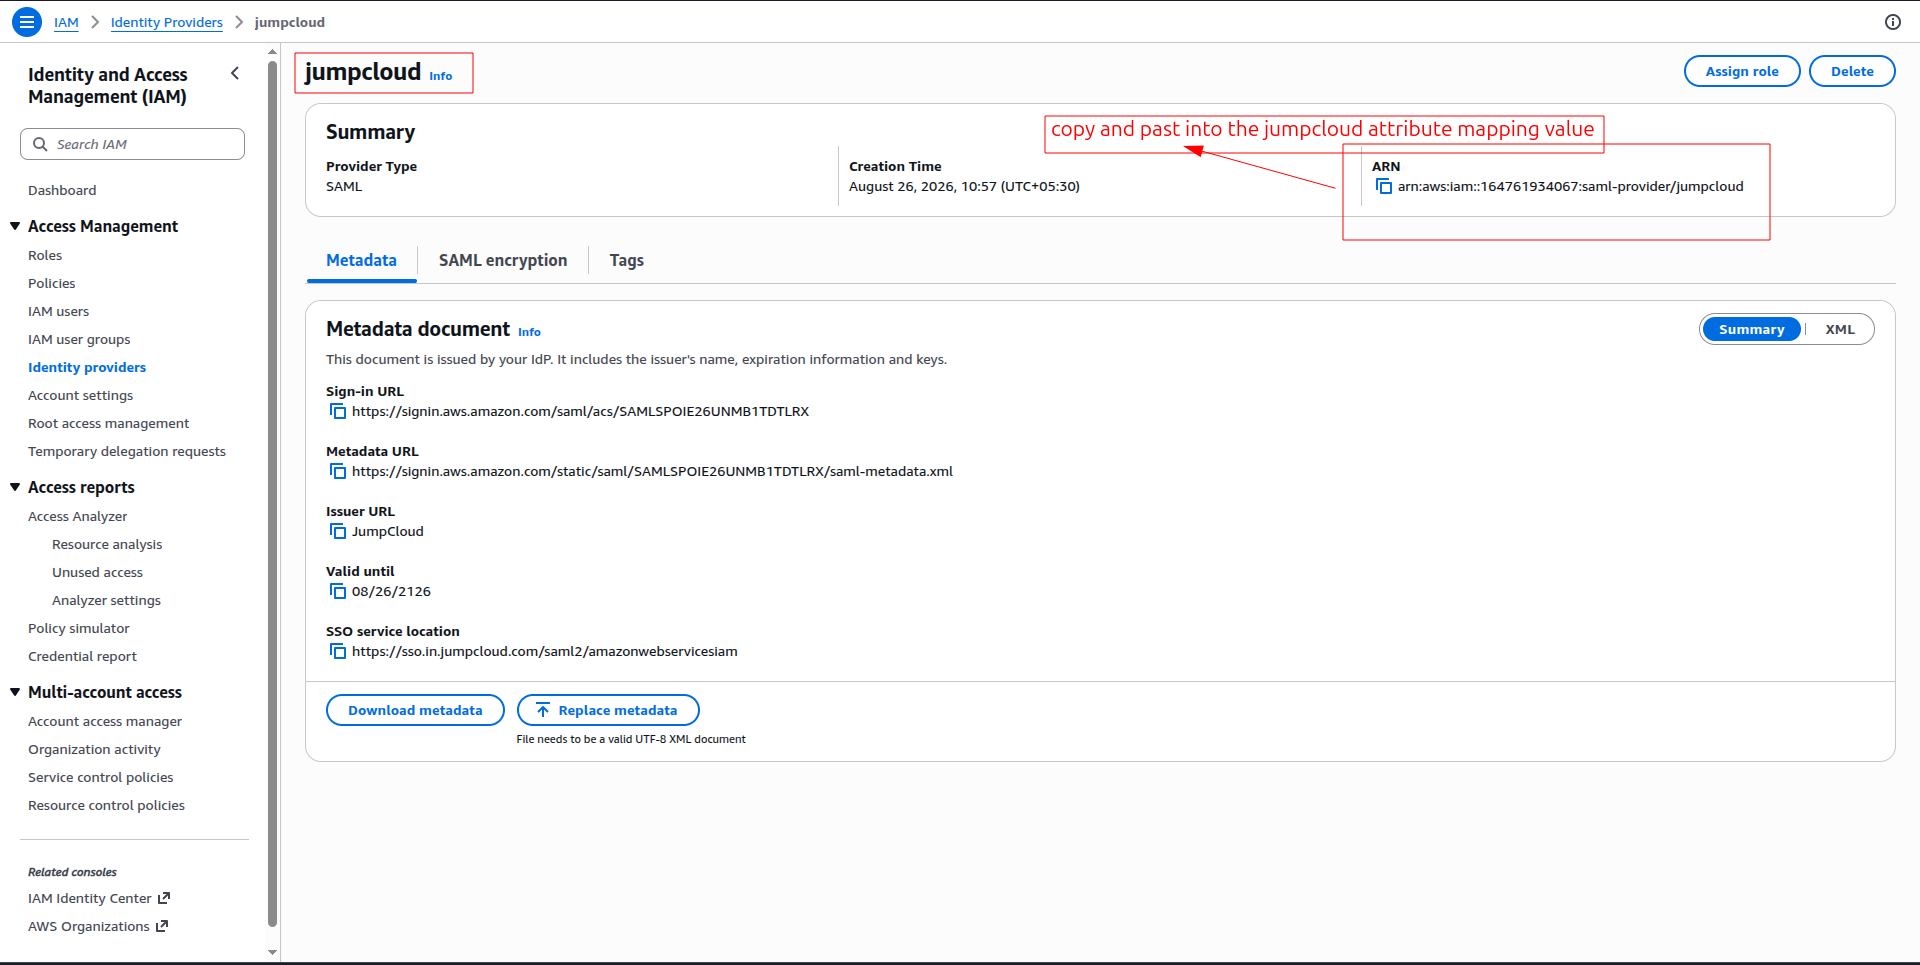
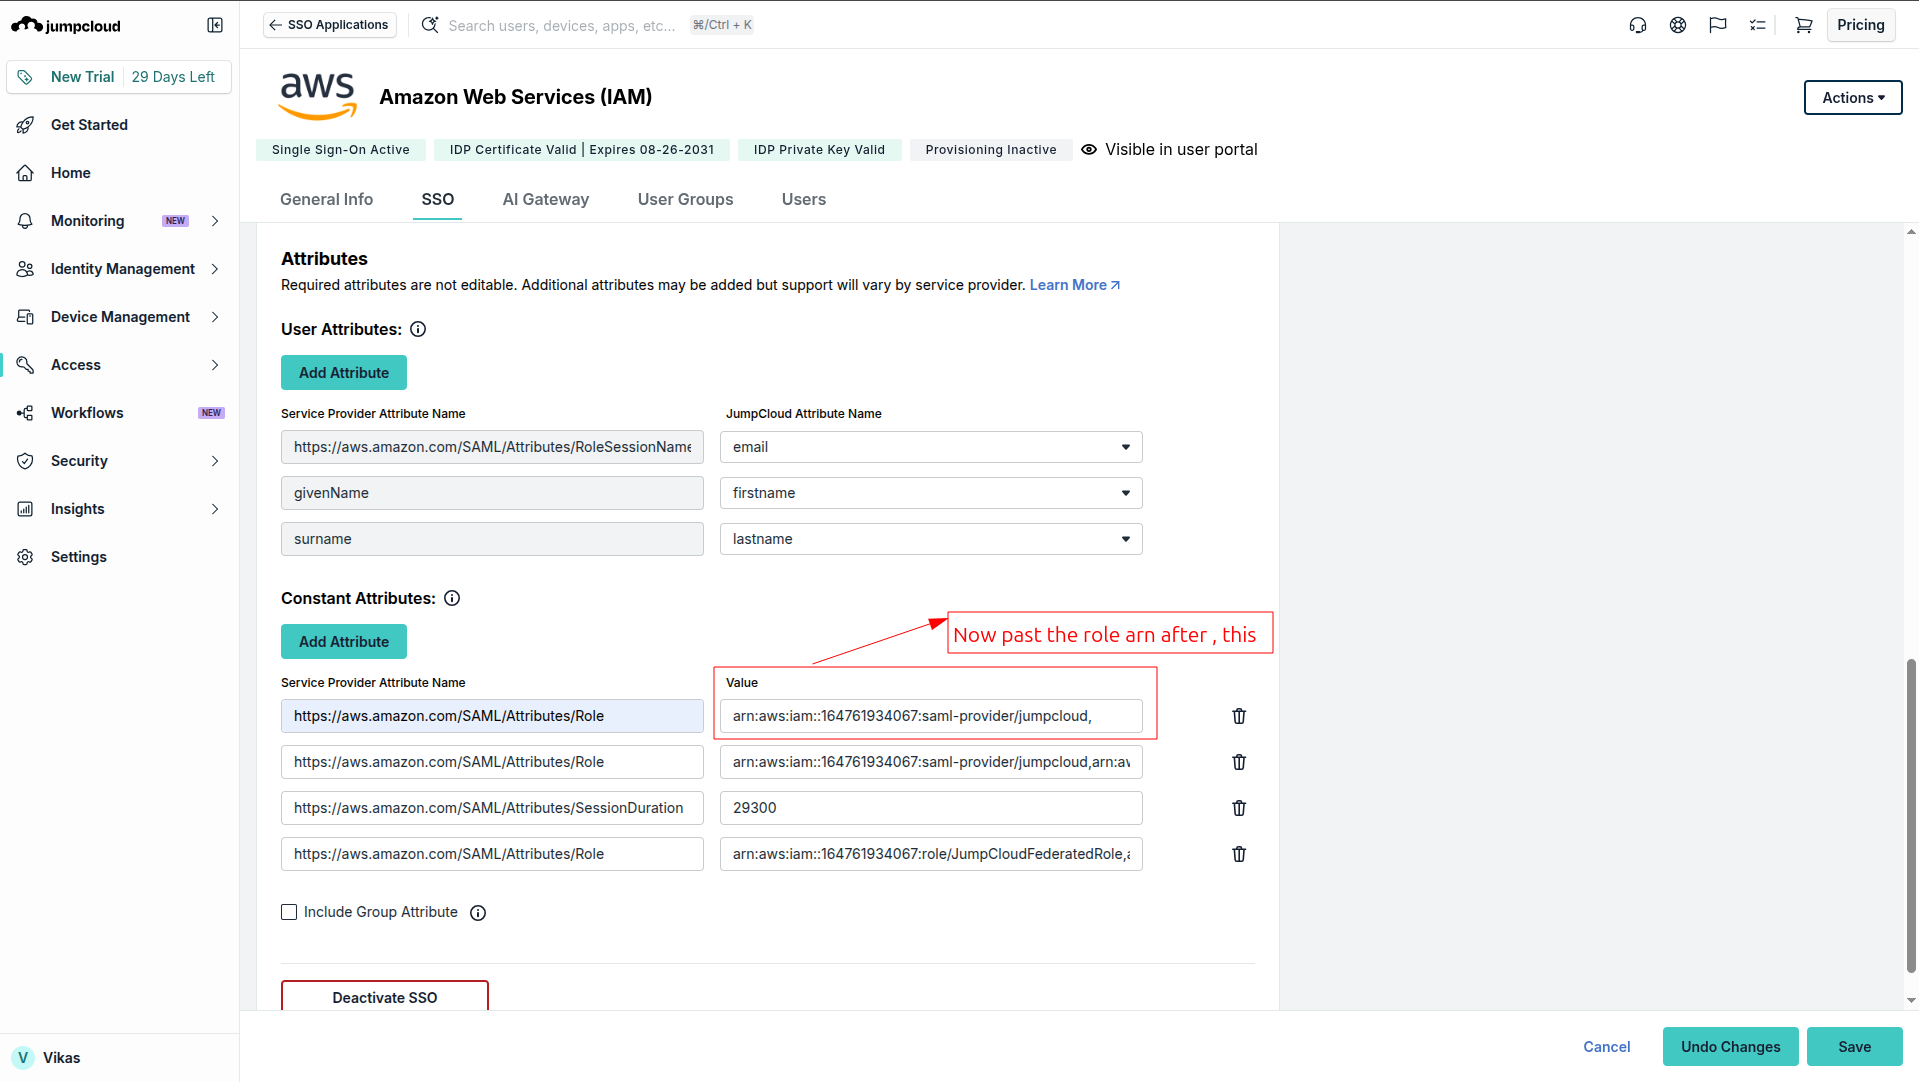
Session duration
SessionDuration is the time (in seconds) you request for the console session, for example 3600 for one hour. It must fit inside the maximum session duration set on the IAM role. Keep it short for powerful roles.
What the SAML assertion carries
This simple view shows what JumpCloud sends to AWS after the user signs in: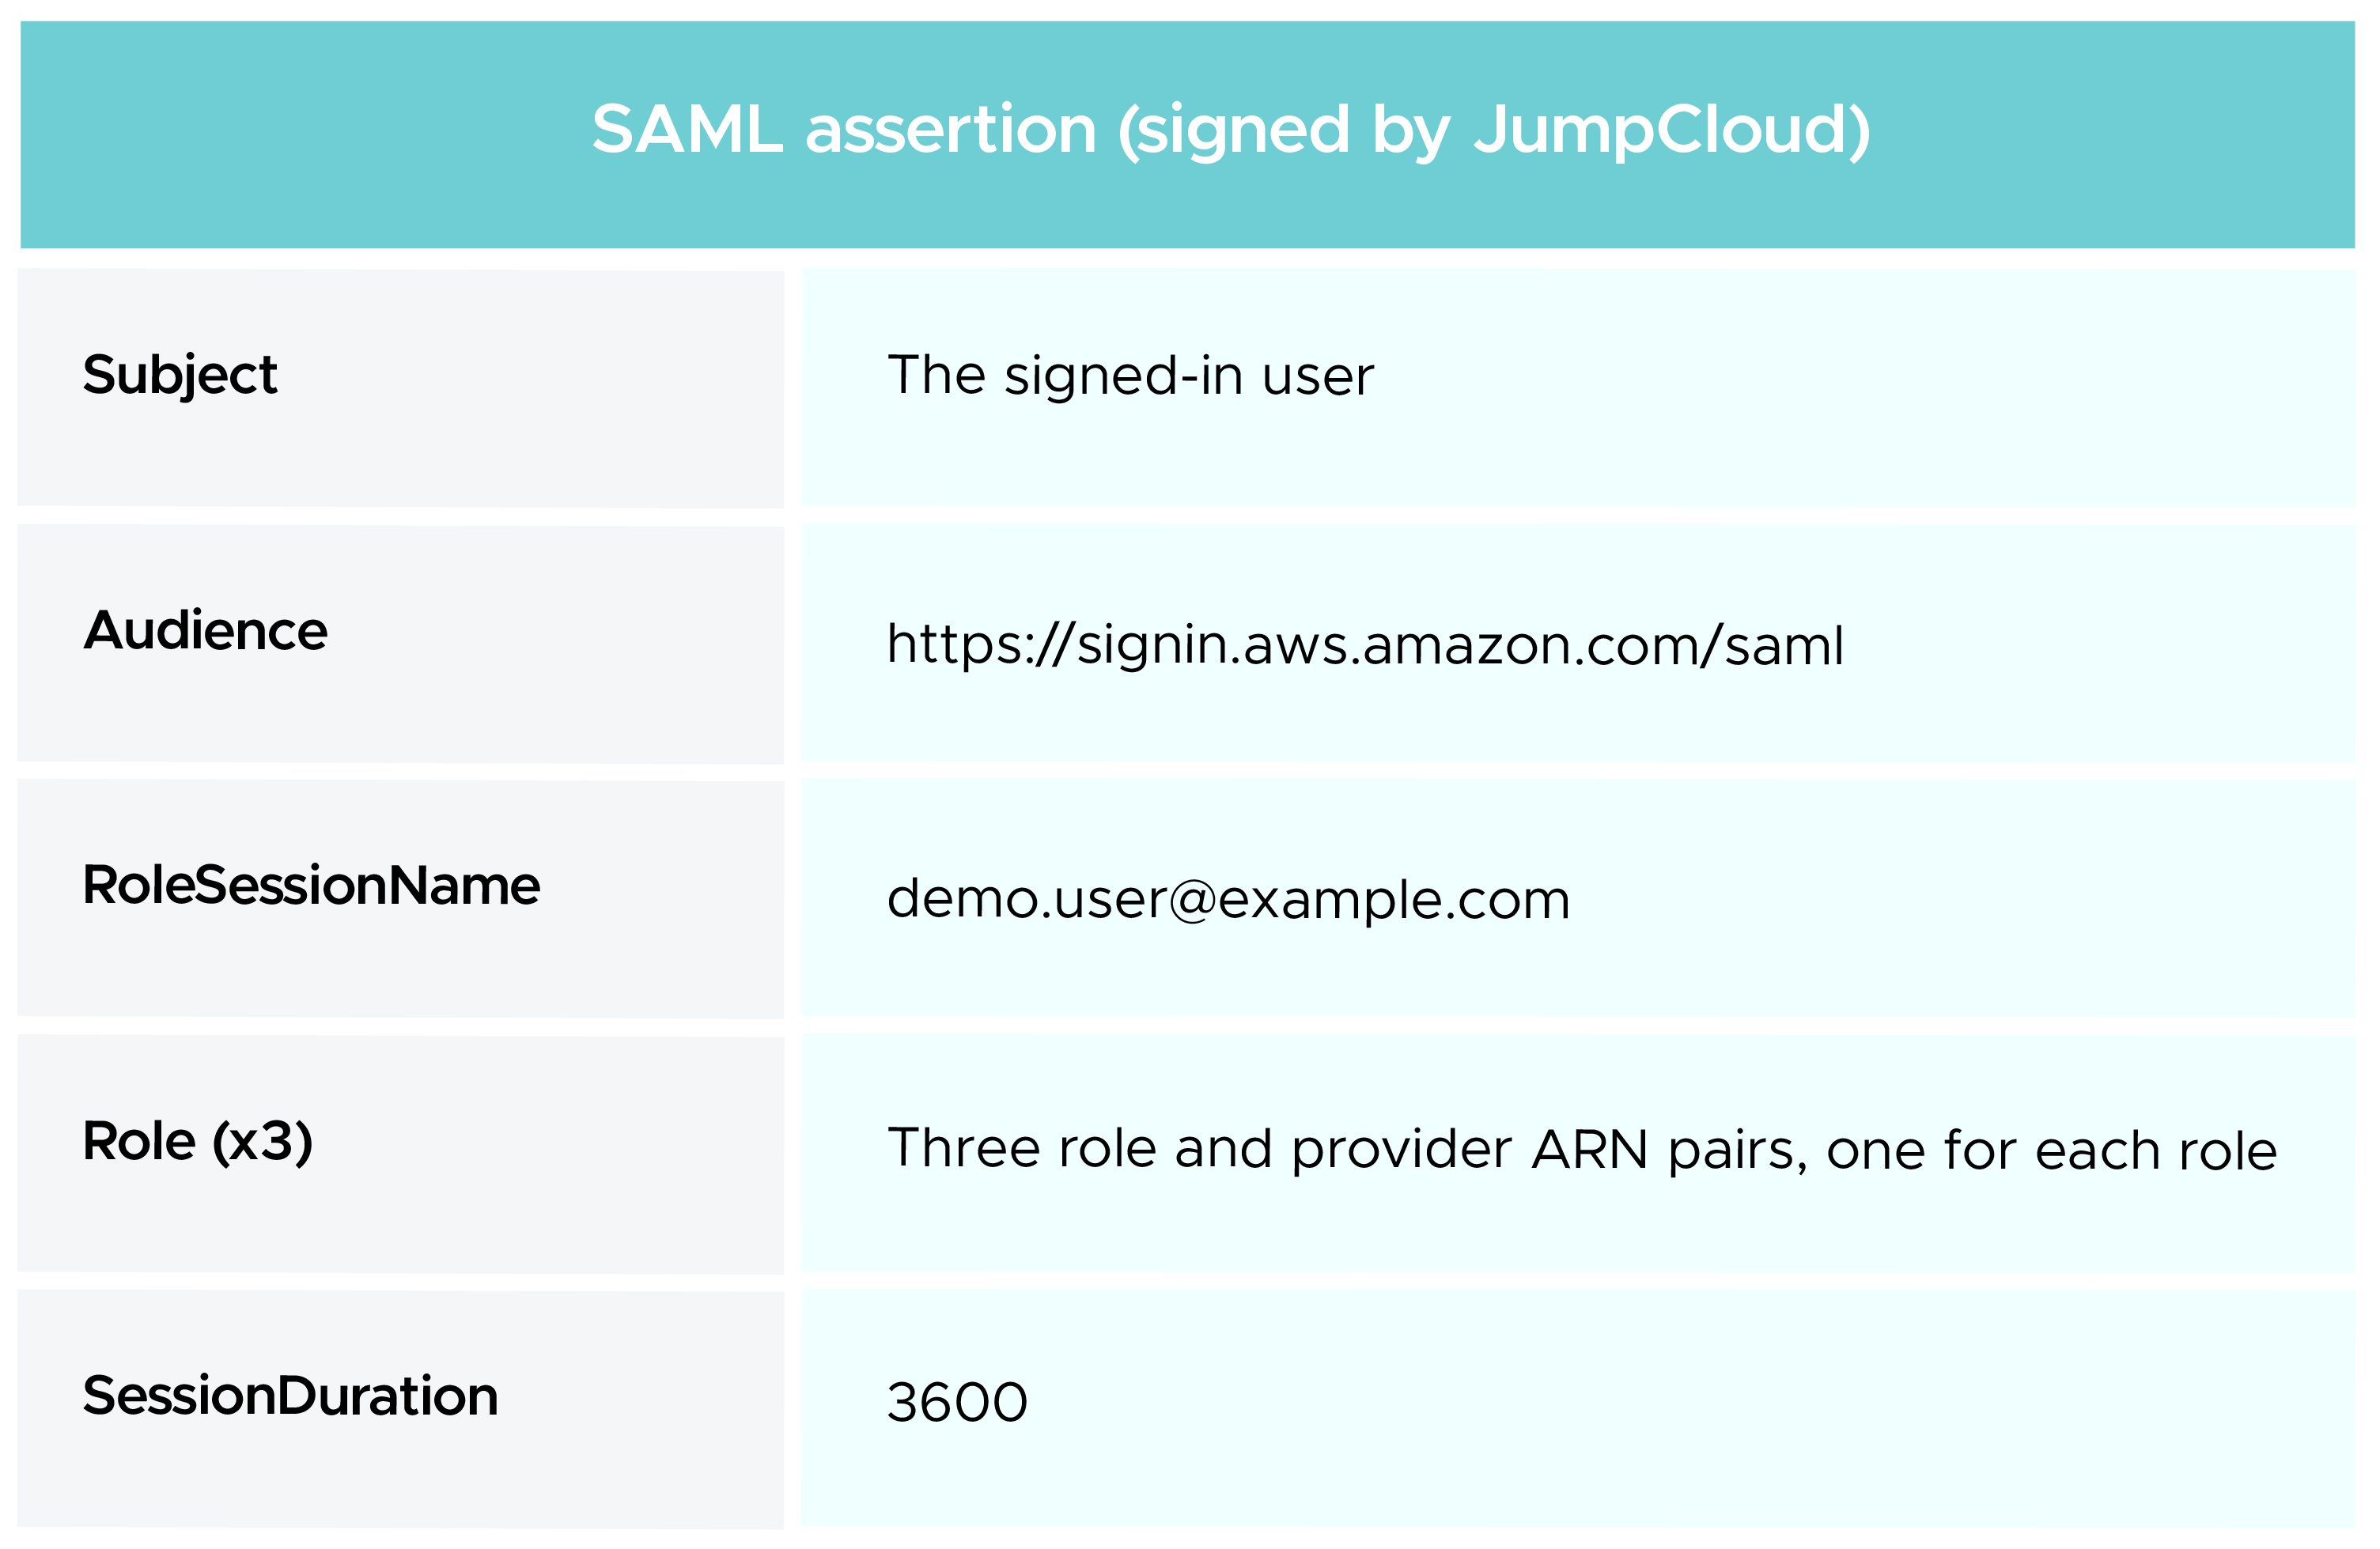
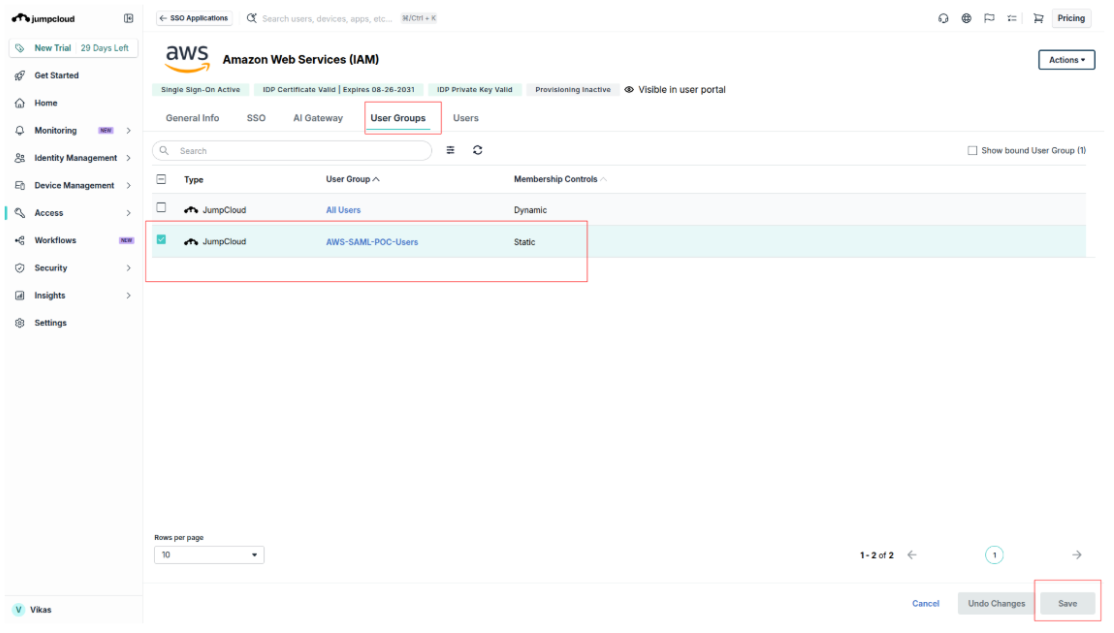
Creating the application does not give access to everyone. JumpCloud blocks users from an SSO application until an admin allows them.
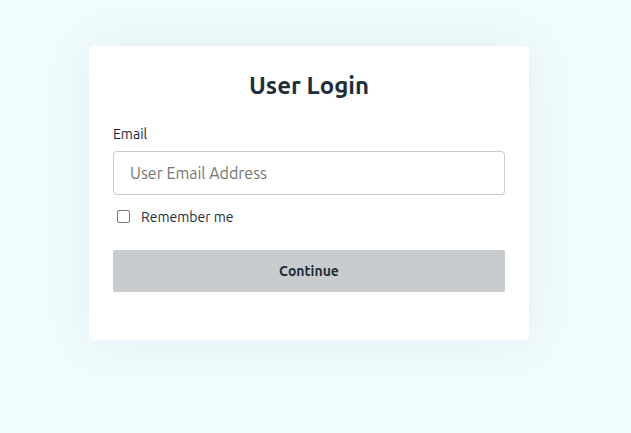
Now test the full login with the demo user.
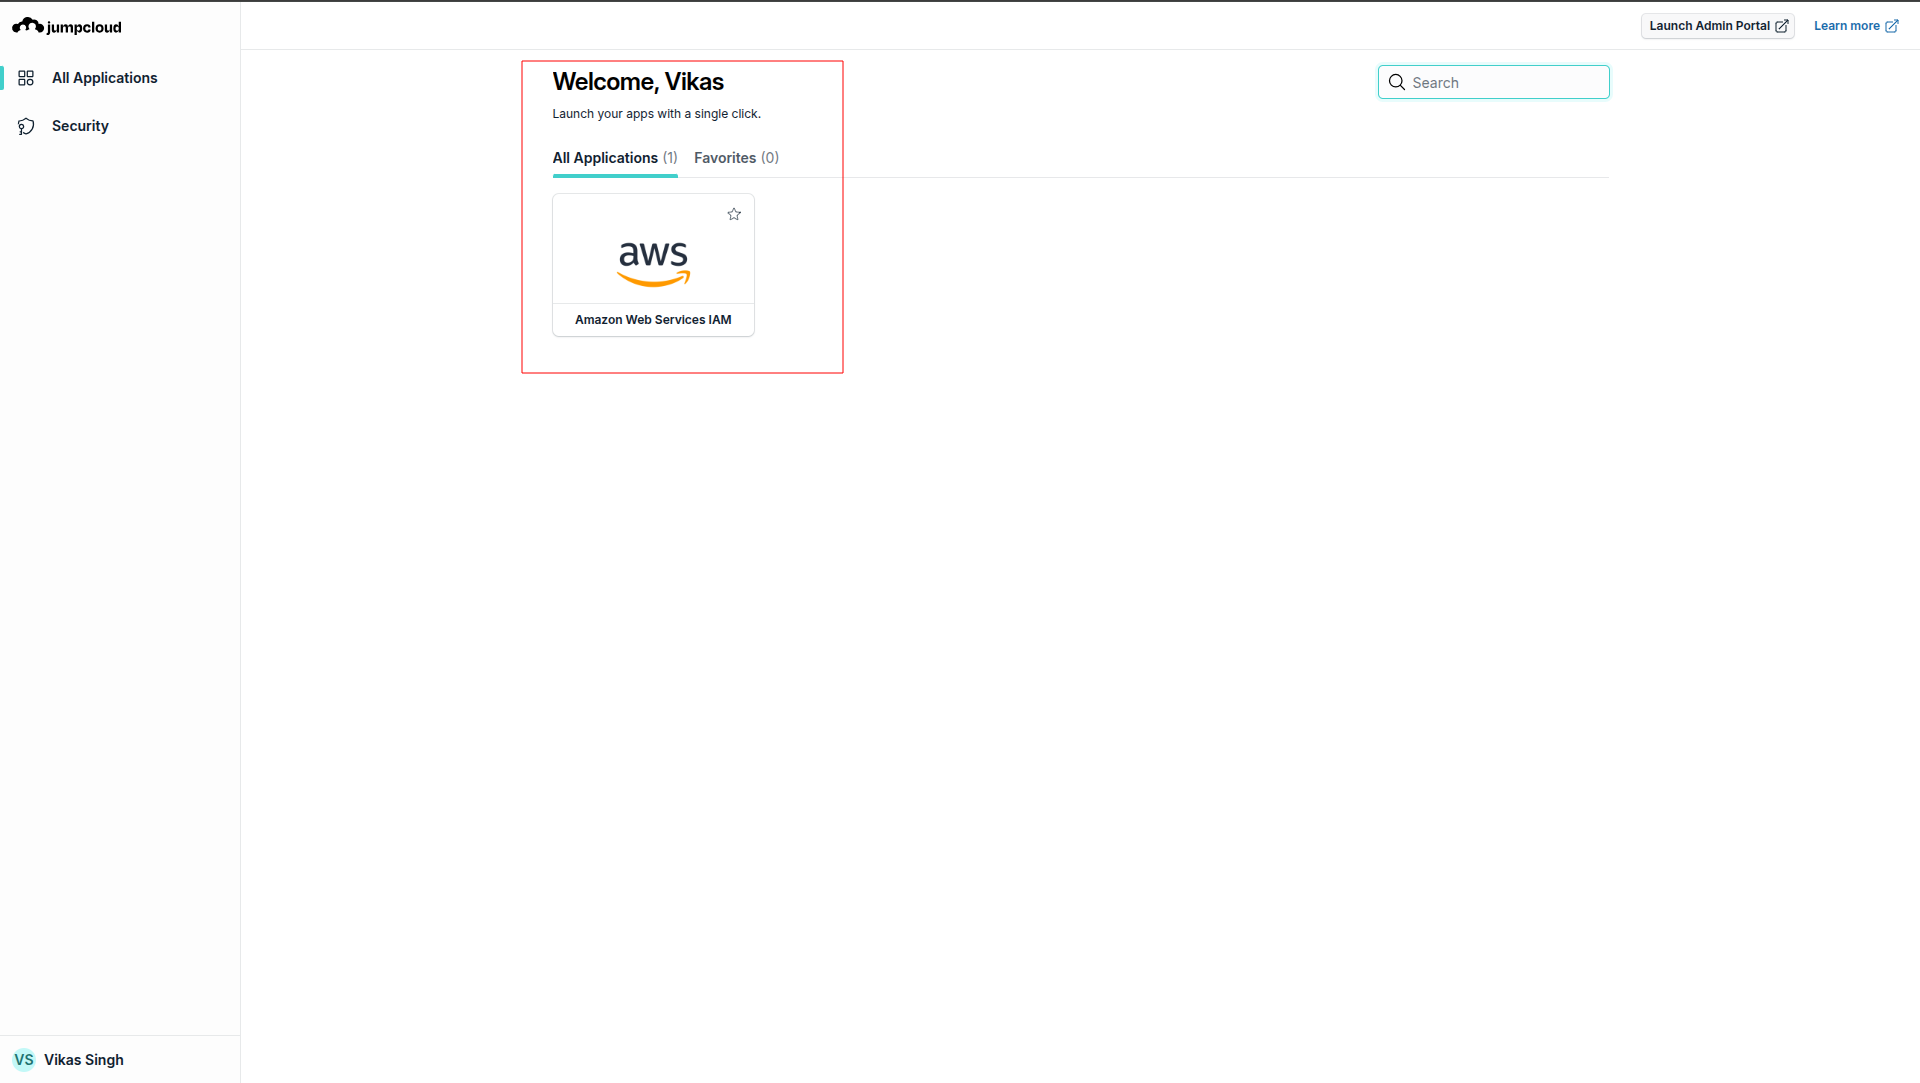
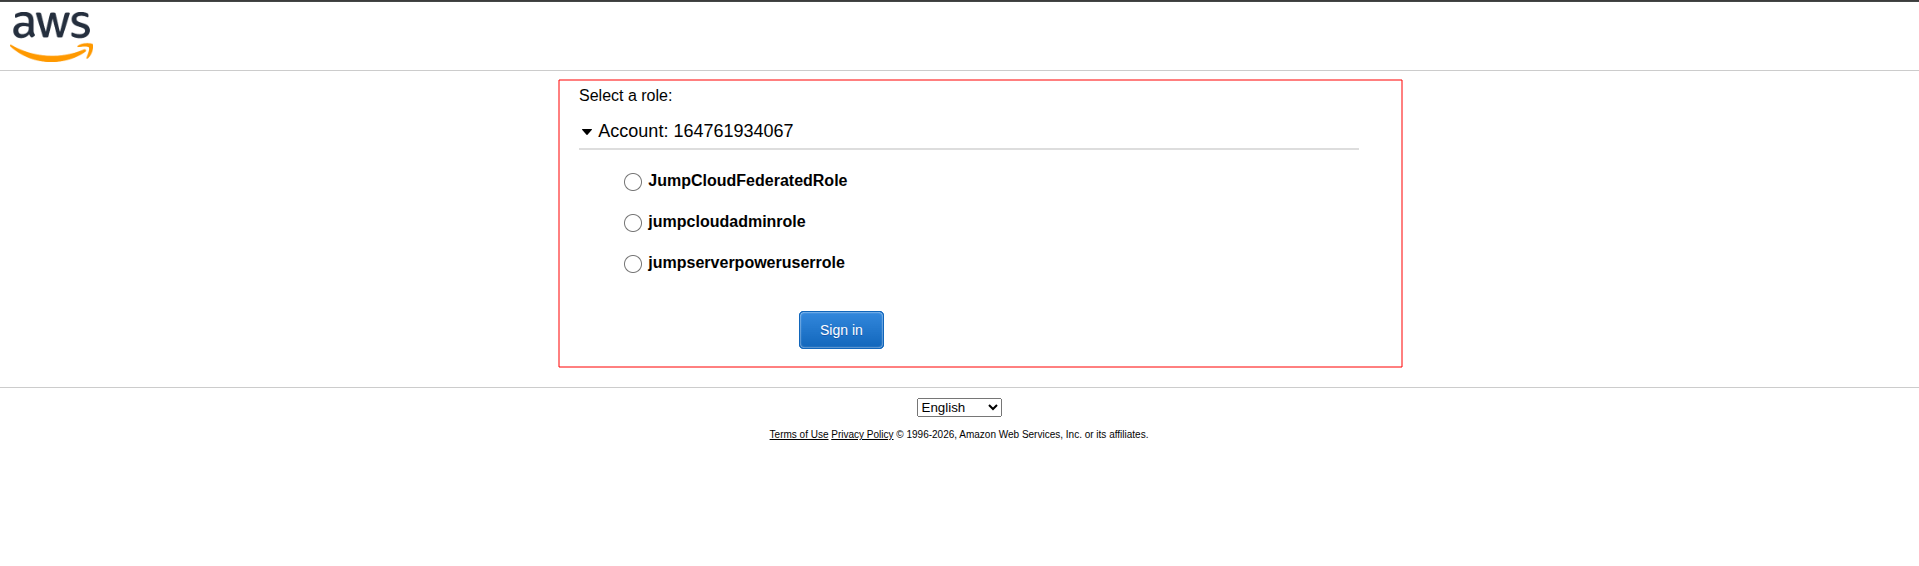
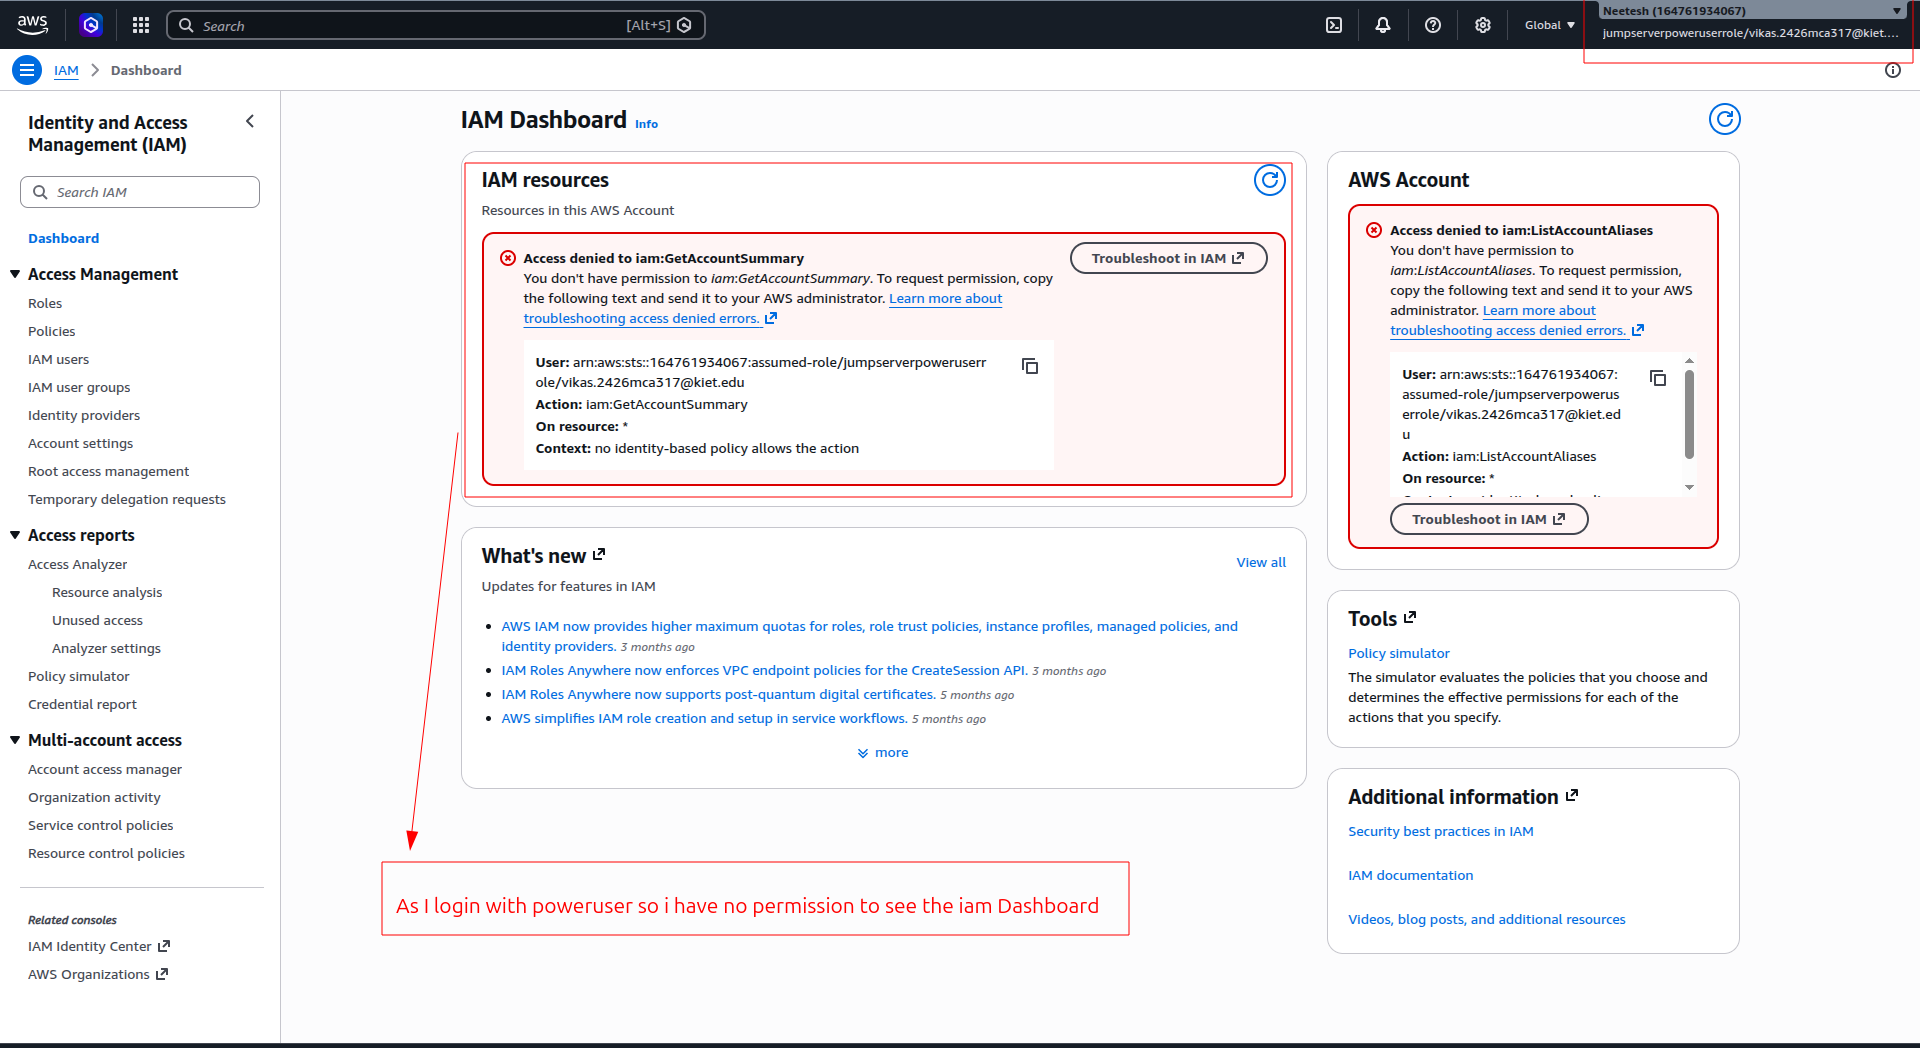
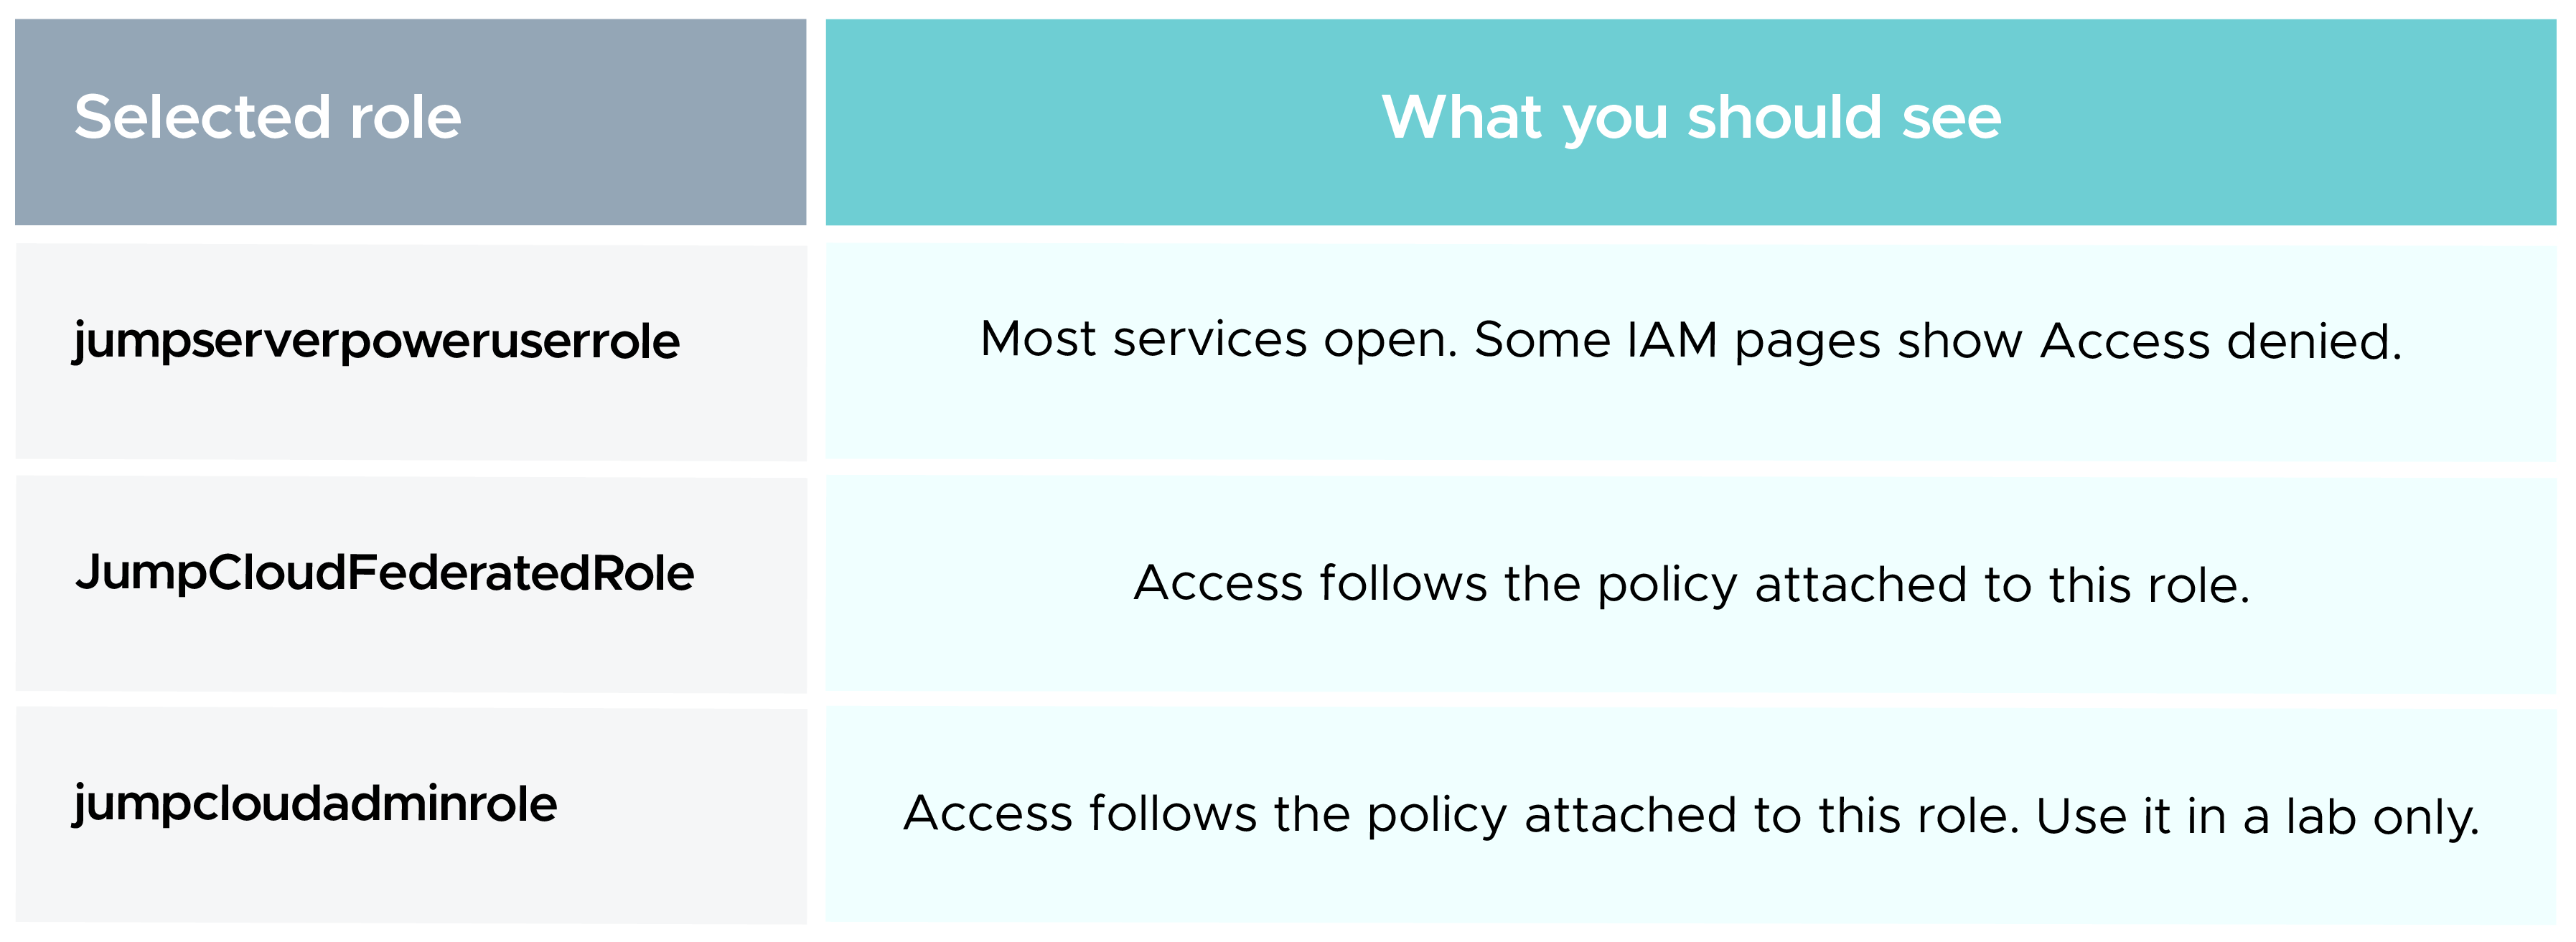
You can also open AWS CloudTrail and look for the AssumeRoleWithSAML event. It confirms that the federated login worked.
A working lab is only the start. Think about these points before you use this design in production.
You now have JumpCloud working as the identity provider for AWS IAM. Users sign in once, pick the role they need, and get temporary access that expires on its own. There are no extra IAM users to manage.
Direct IAM federation is a good choice for specific accounts and clear role needs. For large multi-account setups, also look at AWS IAM Identity Center.

99% of companies saved up to 15% monthly with this plan & achieved peak performance.